How do I clock in and out?
HHAeXchange offers 2 versions of our app, HHAeXchange and HHAeXchange+. Note the plus sign in the name of the app and ensure you are referencing instructions for the correct version of the app.
This topic explains how to clock in and out of a patient visit using the HHAeXchange app.

Complete the following steps to clock in for a visit.
-
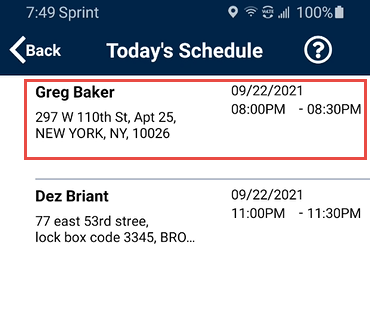
From the Main screen, tap Today’s Schedule. Select the visit. In this example, Greg Baker.
-
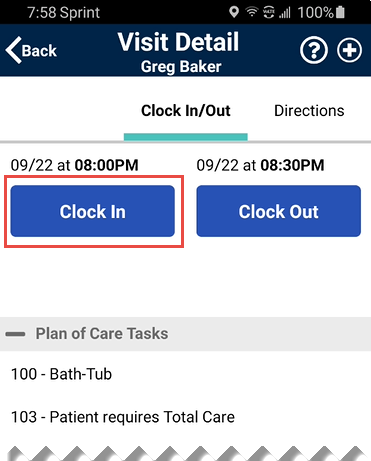
When the Clock-In/Out tab of the Visit Details page opens, tap Clock In.
-
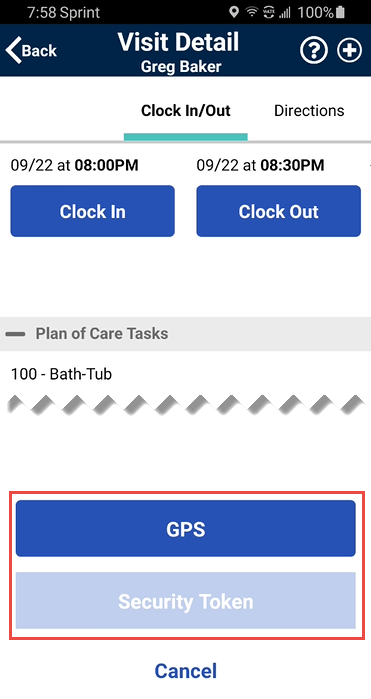
Select either the GPS or Security Token method to send an EVV.
The term Security Token refers to the FOB Device.
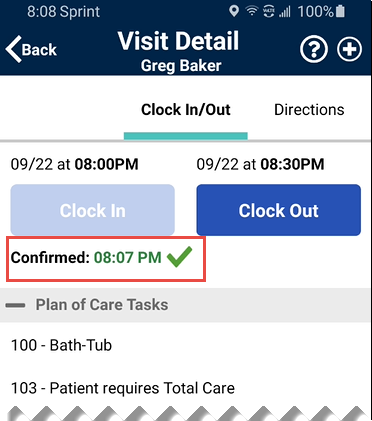
A successful EVV displays in green under Clock In. Unsuccessful EVV placement times display in red instead of green.
From the Visit Detail page, you can also access the following:
| Tab | Description |
|---|---|
|
Directions tab |
Syncs to the mobile device’s GPS to provide directions to the visit location. See the Directions Map section below for further details. |
|
Patient Info tab |
Displays the patient’s name, any phone numbers connected to the profile, their address, and emergency contacts. |
|
Care Plan tab |
Contains the patient’s Plan of Care (POC), listing each duty in detail, describing how often it is required, and including other instructions. |
|
Notes tab |
Maintains a record of notes you or your agency make for the Visit. |

Complete the following steps to clock out of a visit.
-
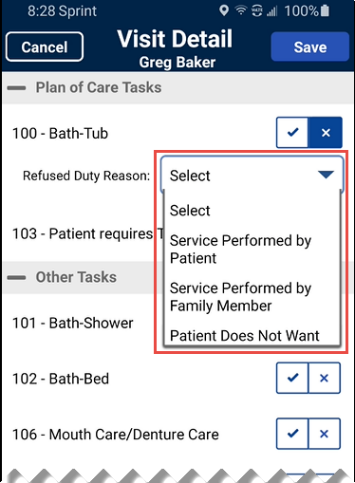
When the visit is completed, tap Clock Out on the Clock In/Out page. If the visit included a Plan of Care (POC), you are prompted to select the duties performed.
-
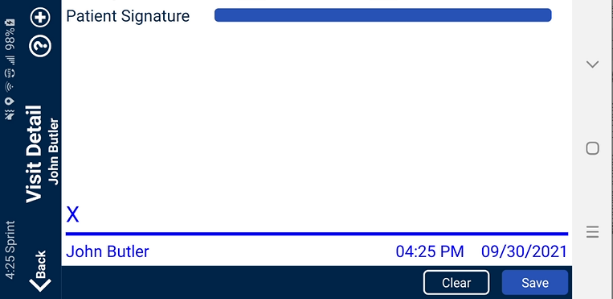
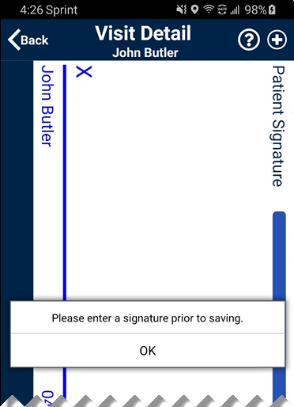
If the visit requires a patient signature, obtain the signature on the device to process the visit.
The Patient Signature may be required during clock in and/or clock out depending on the contract authorizing the visit. This feature is configured by the agency. -
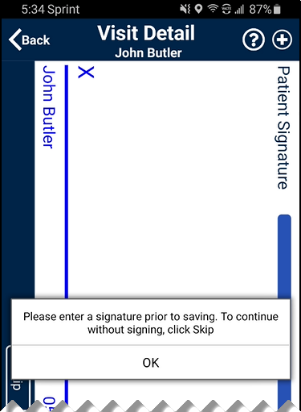
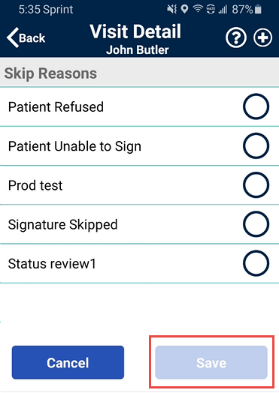
If the agency allows you to skip the Patient Signature, you are prompted to tap Skip and select the reason why the patient cannot sign.
The Save button is unavailable until a reason is selected.
-
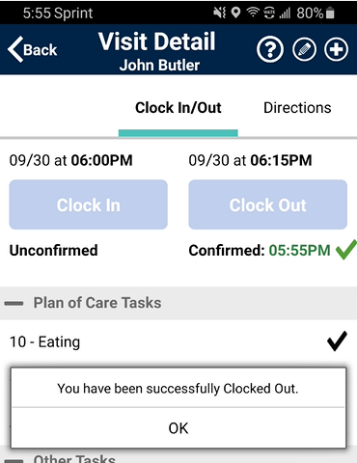
Tap Save when the required screens are completed to return to the Visit Details page with a confirmation message. Tap OK to return to the home screen.
Visit Notes
You can enter visit notes during or after a visit. Follow these steps to enter a visit note.
-
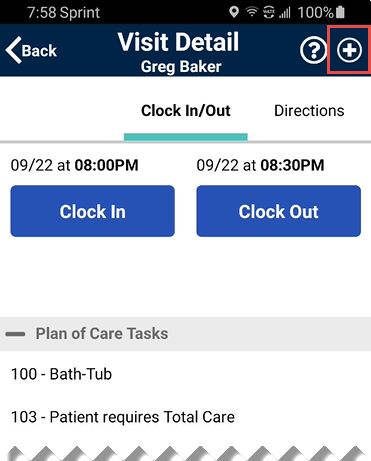
From the Visit Details page, tap the Add Note icon (circled plus sign), as shown.
-
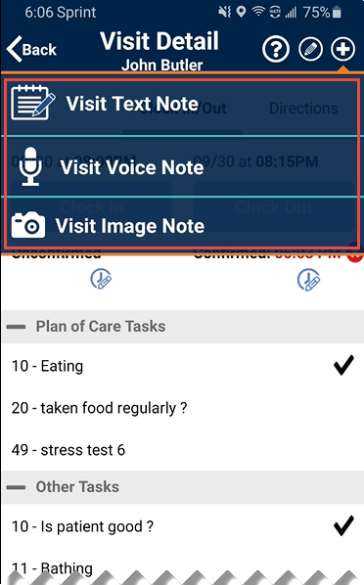
Select the Note Type: Visit Text Note, Visit Voice Note, or Visit Image Note.
Notes can be reviewed on the Notes tab on the Visit Detail page. After a Note is saved, it cannot be edited or deleted. Any Note created on the Mobile App can be reviewed by your agency.
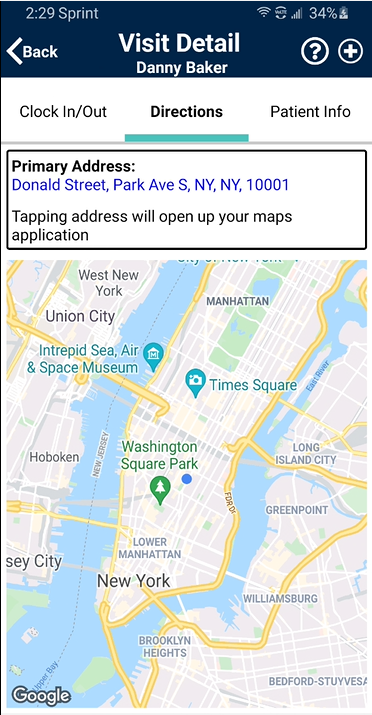
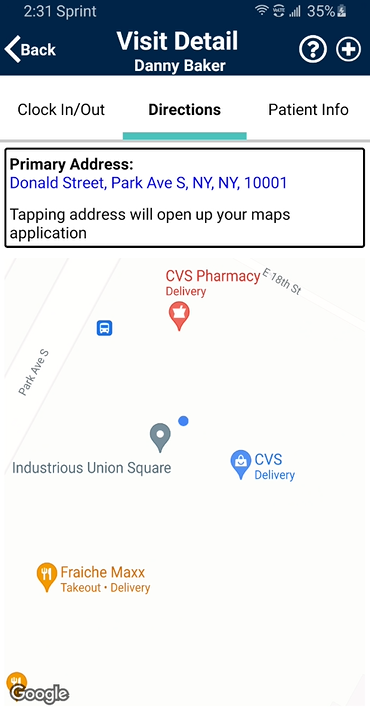
The Directions map (Visit Details > Directions) displays a 5-mile-wide view with a blue dot marking the exact Patient Address. Pinch-in to zoom out or pinch-out to zoom in. The map also displays transportation routes and nearby buildings.
Directions Map: Zoom Out
Transportation Routes: Zoom In
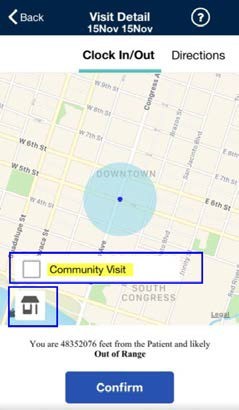
Community Visit
Agencies can allow a patient visit Scheduled or Unscheduled to be designated as a Community Visit.
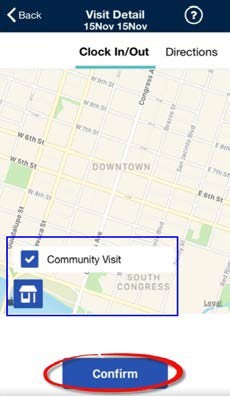
When allowed, you can mark a visit as a Community Visit by clicking the icon at the bottom-left of the screen to display the Community Visit checkbox.
When you select the checkbox and tap Confirm, the visit is set as a Community Visit and bypasses the requirement for proximity to the member’s care location.

The Consecutive Shifts feature allows Caregivers to perform a single Clock-in and Clock-out for consecutive shifts for the same patient or for two linked patients, such as a husband and wife receiving back-to-back services at the same address.
