Clock In and Out
This topic provides the steps involved when Clocking In and Out of a Visit, as well as entering POC Duties and Patient Signatures.

-
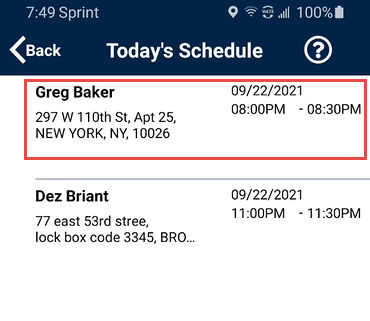
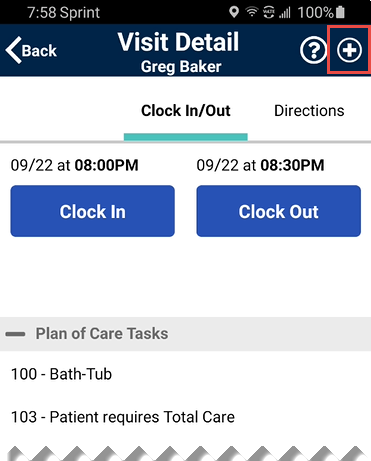
Select Today’s Schedule from the Main Screen. Select the appropriate visit. In this example, Greg Baker.
-
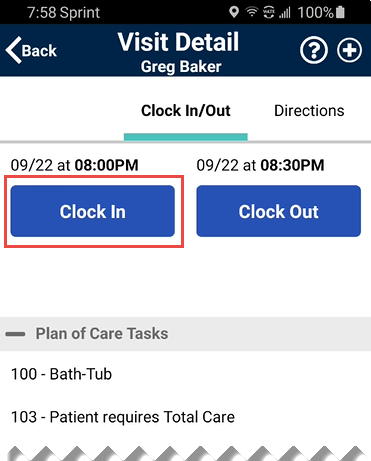
When the Clock-In/Out tab of the Visit Details page opens, tap Clock In.
-
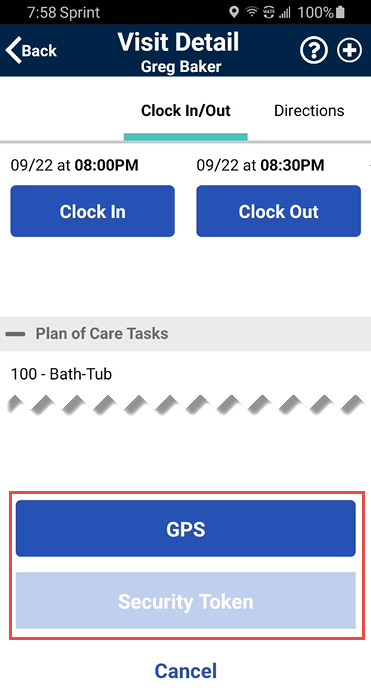
Select either GPS or Security Token to submit an EVV.
The term Security Token refers to the FOB Device.
-
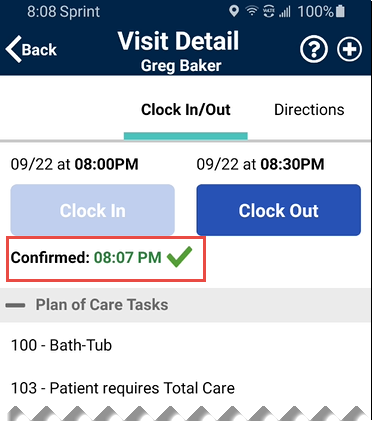
A successful EVV displays in green under Clock In (now disabled), as shown.
Unsuccessful EVV placement times display in red instead of green.
-
From the Visit Detail page, Caregivers can also access the following:
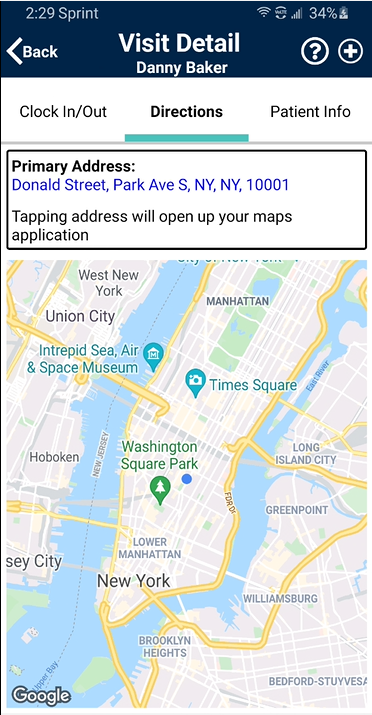
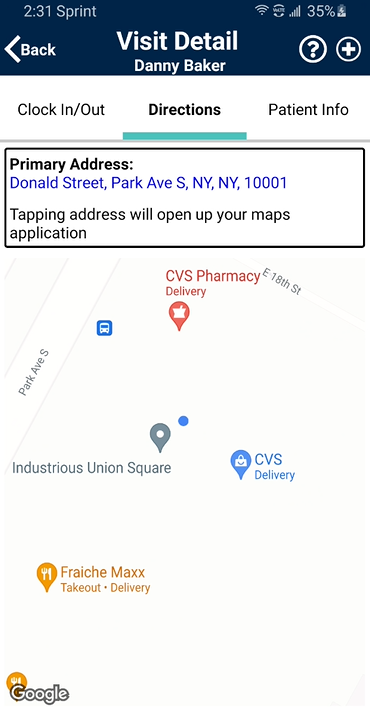
Options (Tab) Description Directions tab
Syncs to the mobile device’s GPS to provide directions to the visit location.
Patient Info tab
Displays the Patient’s name, any phone numbers connected to the profile, their address, and emergency contacts.
Care Plan tab
Contains the Patient’s Plan of Care (POC), listing each duty in detail, describing how often it is required, and including additional instructions.
Notes tab
Maintains a record of notes the Caregiver or Agency makes for the Visit.

-
When the Visit is completed, tap Clock Out on the Clock In/Out page. If the Visit included a Plan of Care (POC), the Caregiver is prompted to select the duties performed.
Select the checkmark for duties performed or the X for duties refused.
In addition, select the Refused Duty Reason (if the Agency requires it) when a duty is marked refused.
When servicing Mutual Patients, the Caregiver must enter separate POC duties for each Patient.
-
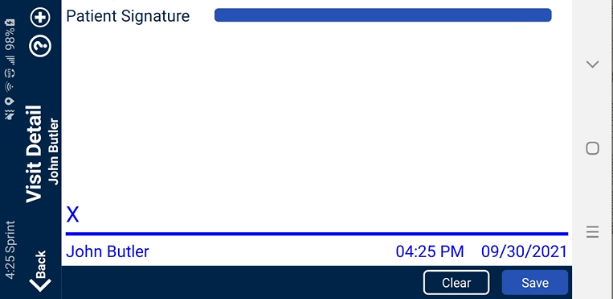
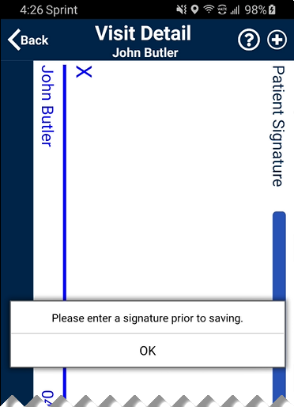
If the Contract authorizing the Visit requires a Patient Signature, the Caregiver must obtain the signature on the device to process the Visit.
The Patient Signature may be required at Clock In and/or Clock Out depending on the Contract authorizing the Visit. This feature is configured by the Agency.
-
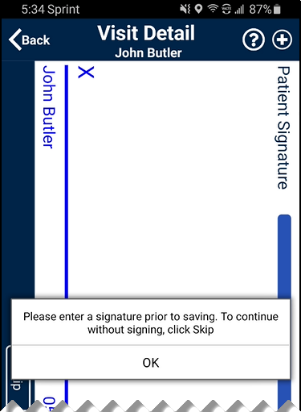
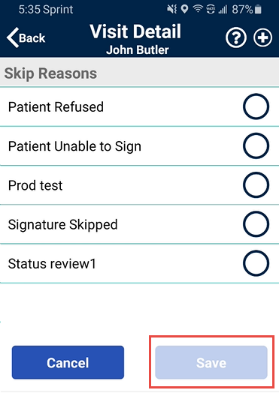
If the Agency allows the Caregiver to skip the Patient Signature, the Caregiver is prompted to tap Skip and select the reason why the Patient cannot sign (required).
The Save button is unavailable until a reason is selected.
-
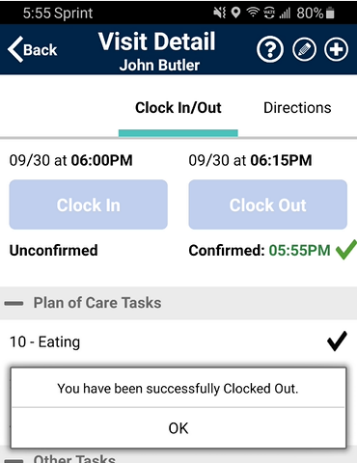
Tap Save when the required screens are completed to return to the Visit Details page with a confirmation message (as shown).
Tap OK to return to the home screen.

Visit Notes can be entered during or after a Visit. Follow the steps outlined below to enter a Visit Note.
-
From the Visit Details page, tap the Add Note icon (the circled plus sign).
-
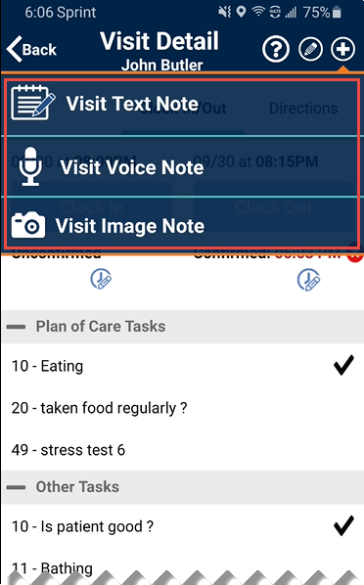
Select the Note Type: a Visit Text Note, a Visit Voice Note, or a Visit Image Note.
-
Notes can be reviewed on the Notes tab on the Visit Detail page. After a Note is saved, it cannot be edited or deleted. Any Note created on the Caregiver Mobile App can be reviewed by your Agency/Office.

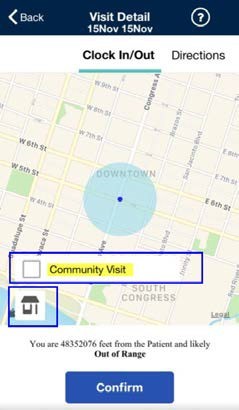
Agencies can enable an option to allow a member visit (whether Scheduled or Unscheduled) to be designated as a CommunityVisit.
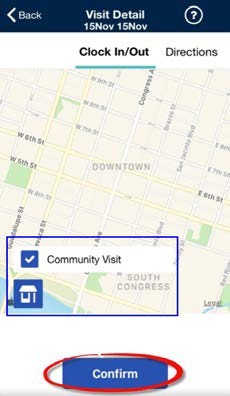
When enabled, a Caregiver can mark a visit as a Community Visit by clicking the icon  at the bottom-left of the screen to display the Community Visit checkbox.
When the user selects the checkbox and taps Confirm, the visit is set as a Community Visit and bypasses the requirement for proximity to the member’s care location.

The Consecutive Shifts feature allows Caregivers to perform a single Clock-IN and Clock-OUT for consecutive shifts for the same Patient or for two Linked Patients (Internal Contract), such as a husband and wife receiving back-to-back services at the same address.
