EDI Provider Rebilling
This topic explains rebilling (resubmitting claims) scenarios and solutions for EDI Providers. These scenarios show what happens after a claim is exported, received, and reviewed.
A claim or Transaction Reference Number (TRN) is required to rebill in HHAeXchange.

|
Scenario |
Provider bills the incorrect Payer directly and needs to resubmit a corrected claim through HHAeXchange. |
|
Solution |
The system exports these claims as an Adjustment, allowing a new original claim to be submitted to the correct Payer. |
Complete the following steps to rebill a claim:
-
Go to Billing > Electronic Billing > E-Submission Batches.
-
On the E-Submissions Batches page, select applicable contracts and click the Add Resubmit Claims button.

-
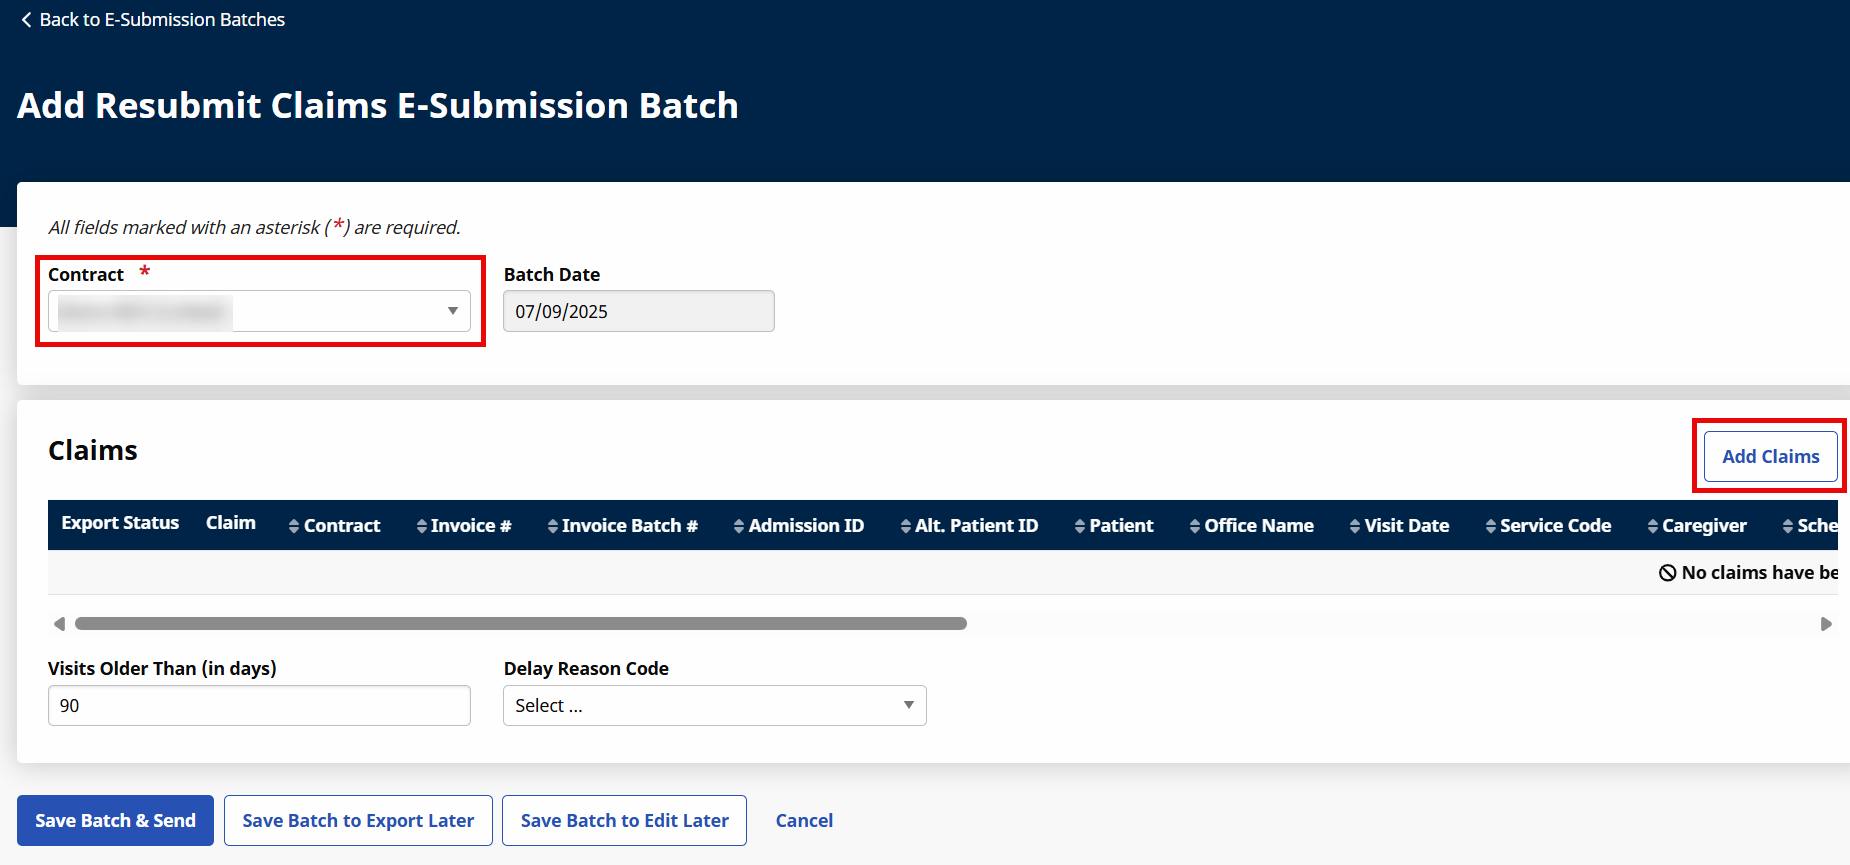
On the Add Resubmit Claims E-Submission Batch window, select the Payer (MCO) from the Contract field and click the Add Claims button to search and add the claims.
-
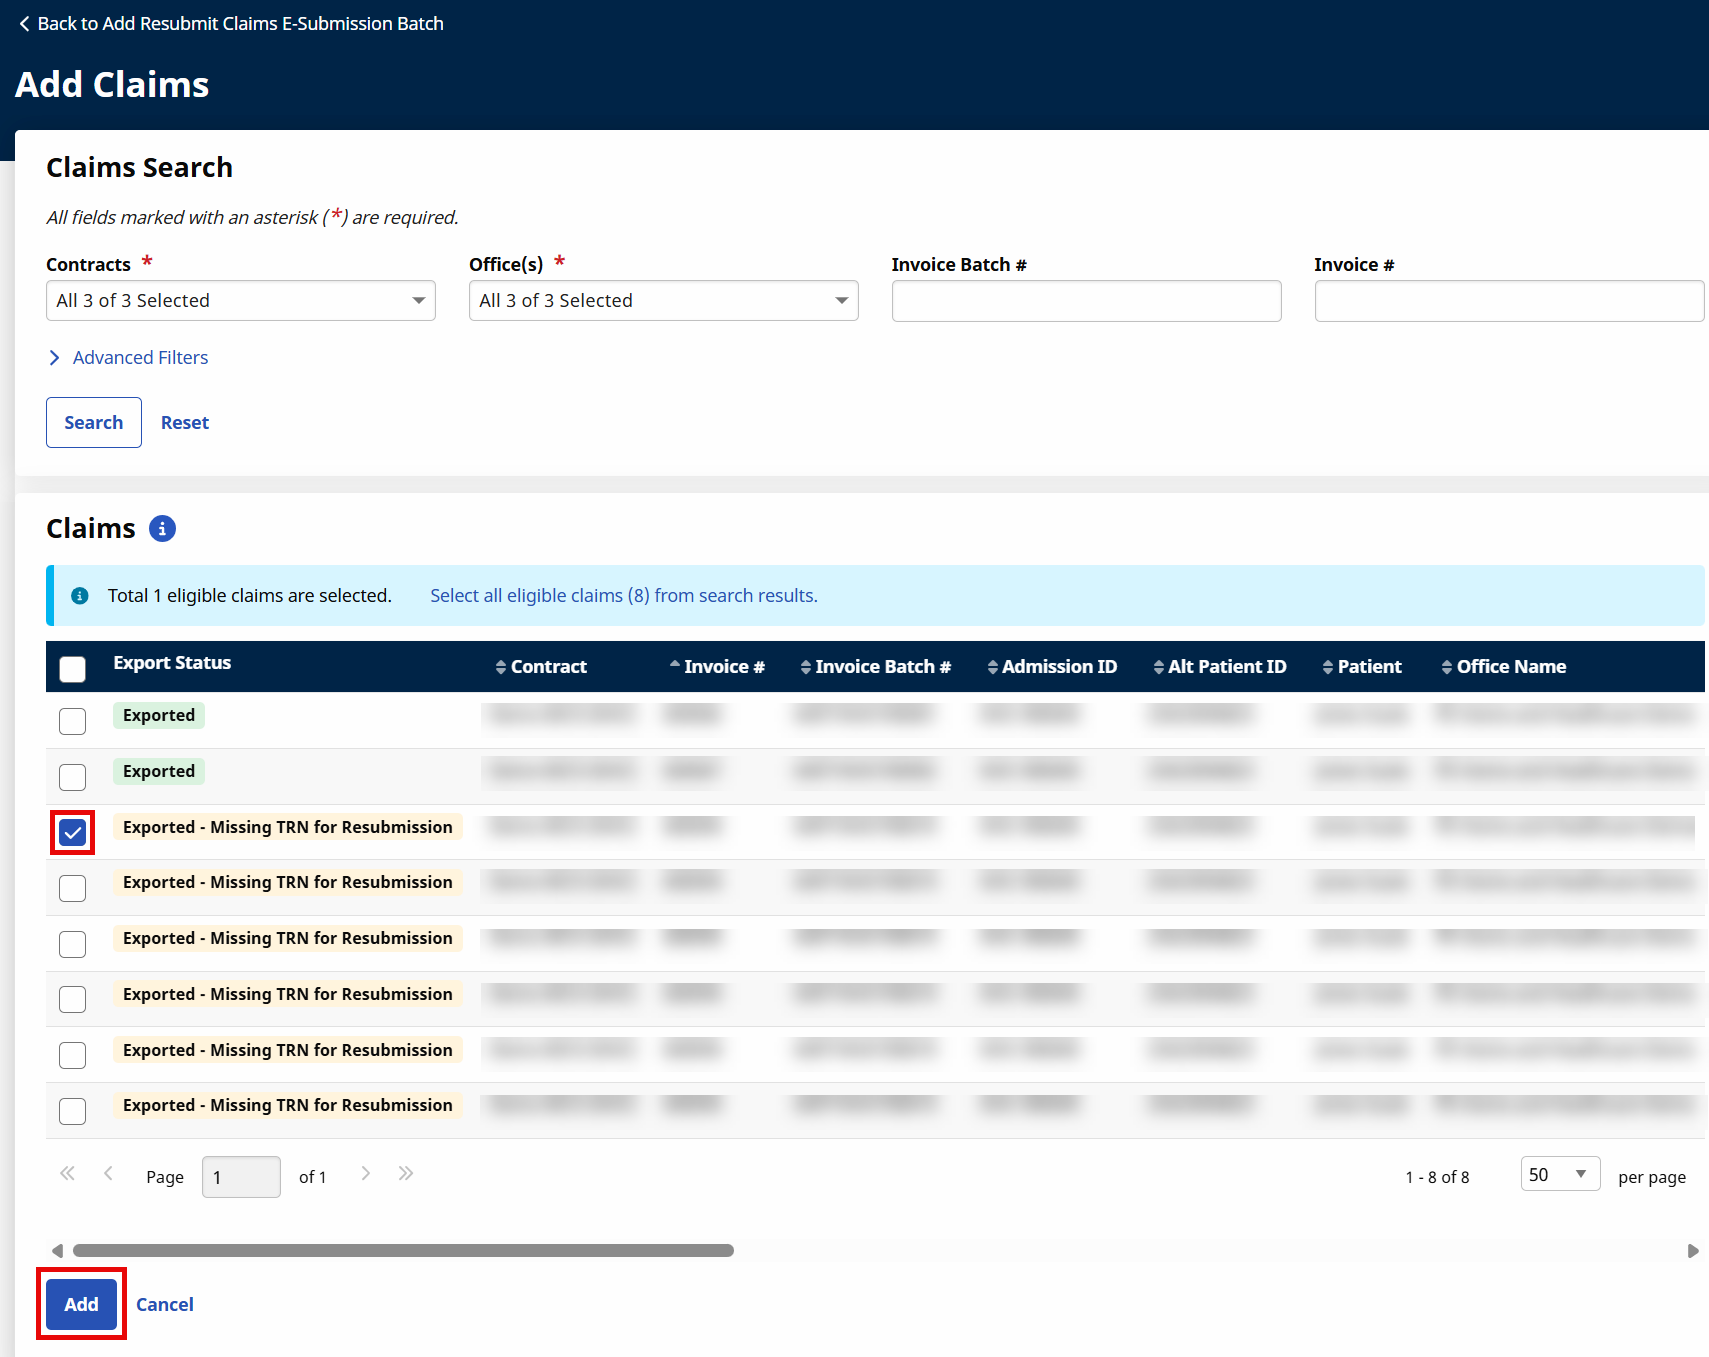
On the Add Claims page, search for the visit using the Invoice Number field.
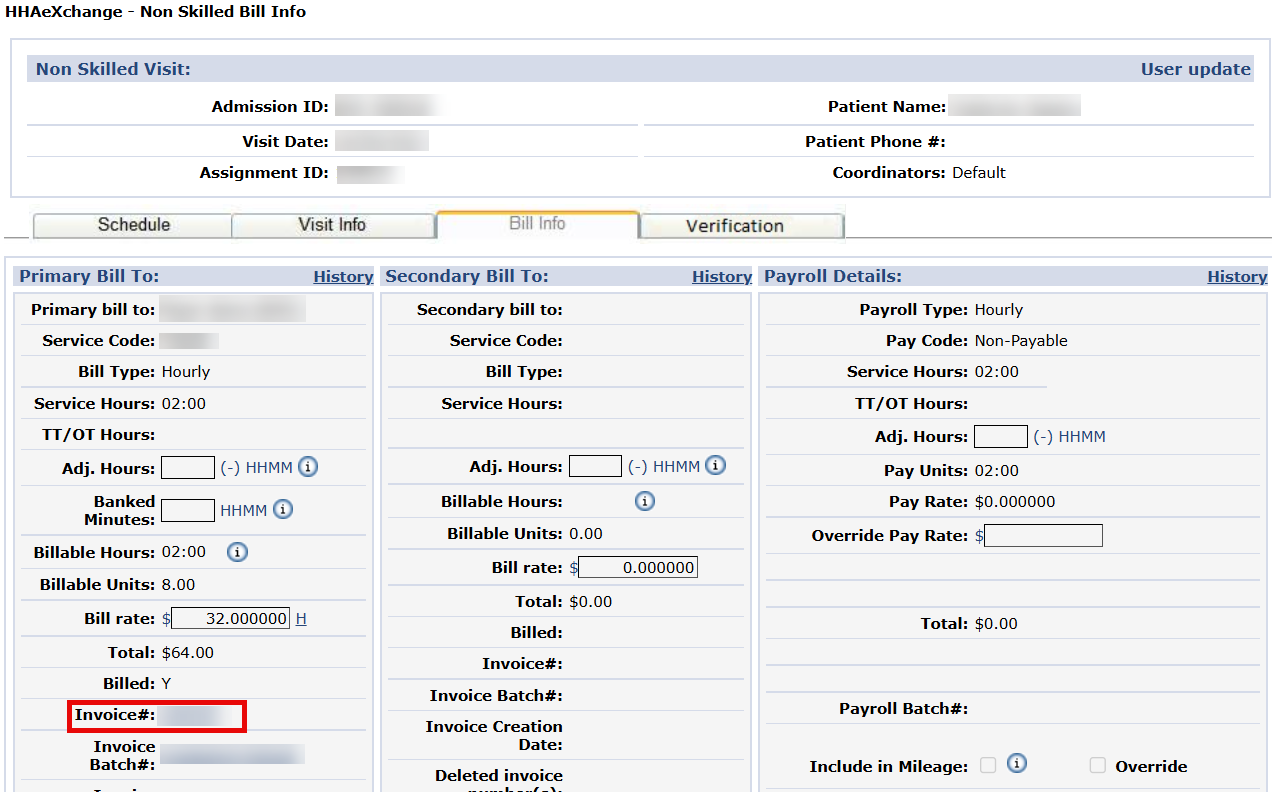
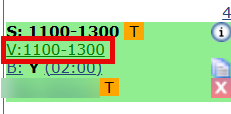
The invoice number is listed on the Bill Info tab under Visit > Visit Search (click on the V: link on the Member Calendar to access).
On the Claims Search results, select the claim checkbox and click on the Add button.
-
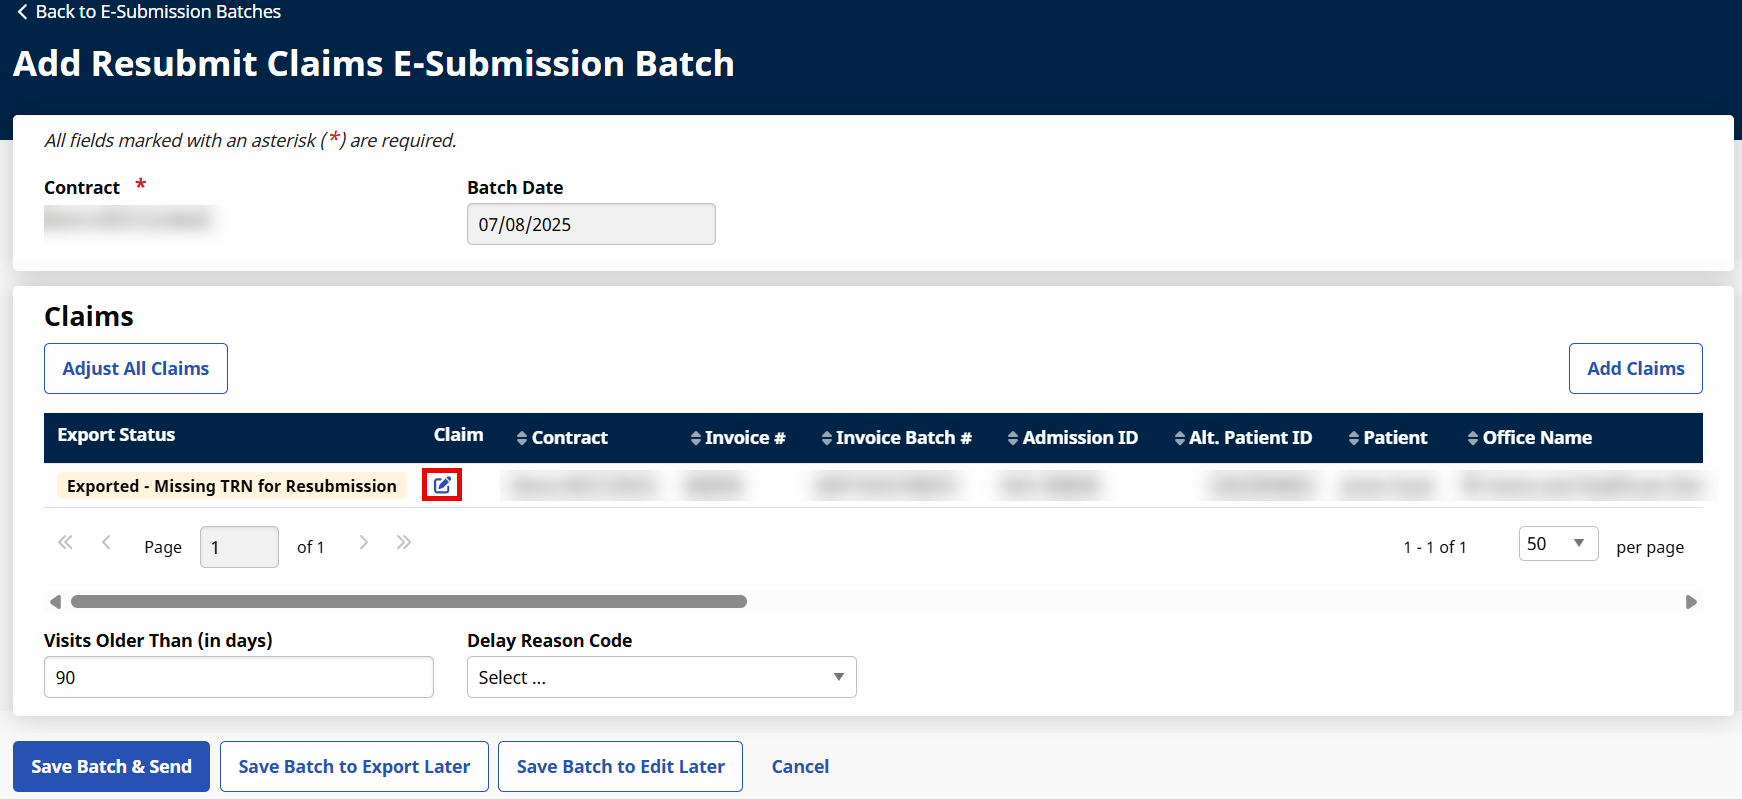
On the Add Resubmit Claims E-Submission Batch window, click the edit icon to edit the claim.
-
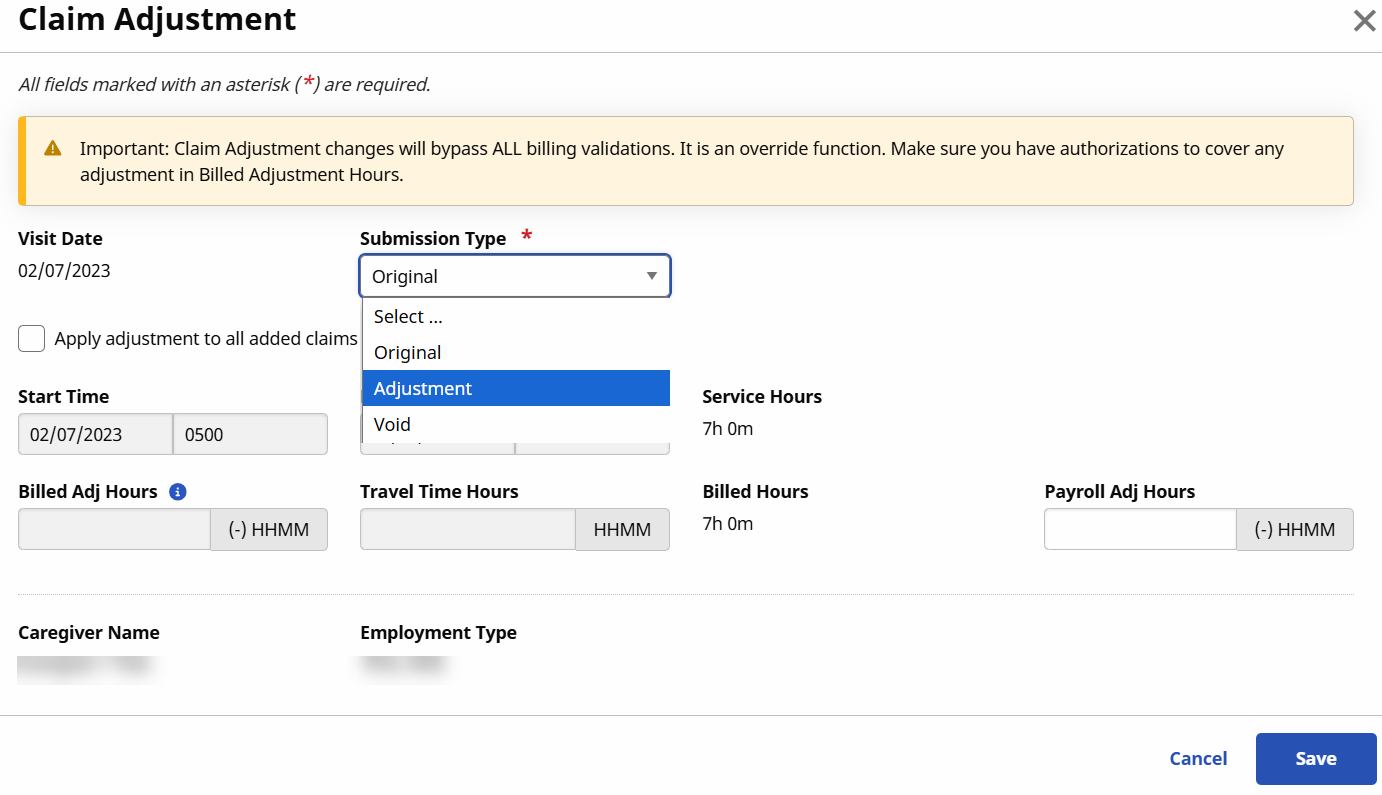
The Claims Adjustment window opens. Select Adjustment in the Submission Type field and enter the TRN Number (the Transaction Reference Number field appears after Adjustment is selected).
Do not place the updated visit on hold if you see this as an option. This prevents the system from re-exporting the claim.
-
Click the Save button to continue.
-
Select the Save Batch & Send button.
Once completed, the system automatically generates an 837 Adjustment File and exports both Visits/Claims using the nightly process (overnight).

Visits on the same day/service code must be billed on the same invoice.
|
Scenario |
The Provider invoices Visit 1 and HHAeXchange exports the claim. Once the claim is received and reviewed, the Provider adds Visit 2 on the same day, for the same Patient, with the same service code, as a separate claim. Since Visit 2 was not billed properly before exporting, it is on hold in Billing Review with each Visit listed on the same day/service code billed with the same invoice reason. |
|
Solution |
As a result, HHAeXchange exports both claims as an Adjustment to one invoice. |
Complete the following steps to export both visits on the same claim:
-
To unexport Visit 1, go to Billing > Invoice Search > By Invoice to find the invoice associated with the visit.
The invoice number is listed on the Bill Info tab under Visit > Visit Search (click on the V: link on the Member Calendar to access).
-
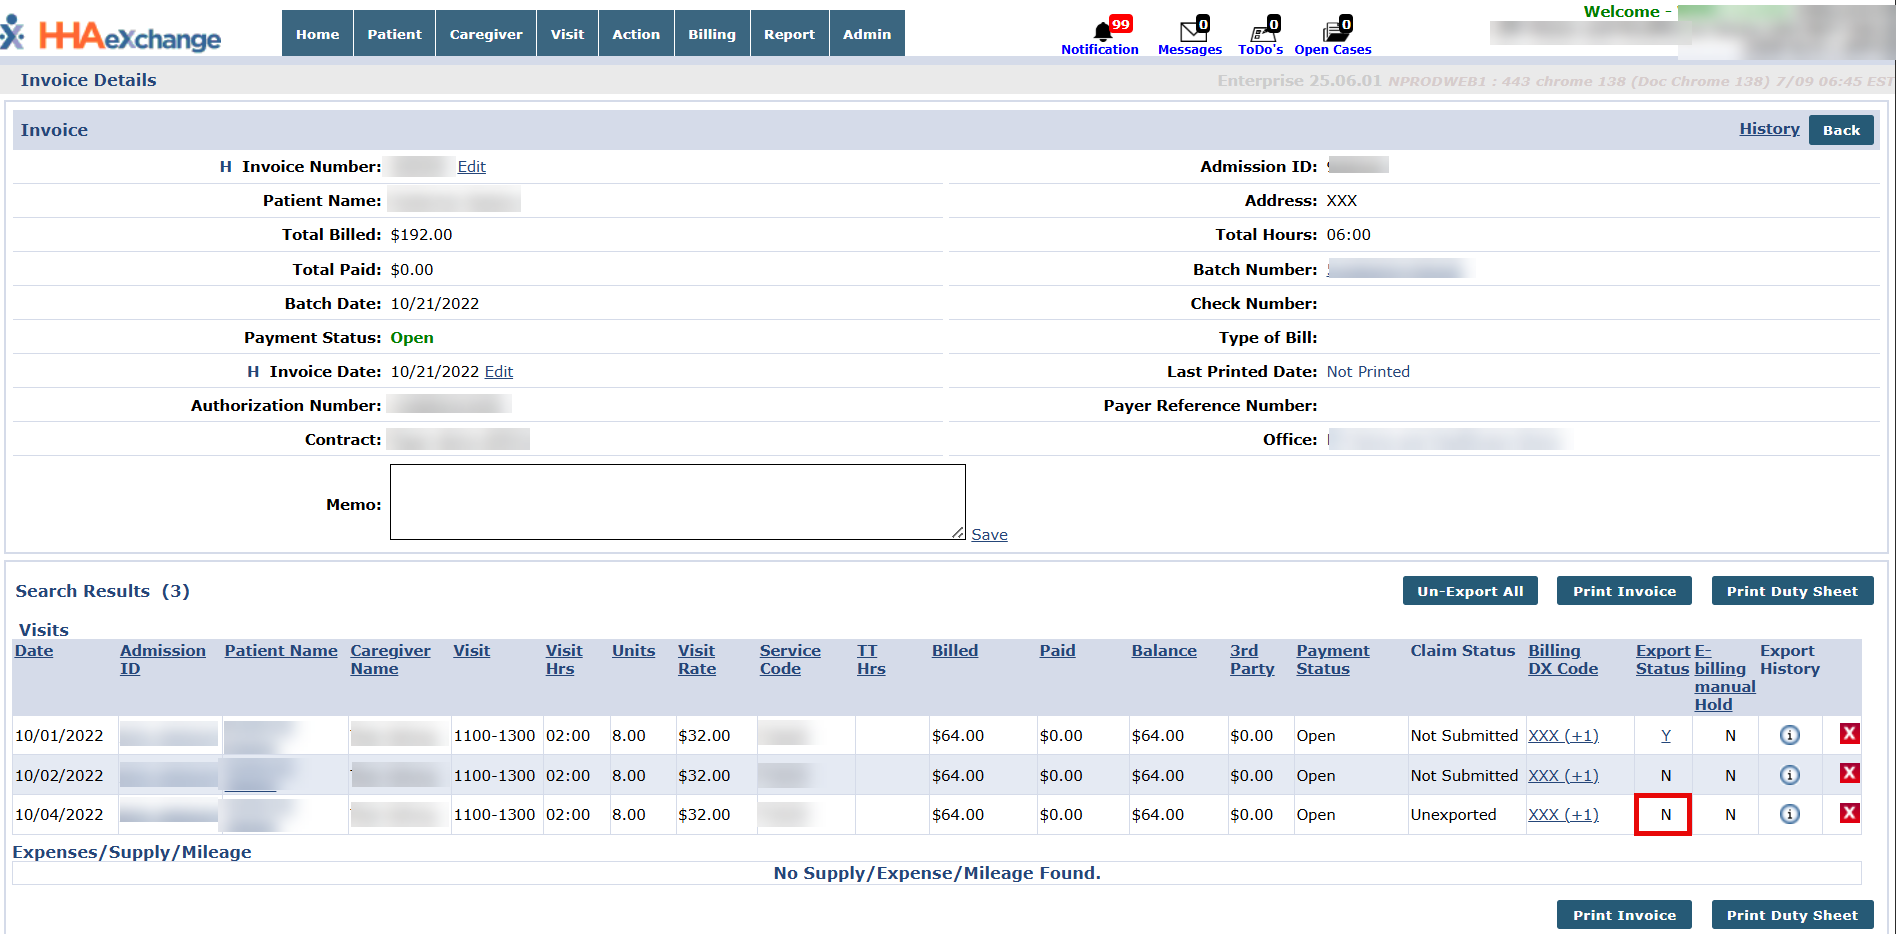
On the Invoice Search results, click on the Invoice Number link to open the Invoice Details page.
On the Invoice Details page, click on the “Y” link under the Export Status column to change the export status.
-
The Update Export Flag to “No” window opens. Enter the TRN number (sent with ERA by the Payer). If all changes are completed on the same day, then do not select the Place On Hold checkbox. This checkbox places a Manual Hold on the invoice and adds the invoice to the Billing Review page. Next, click the Save button.
The Visit and associated TRN is found in the Remittance File.
The Export Status changes to “N” (No).
-
Next, click on the Batch Number link in the Invoice section. Click on the Batch Number link again in search results to go to the Batch Details page.
-
On the Batch Details page, click on the Patient Name link to access the patient profile and calendar and select the visit date.
-
On the Patient's calendar, click on the V: link for Visit 2.
-
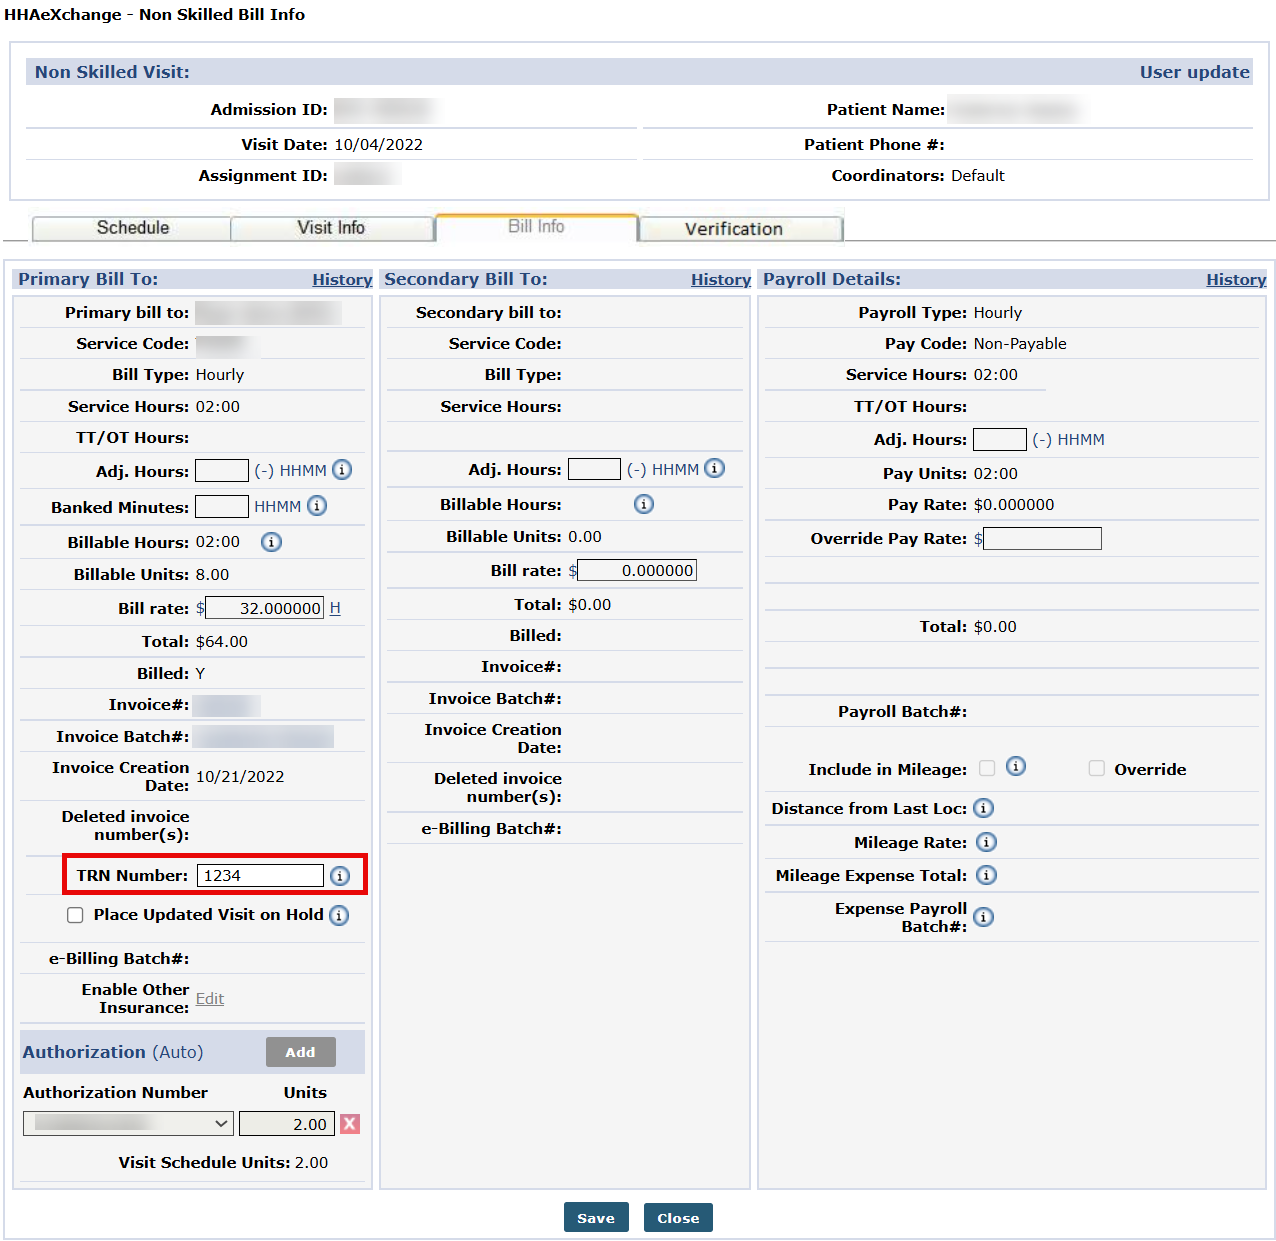
Select the Bill Info tab and confirm that the TRN Number is entered. Click the Save button.
Once completed, the system automatically invoices the visits, generates an 837 Adjustment File, and exports both visits/claims using the nightly process (overnight).

|
Scenario |
Provider bills a claim to the wrong Payer. |
|
Solution |
|
-
To void the claim go to Billing > Electronic Billing > E-Submission Batches.
-
On the E-Submissions Batches page, select applicable contracts and click the Add Resubmit Claims button.

-
On the Add Resubmit Claims E-Submission Batch window, select the Payer (MCO) from the Contract field and click the Add Claims button to search and add the claims.
-
On the Add Claims page, search for the visit using the Invoice Number field. In the Claims Search results, select the claim checkbox and click on the Add button.
The invoice number is listed on the Bill Info tab (click on the V: link on the Member Calendar to access).

-
On the Add Resubmit Claims E-Submission Batch window, click the Adjust Claim icon to edit the claim.
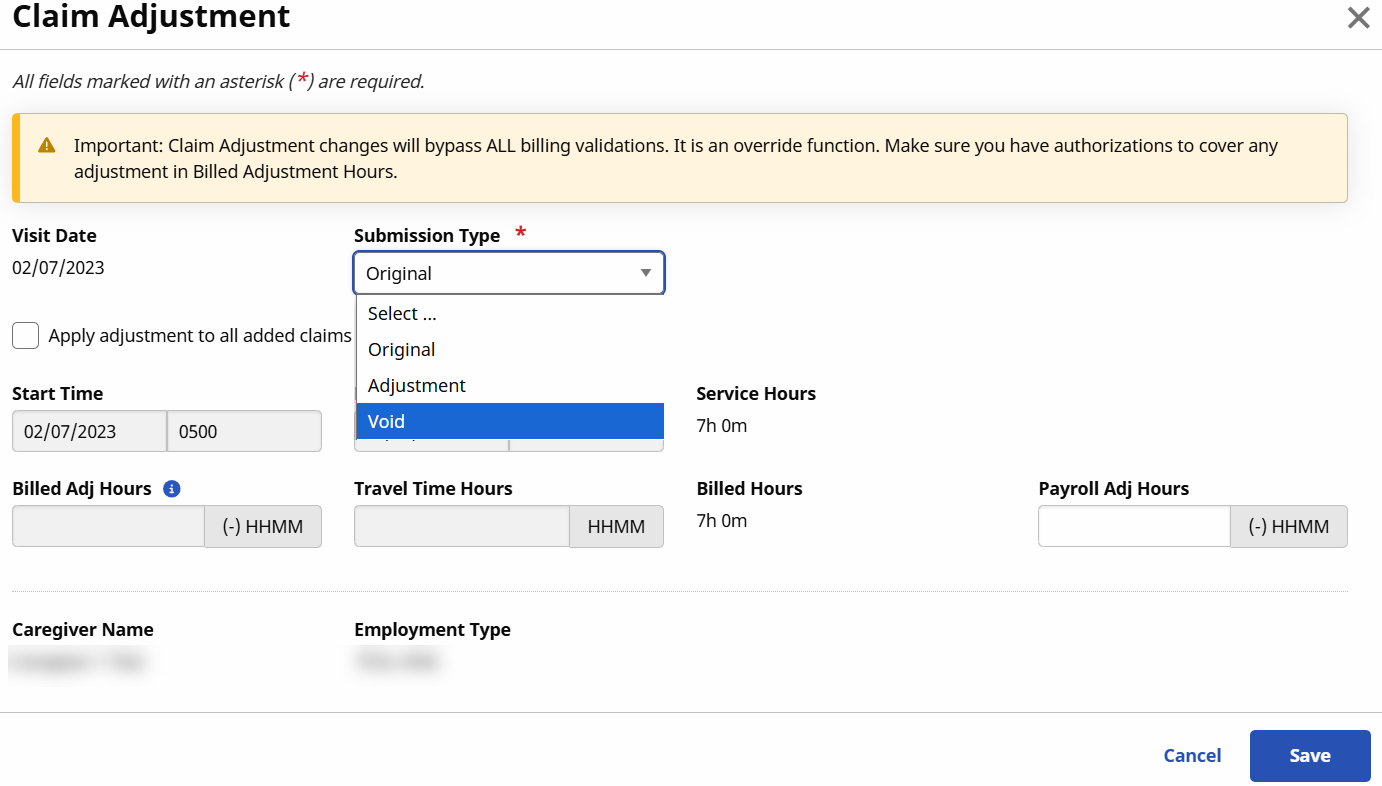
The Claims Adjustment window opens.
-
Select Void in the Submission Type field and enter the TRN Number (the Transaction Reference Number field appears after Void is selected). Once Void is selected, the visit is automatically placed on hold (preventing the system from re-exporting the claim).
-
Click the Save button to continue.
-
Back on the Add Resubmit Claims E-Submission Batch window, click the Save Batch and Send button. This completes the first part of this process.
-
To unbill the visit, navigate to Billing > Invoice Search > By Invoiceto find the applicable invoice.
-
On the Invoice Search results, click on the Invoice Number link.
-
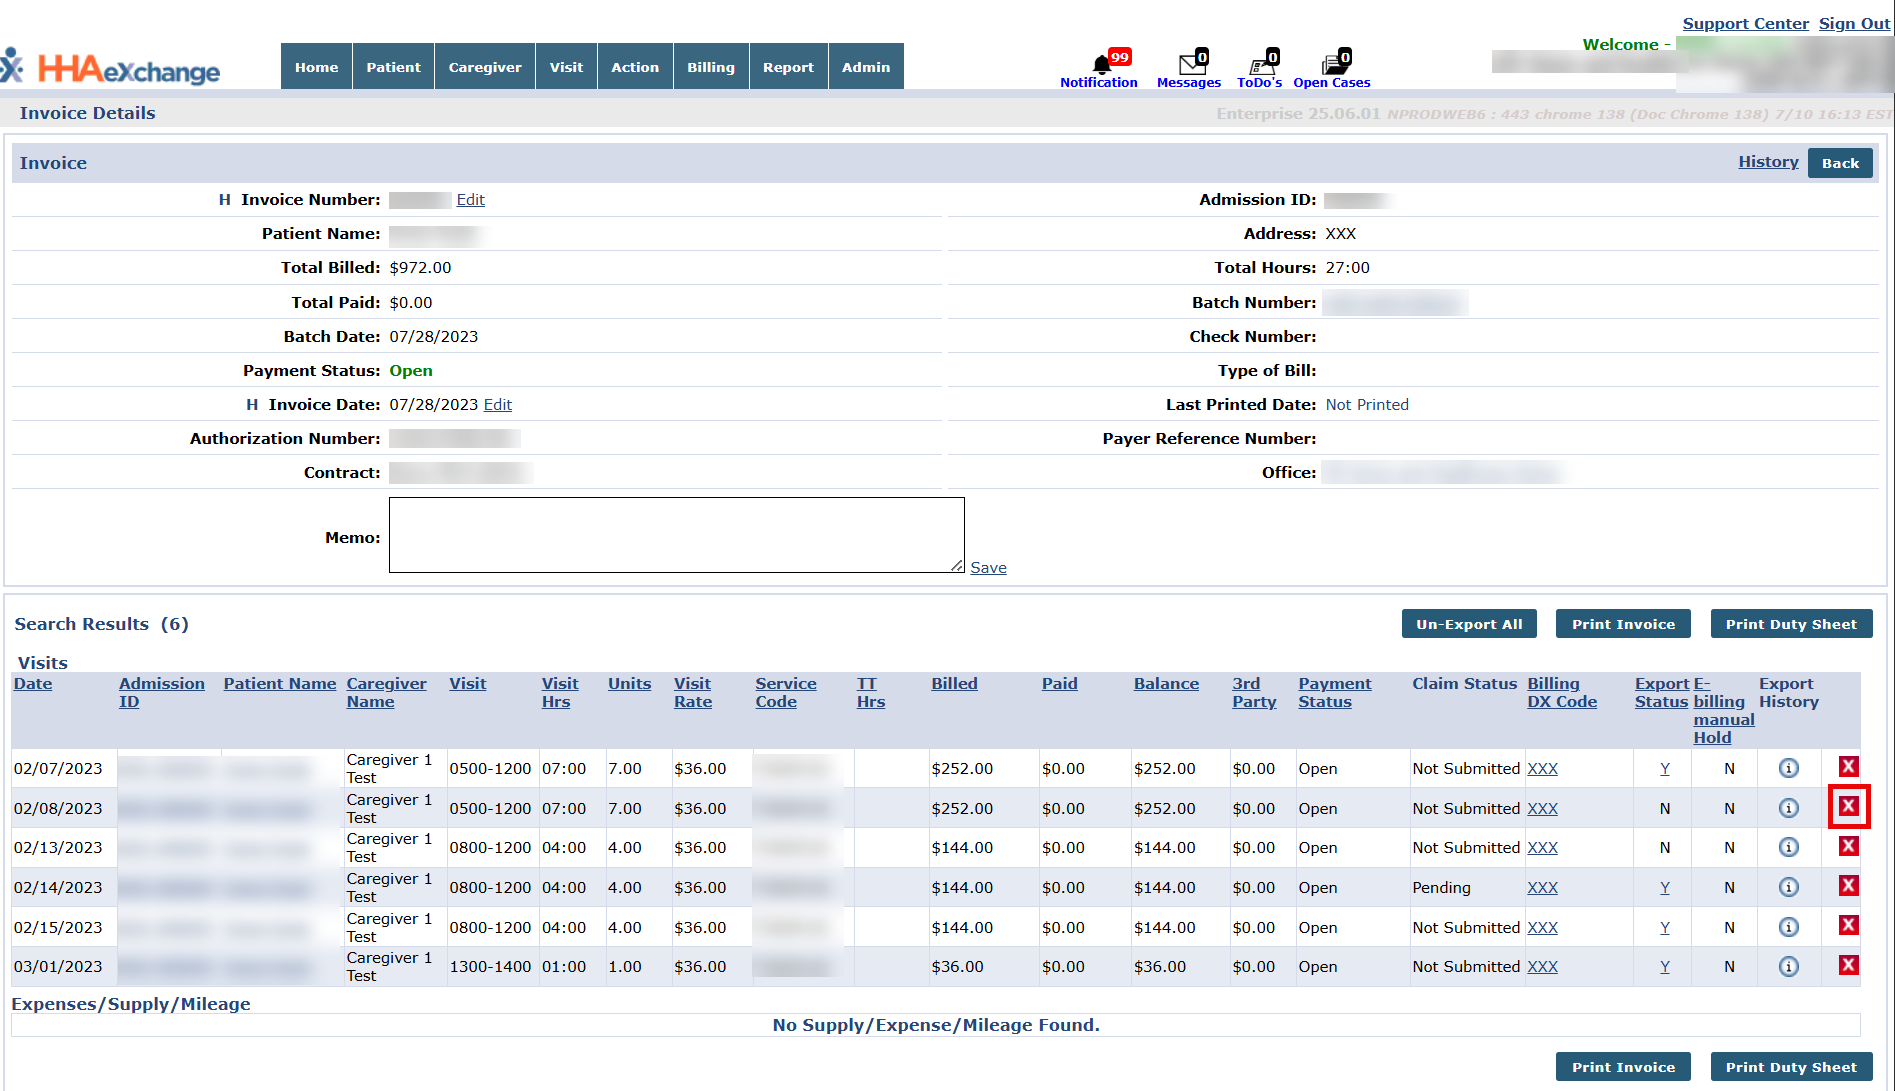
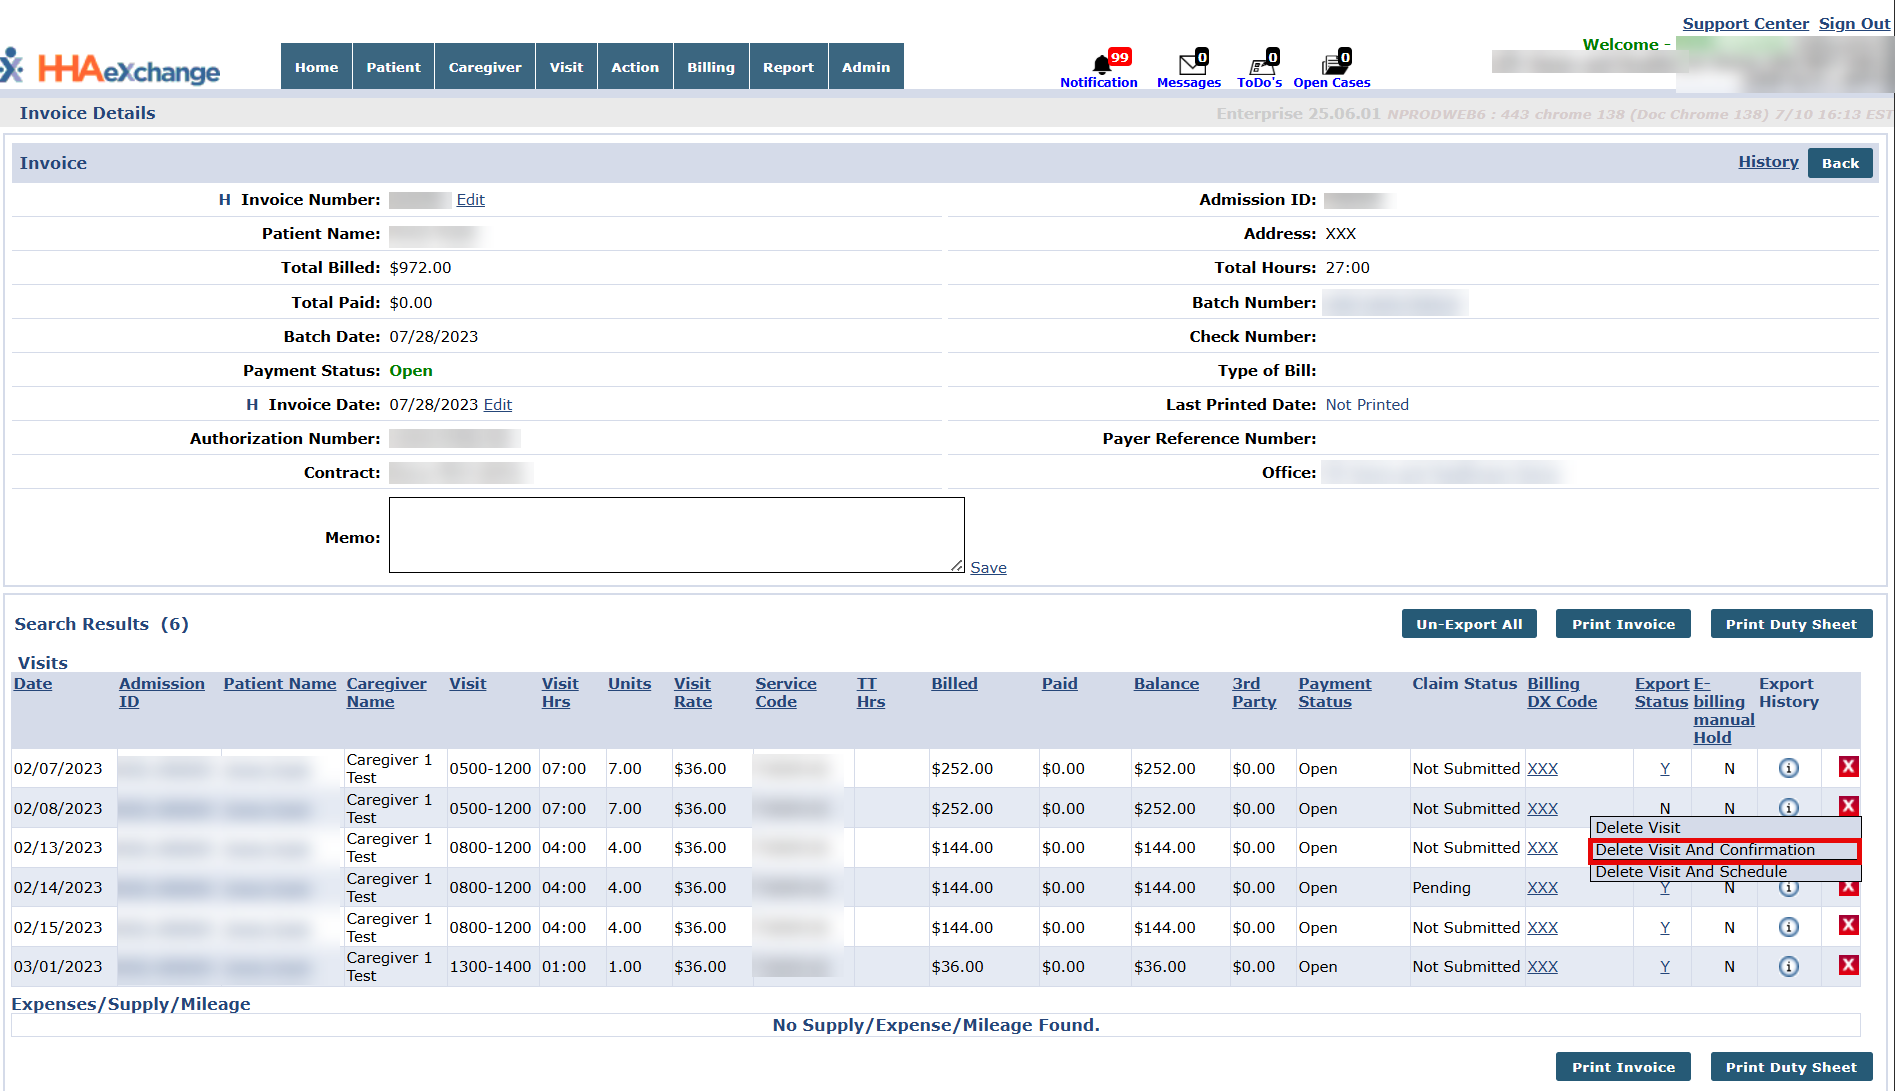
On the Invoice Details page, click the x icon to delete the visit and invoice records.
-
Select Delete Visit and Confirmation from the dropdown menu.
-
The Visit Delete window opens. Select an option from the Reason field. Click the Delete button to finalize.
The visit is removed. A new visit can now be created and billed as usual to the correct Payer.

|
Scenario |
Provider bills a claim. After the claim is received and reviewed, the Provider must make changes to the scheduled visit and/or visit times. |
|
Solution |
|
-
Go toBilling > Invoice Search > By Invoice to search for the applicable Invoice.
-
On the Invoice Search results, click on the Invoice Number link.
-
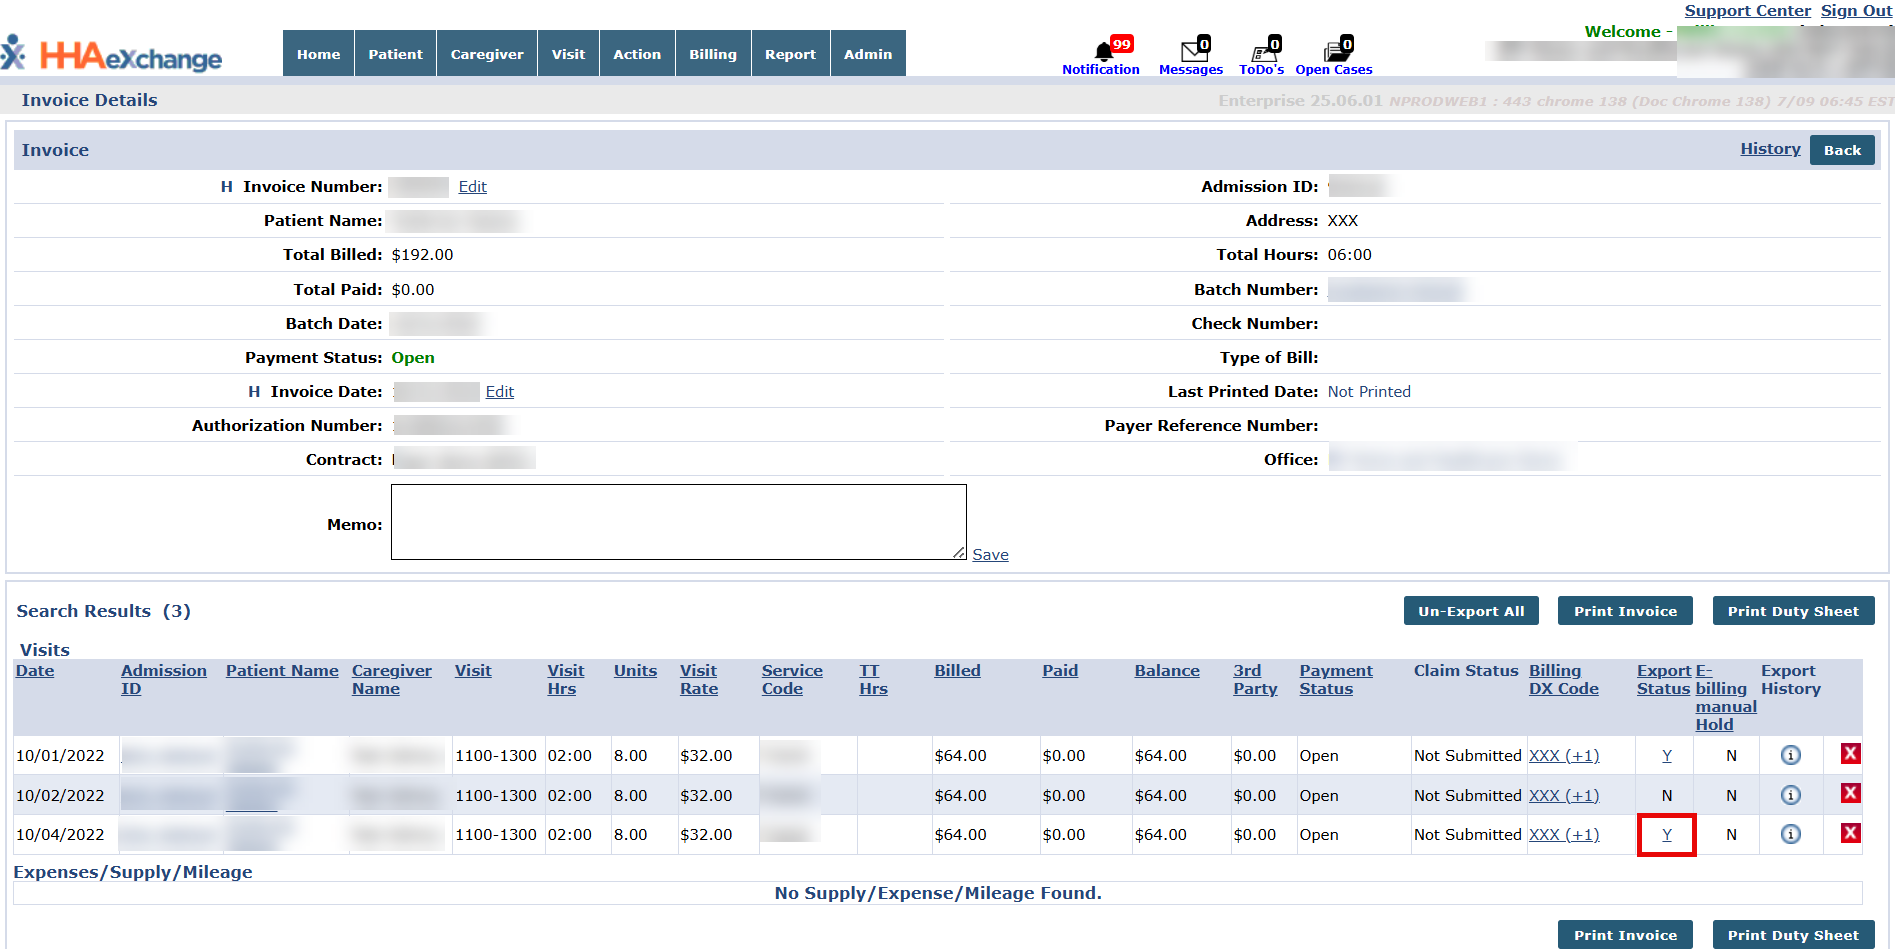
On the Invoice Details page, click on the Y link under Export Status to unexport the claim.
-
The Update Export Flag to “No” window opens. Enter the TRN number (sent with ERA by the Payer).
If all changes are completed on the same day, then do not select the Place On Hold checkbox.
Click the Save button.
The Export Status changes to “N” (No).
The visit and associated TRN is found in the Remittance File.
-
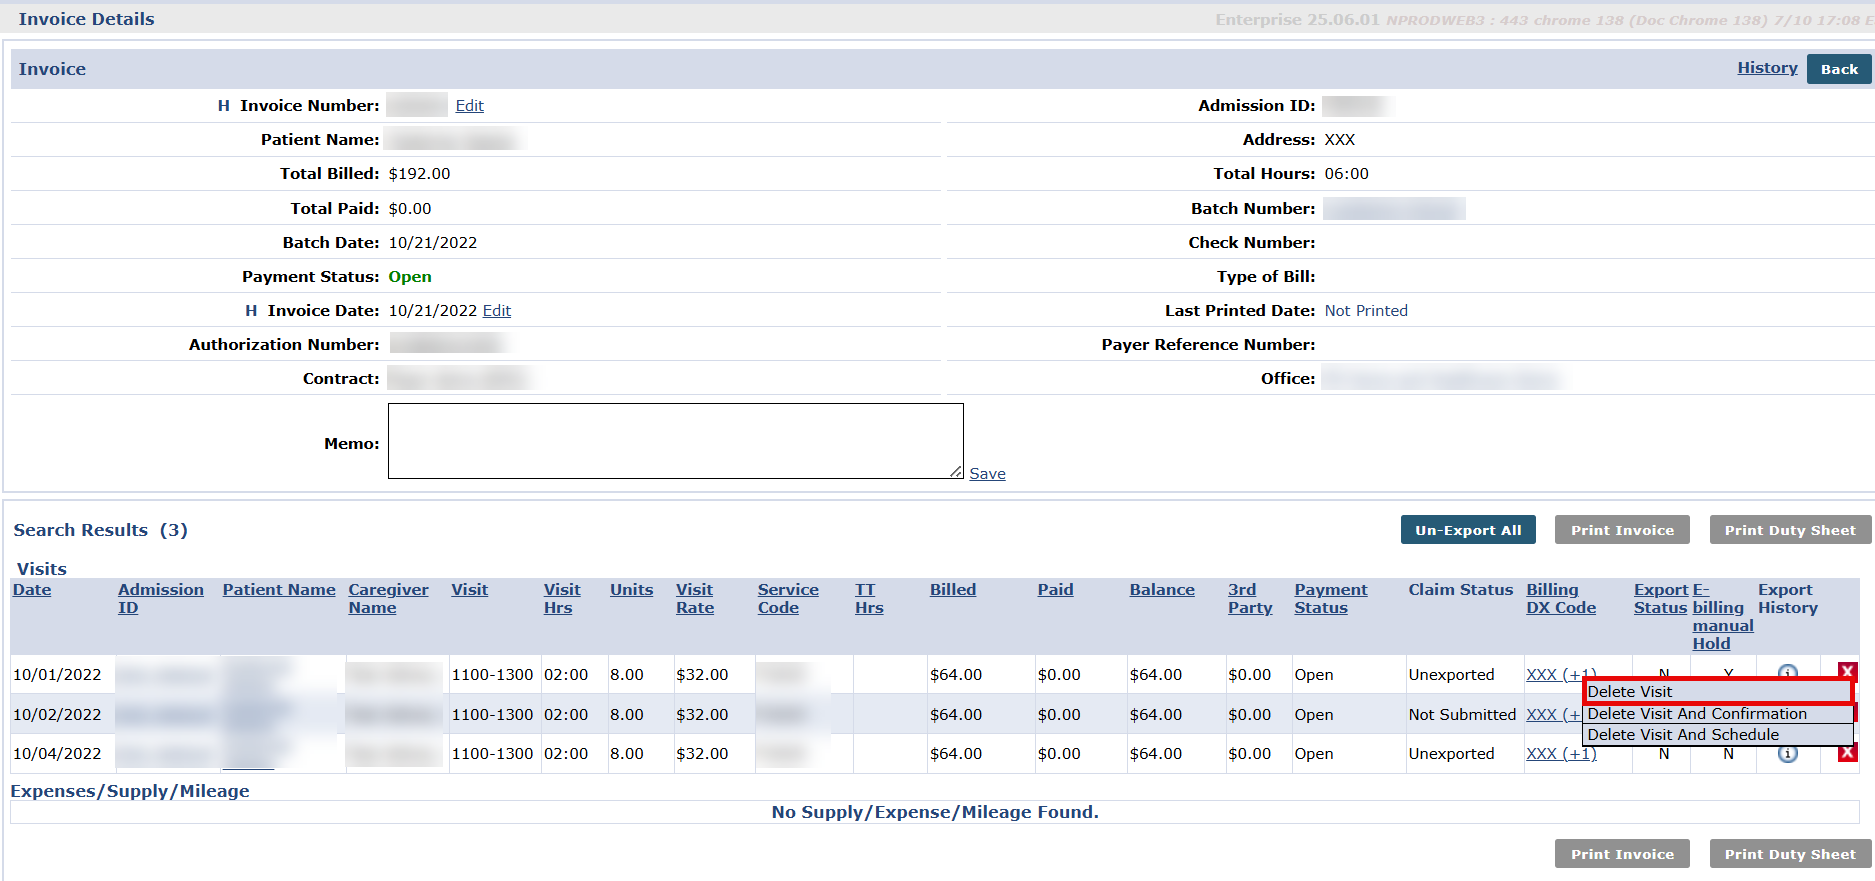
On the Invoice Details page, click on to X icon, then select the Delete Visit option to remove the visit from the Invoice.
-
The Visit Delete window opens. Select an option from the Reason field. Click the Delete button to finalize.
-
Go to the Member’s Calendar to confirm the bill status (Patient > Search Patient > Calendar). Notice that the Billed Status has changed to “N” (No).
-
Submit all edits and updates from your 3rd party EVV vendor via interface. Be sure to include the 3rd party invoice number.
Once completed, the system automatically invoices the visits, generates an 837 Adjustment File, and exports both visits/claims using the nightly process (overnight).

