Create Custom Dashboard Views
You can create and save custom views, based on selected filters. With custom views, you can access saved sets of filters to view specific information on dashboards without having to reselect filters each time.
You can create multiple custom views and set one as default to always open to the selected custom view. The system defaults to Original View to show all details for all dashboards. Click the View tab to toggle between views, as needed.

Complete the following steps to create a custom view on any dashboard.
-
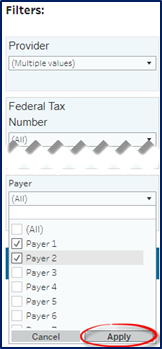
 Select the desired filters and click Apply.
 -
Click the View tab at the top bar.
-
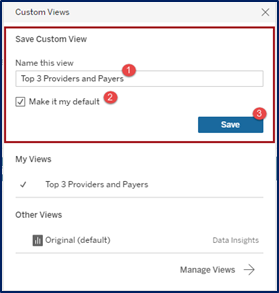
3. The Custom Views window opens. Enter a title for the custom view in the Name this view field. To make this a default view, select the Make it my default checkbox and then click Save.
-
Once created and made default, the Custom View replaces the Original View on the View tab. To toggle between Original and other saved custom views, click the tab to open the Custom Views window and select other views from the My Views section.

Custom views can be edited, renamed, or deleted from the saved views. To manage a custom view:
-
Select the View tab at the top.
-
The Custom Views window opens. On the My Views section, select the applicable custom view.
-
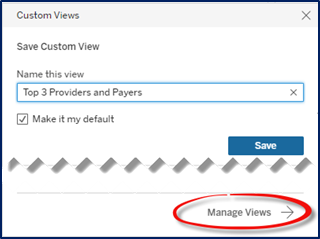
At the bottom of the window, click the Manage Views button.
-
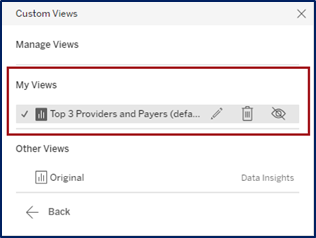
A set of icons appear under the My Views section of the window.
-
Click the Pencil icon to edit or rename the custom view; or
-
Click the Delete icon to delete a custom view. A confirmation window opens when deleting a custom view. Click Delete as prompted to remove the view.
-
-
Click Back to return to the dashboard.

-
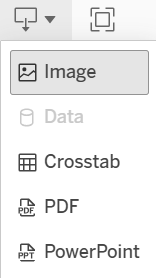
To download dashboard information, click the Download icon and select Crosstab.
-
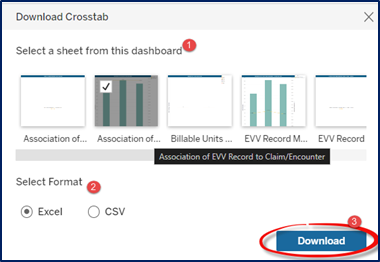
The Download Crosstab window opens. Select a sheet from the options. Hover over each option to view the title on the tool tip. Use the scroll bar at the bottom of the options to see all options for the dashboard.
-
Select the format: Excel or CSV for the output. Click the Download button to continue.
-
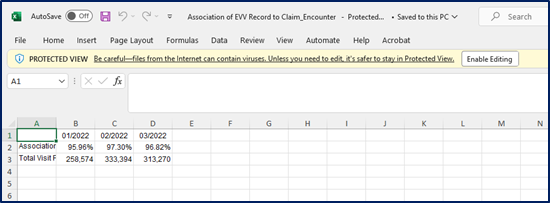
Follow the system prompts to download the file to your workstation. In the following example, an Excel file has been created as an output file.
