Run Exclusion/Verification Lists
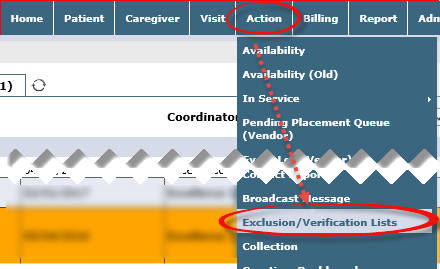
To run Exclusion/Verification Lists, go to Action > Exclusion/Verification Lists to access the interface page.
The Exclusion/Verification Lists Interface opens in a separate window to a summary page on the Requests Pending tab. Other tabs include Batch Search and False Positive List which are covered in the following sections.

A List Name dropdown menu is available to select Lists as setup by the System Administrator. Once the dropdown is opened, several lists appear for which the user has permissions based on their Agency’s offices. From this dropdown, users can select which Lists to batch in a search.
Once a search is executed, the results page appears as follows.
The dropdown menu displays all Exclusion Lists for which the Agency chooses to run batches for. Search results are based on the selected Exclusion Lists.
Upon selecting the Batch, the user arrives at the Batch Details search page which provides the selected Batch Details such as the List Name, Batch Number, and other details. Search filters are available to expand the search further to include a Results dropdown. Click the Search button to expand details further.
|
Field (Select…) |
Results… |
|---|---|
|
All |
Displays Valid, Invalid, and Not Searched results on the same page. |
|
Valid |
Displays all Verification List results where the search details are the same as the match details. |
|
Invalid |
Displays all results where search name and license number do not match records in queried database. In the image above, the Death Master List is used. In this List, a person’s Social Security Number (SSN) is verified to ensure that the SSN does not belong to a dead person (in case the employee provides a false SSN). In the system, the SSN is considered a License Number. In this case, a searched license number is identical to a matched license number which may indicate fraud. For this reason, the individual shows as Invalid. |
|
Not Searched |
Displays all results which had insufficient information recorded in the HHAeXchange system such that a query would have been unsuccessful, and therefore no query was run. All individuals batched up to be run through a Verification List must have the minimum required details available in the required fields of their profile. If the required details are not available in the required fields, they are not entered into a batch or query, and their record appears as Not Searched. |

The following example illustrates how to add a Caregiver to a False Positive List (FPL) after running a Batch Search. Caregiver Jane Doe shows up on a GSA list; however, the Agency has determined that Jane Doe is not a Caregiver.
-
On the Batch Search results, click the Batch Number link showing Exceptions (count).
-
The Batch Details page opens. Select the Exclusion (for example GSA)
-
On the search results, 1) compare and confirm that the Caregiver is a false positive. 2) Click the Add to FPL button (on the right-most column of the row).
-
Moving forward, the selected Caregiver does not show up on the selected Exclusion list when compared to the same incorrect excluded individual.

The False Positive List tab only deals with Exclusion Lists which includes newly added Lists. The Exclusion dropdown shows all selected Lists (all Lists available for any office throughout an Agency). Select an Exclusion List from the dropdown, which is required to run a query. Click the Search button to continue.
The results are generated in the False Positive List grid. Each line item indicates specific information as described in the table below the image.
|
Column |
Column Name |
Description |
|---|---|---|
|
1 |
Type |
Indicates Employee Type (Caregiver or Physician) |
|
2 |
Caregiver Code/NPI |
The National Provider Identifier (NPI) Number or Caregiver Code assigned by the HHAeXchange system. |
|
3 |
Name |
Caregiver/Physician Name |
|
4 |
DOB |
Date of birth recorded in the system |
|
5 |
Exclusion Name |
Name registered with Licensure |
|
6 |
Exclusion DOB |
Date of birth registered with Licensure |
|
7 |
General |
Specifies the type of Licensure |
|
8 |
Exclusion Type |
Indicate what the applicable Exclusion |
|
9 |
Specialty |
Indicates the individual’s specialty |
|
10 |
Address |
Address registered with Licensure |
|
11 |
Date |
Effective date of Exclusion |
|
12 |
Reinstatement |
Effective date of Reinstatement (if applicable) |
|
13 |
Date Added |
|
|
14 |
More Info |
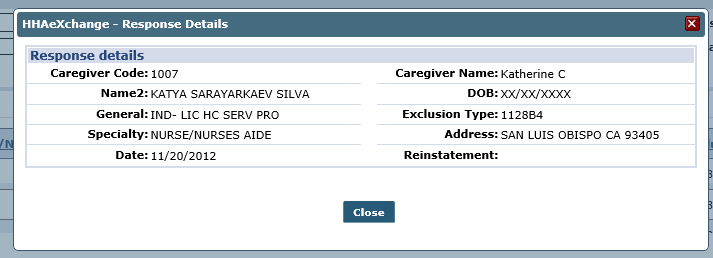
Click the More Info icon to access the view-only Response Details popup summary window. |
|
15 |
Delete |
Delete the record from the result list |


