Review and Update Provider Identifier - NPI and UMPI Numbers
In Minnesota, National Provider Identifier (NPI) and Unique Minnesota Provider Identifier (UMPI) are used by Payers to import authorizations. In addition, NPIs and UMPIs are used by EDI providers to import visits. These values are used to route authorizations correctly when imported by Payers. These values allow for matching EDI visit import data.
This topic addresses how to review and add or update a Provider Identifier (NPI and/or UMPI) for an Agency at the office level.
The following information is needed to complete:
-
Agency Tax ID Number
-
Agency NPI(s)
-
Agency UMPI(s)
Complete the steps below to successfully view, add, or edit the Provider Identifier number in the HHAeXchange system.
-
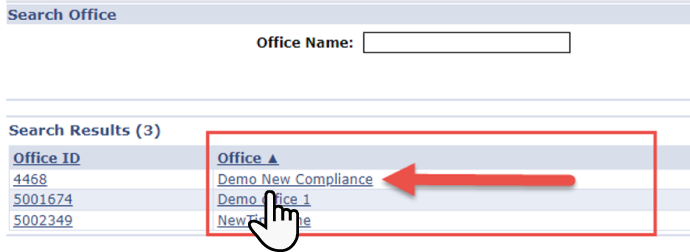
In HHAeXchange, go to Admin > Office Setup > Search Office to search and locate the applicable Office using the search fields.
-
From the Search Results, click the Office Name hyperlink to route to the Edit Office page.
-
In the General section, locate the NPI No. and Secondary Identifier fields and review the values.
Read the following before making any changes to these fields.
-
Only NPI numbers can go in the NPI No. field. The NPI is a 10-digit numeric value.
-
Only UMPI numbers can go in the Secondary Identifier field. The UMPI is an alpha-numeric value starting with either an M or an A.
-
Two different UMPI numbers cannot exist in the same office.
-
-
If the NPI No. and Secondary Indentifier values are correct, then nothing else is required for the selected office. Continue to review other offices, as needed.
-
If either of these values is incorrect, then make the necessary updates. Values can be deleted if needed.
-
Scroll to the bottom of the page and click Save to save the update.
-
Repeat steps above to review ALL applicable Offices.

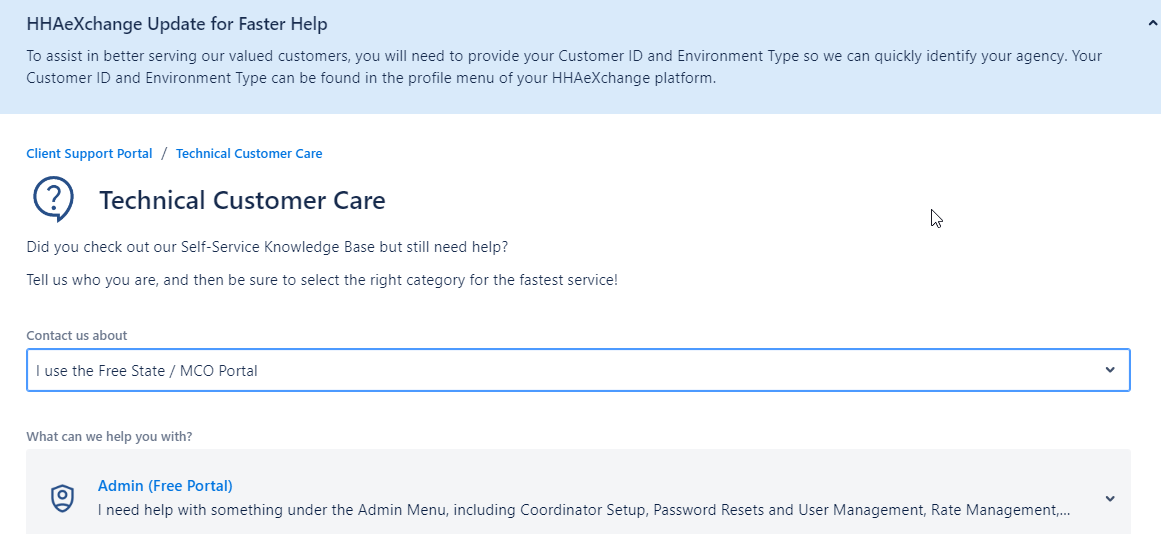
If you have additional NPIs or UMPIs to add to your HHAeXchange Portal, submit a request to the Technical Customer Care Team for assistance with creating a New Office.
Complete the following steps to submit the request.
-
Click Technical Customer Care Free Portal to begin the request.
-
Complete all required fields, marked by a red asterisk. Select the following for this specific request type:
-
Select Admin in the What Can We Help With field.
-
Select CLOUD for Environment Type.
-
Select MN State Multiple for Payer.
-


