Log Manual Payments
If a Payer provides a paper (non-electronic) explanation of payments, then this information is added manually to the Cash Payment page. To manually log payments, enter the summary details of the payment, then apply the payment to individual invoices which have been processed in HHAeXchange.
If the Payer provides a Remittance (an electronic explanation of payments), any discrepancies between the Billed Amount and the Remittance received need to be adjusted manually. HHAeXchange only automatically processes if the remittance lists the invoice as paid in full. Invoices which have been denied or received partial payments must be logged manually.

-
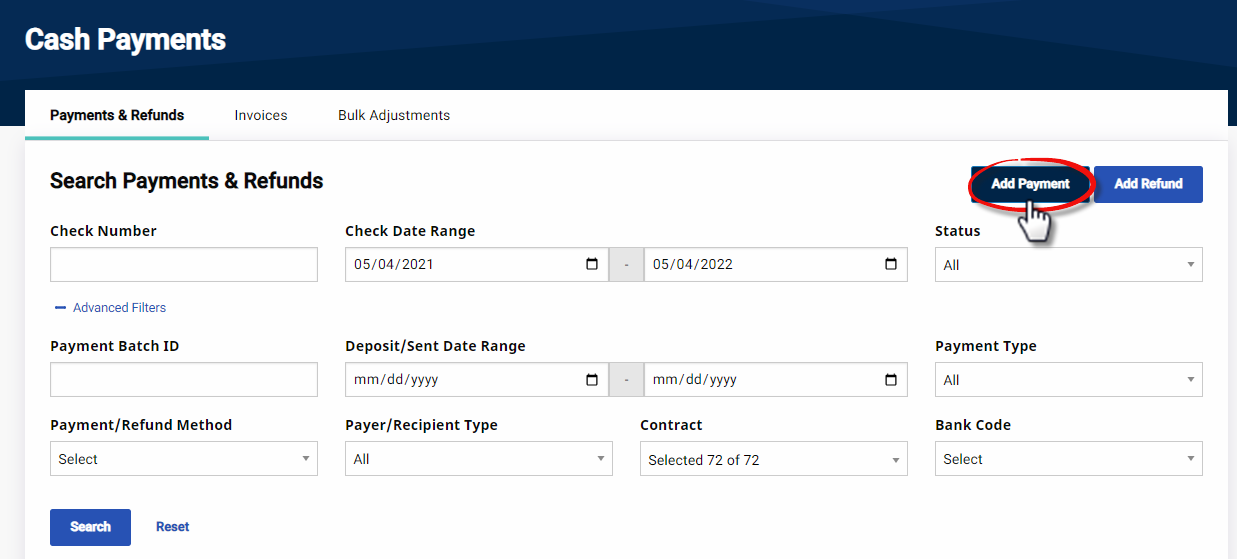
Go to Billing > Cash Payment to open the Cash Payments page.
-
The Payments & Refunds tab open by default. Click the Add Payment.
-
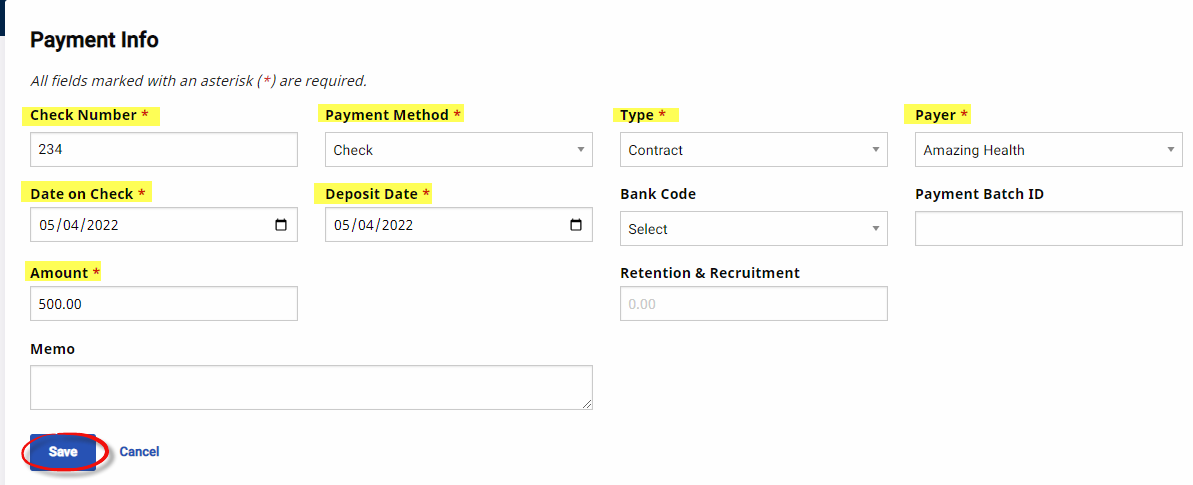
On the Add Payment/Payment Info window, complete the required fields marked with red asterisks. Click Save to continue.
When entering payment info from a Contract, the system prompts users to select a Payer; whereas a Private Pay Payment requires the Patient’s Admission ID.
-
The Retention & Recruitment field is used to record any funds sent with the payment which may be used by your Agency to improve working conditions for existing Caregivers and/or to attract new employees. The value entered in this field is deducted from the overall Amount.
-
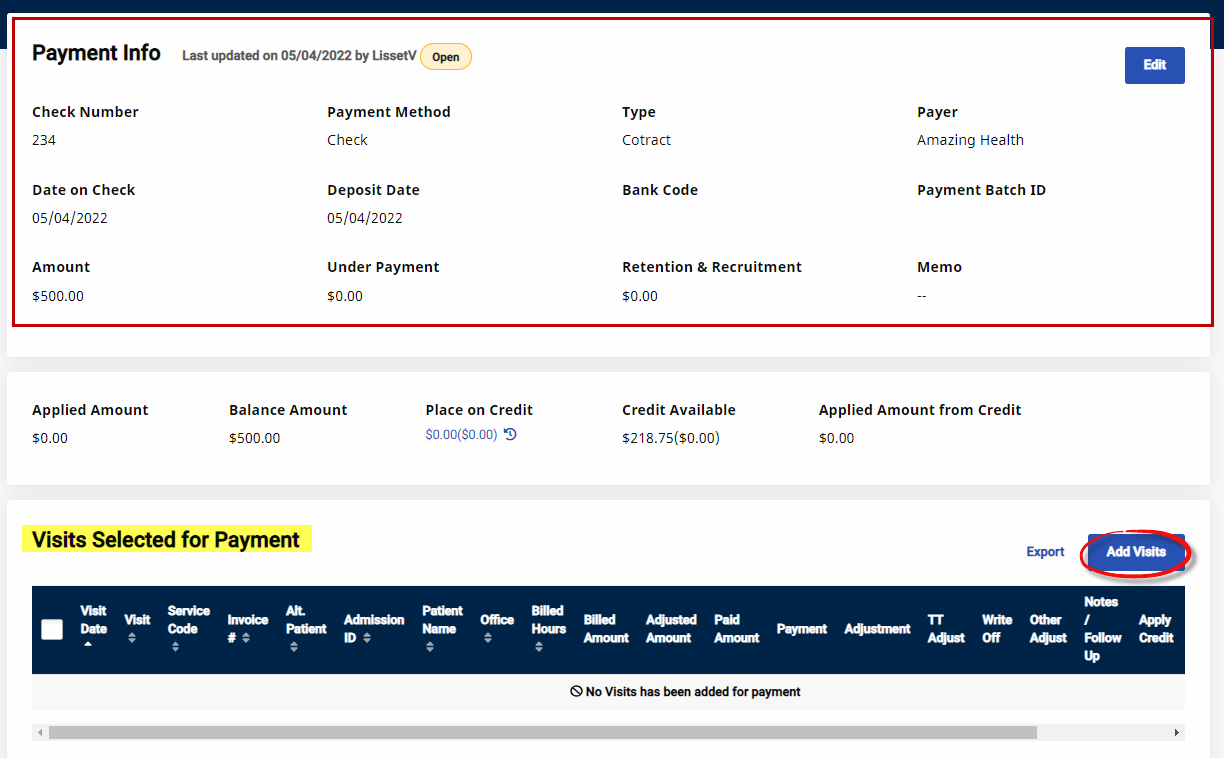
The Payment Info appears on the header of the page. From here, click the Edit button to update the Payment Info or scroll to the Visits Selected for Payment section to apply visits to the payment. Click the Add Visits button.
-
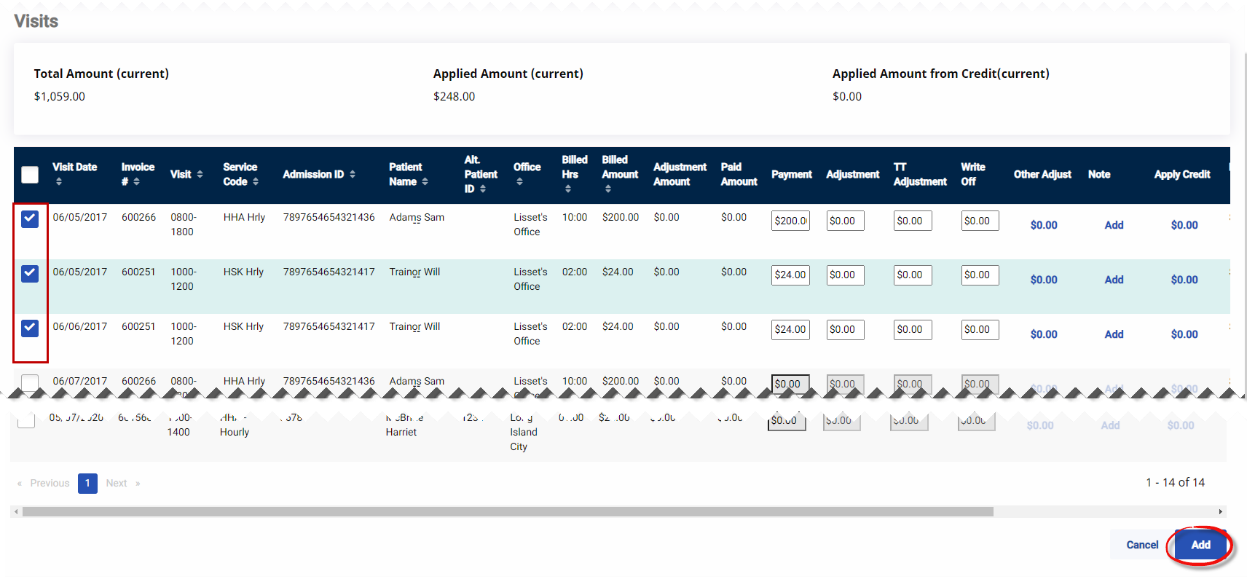
The Add Payment window opens. Use the search filters to locate visits and/or Click Search to generate results. From the Search Results, select the visits to apply payment to and click the Add button at the bottom of the page.
-
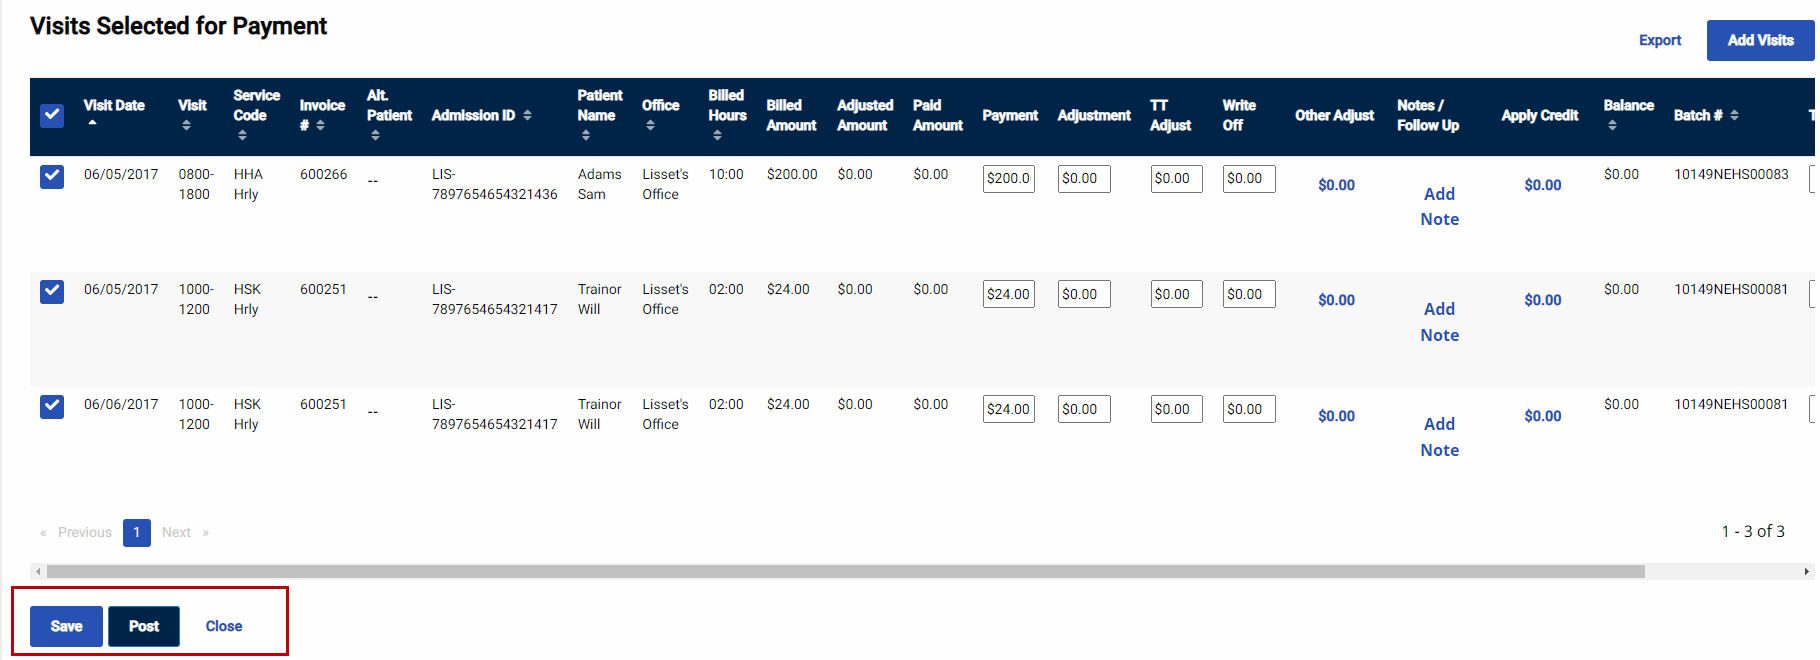
On the Visit Selected for Payment section, there are several options per line item to include Payment, Adjustment, TT Adjustment, Write-off, or Other Adjustments. To apply the full payment to the visit, select the checkbox to the left of the Visit Date column.
-
Above the search results, review the Applied Amount, (payment previously applied to the visit(s)), the Balance Amount remaining balance, and the Applied From Credit, amount applied from existing credit.
-
Once complete, click Save to save changes. Continue adding visits click the Add Visits button. To apply payment to the selected visits, click the Post button to finalize.
To post a payment, the Balance Amount must be zero
