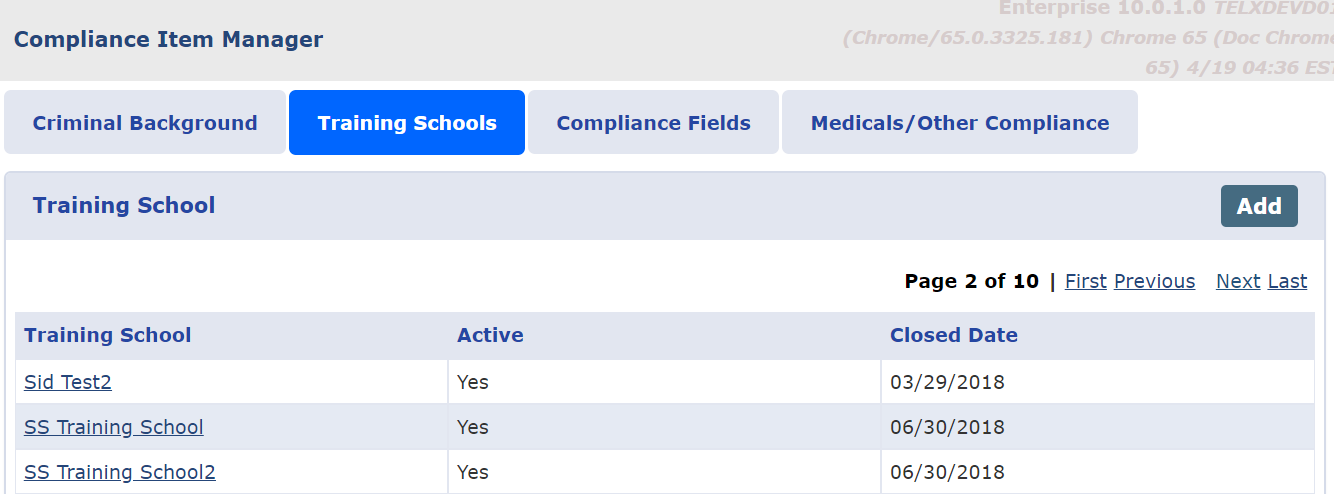
Item Manager

This section is intended for Agency Admin users responsible for setting up Caregiver Compliance.
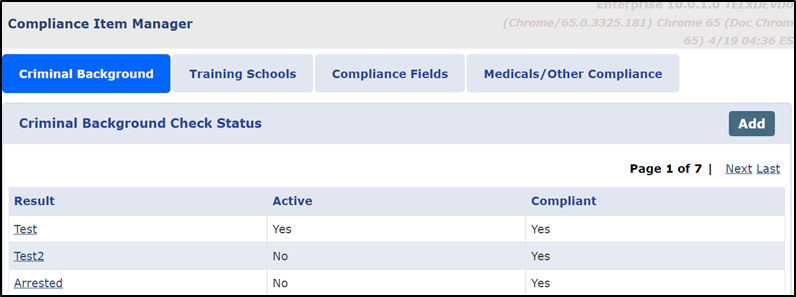
The Item Manager under Admin > Compliance Setup > Item Manager is the first level of the Compliance module. The Item Manager is defined as the library of compliance fields and values at an Agency level. The Item Manager is comprised of 4 specific tabs used to create and manage values for Criminal Background checks, Training Schools, custom Compliance Fields, and Medical/Other Compliance fields.
Once created and Active, these values/fields become available for use at the Compliance Setup level. Values entered on the Item Manager are not used for any compliance calculations until they are assigned to a Compliance Setup(s). The same value may be applied to multiple setups if required.

The Compliance Fields tab is used to create custom compliance fields via the compliance Item Manager. Examples of custom fields may be a Caregiver’s car insurance information, Certification Notes, Test Scores, and Seminar Completion details among other details to track. Complete the following steps to create and manage Compliance Fields via the Item Manager functionality.
-
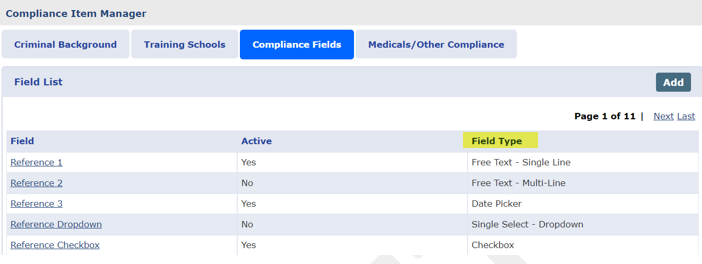
Go to the Item Manager and select the Compliance Fields tab.
-
Click the Add button.
-
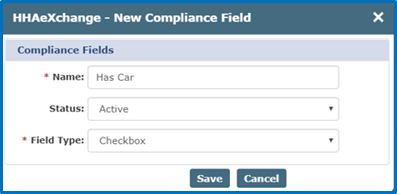
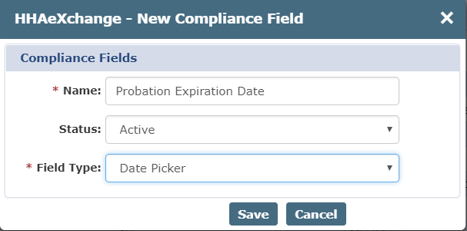
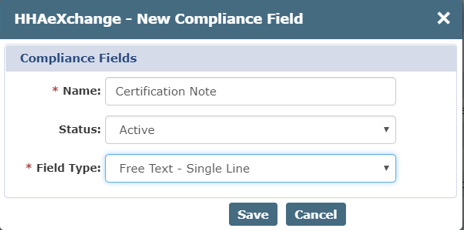
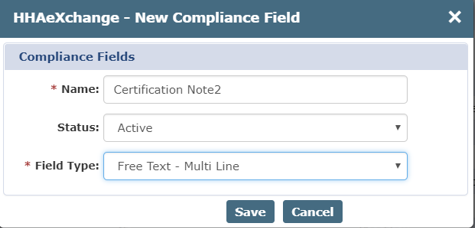
TheHHAeXchange-New Compliance Field window opens. Complete the required fields.
Field
Description
Name
Enter the custom field name in this free text field to capture the name of the custom Compliance field.
Status
The default value is set to Active. Select Active or Inactive from the dropdown to set the availability of the Status.
Field Type
Dropdown menu provides options for the field including Checkbox, Free Text - Single Line, Free Text - Multi Line, Date Picker, Single Select – Dropdown, and Multi Select - Dropdown.
-
Click the Save button to finalize.
-
Upon saving a Compliance Field, the value displays on the table. To edit the Status of a value, click the Field link and follow Steps 3-4 above.

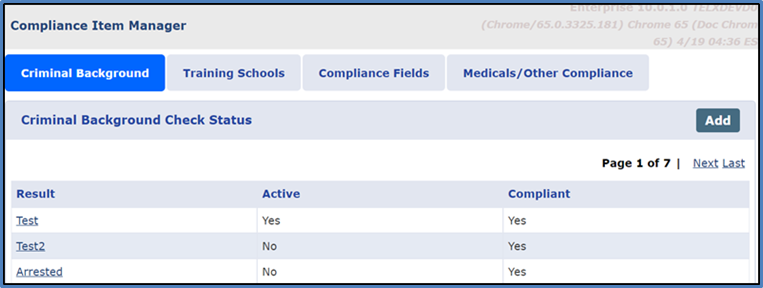
The Criminal Background tab is used to enter and manage Result values for Criminal Background checks. Complete the following steps to create a value.
-
Go to the Item Manager and select the Criminal Background tab.
-
Click the Add button.
-
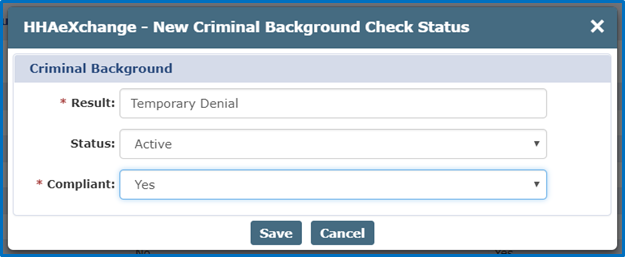
The HHAeXchange-New Criminal Background Check Status window opens. Complete the required fields.
Field
Description
Result
Enter the Result Name in this free text field to capture the title of the result.
Status
The default value is set to Active. Select Active or Inactive from the dropdown to set the availability of the Status.
Compliant
Select Yes or No from the dropdown to indicate whether the Result qualifies as compliant or non-compliant.
-
Click the Save button to finalize.The Result value displays on the table.
-
To edit Status of a value, click the Result link and follow Steps 3-4 above.
The system does not allow duplicate values to be saved.
-
Review the values selected for the Criminal Background check to ensure that there is at least one compliant value entered. Upon saving on the Item Manager, Criminal Background tab, the system validates if there is at least one Active compliant value. If not, then the system issues a warning validation. This validation warning does not stop users from saving; one may proceed without an active compliant value for this section.
The above also applies when saving on the Compliance Setup side in the Criminal Background tab.

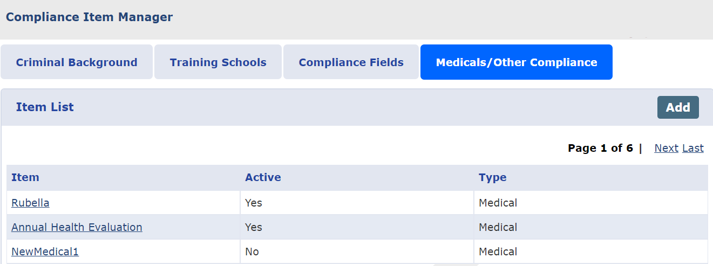
The Medicals/Other Compliance tab is used to create and manage Caregivers’ Medical and Other Compliance field values via the compliance Item Manager. Complete the following steps to create and manage Medicals and Other Compliance Fields via the Item Manager functionality.
-
Go to the Item Manager and select the Medicals/Other Compliance tab.
-
Click the Add button.
-
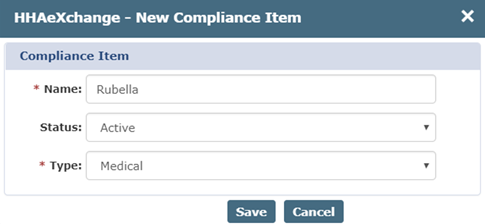
The HHAeXchange- New Compliance Item window opens. Complete the required fields.
Field
Description
Name
Enter the custom field name in this free text field to capture the name of the Medical or Other Compliance field.
Status
The default value is set to Active. Select Active or Inactive from the dropdown to set the availability of the Status.
Type
Select Medical or Other Compliance from the dropdown menu.
-
Click the Save button to finalize.
-
Upon saving a Medical/Other Compliance, the value displays on the table. To edit the Status of a value, click the Field link and follow Steps 3-4 above.

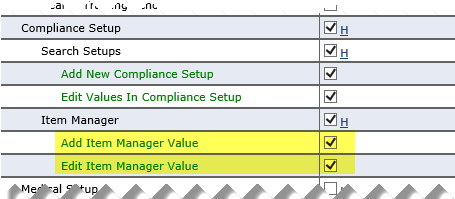
The following permissions are necessary to add new information or edit in the Item Manager under Compliance Setup > Item Manager:
|
Permission |
Description |
|---|---|
|
Add Item Manager Value |
Allows users to add new values on the Item Manager. |
|
Edit Item Manager Value |
Allows users to edit existing values on the Item Manager. |
By default, users with the Medical Setup permission also have Item Manager permissions.
Go to Admin > User Management > Edit Roles. Select Admin from the Section dropdown and Admin from the Roles dropdown to enable these permissions.

Agencies can setup and manage the values for approved Training Schools via the compliance Item Manager. Complete the following steps to add a Training School.
-
Go to the Item Manager and select the Training School tab.
-
Click the Add button.
-
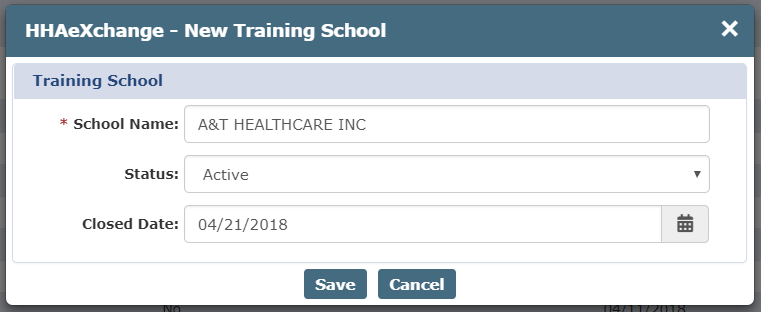
The HHAeXchange-New Training School window opens. Complete the required fields.
Field
Description
School Name
Enter the Training School name in this free text field to capture the name of the Training School.
Status
The default value is set to Active. Select Active or Inactive from the dropdown to set the availability of the Status.
Closed Date
Date field used to enter the date the school closed (if applicable).
-
Click the Save button to finalize.
-
Upon saving a Training School, the value displays on the table. To edit the Status of a value or enter a Closed Date (if not initially entered), click the Training School link and follow Steps above.
