Blended Services: Split Patient Record
The Blended Services feature allows Providers to split a Patient record, typically used when a Patient receives both Personal Care Services as well as Consumer-Directed Services. Ultimately, the system makes a copy of the Patient record and routes the information back to the Payer as one Patient. This feature only works on Patients with active or future Placements. If the Placement is in the past, then the system does not allow the split.

A Split Patient Profile can be deleted provided that there are no scheduled visits, authorizations, invoices or any activity associated with the profile. To delete, click the Unsplit link and follow the system prompts. If any activity is associated with the Split Patient Profile, then the system issues a validation at the time of deletion, not allowing the un-split.

Once the split is completed, Providers have the option to move Authorizations from one Patient Profile to the other. To move an Authorization, go to the Authorization/Orders page under Patient > Authorizations/Orders and click the Move Authorization link, above the grid.
The Move Authorization window opens. Select the applicable Authorization and Patient. Note that this only applies to Patients with split records and for active current Authorizations (no past Authorizations); therefore, only applicable Authorizations and Patients are available to select.
In addition, an Authorization cannot be moved if visits are confirmed and billed.

The Split Patient feature supports the automation of the Placement process, routing authorizations to the corresponding or correct Provider Office with the same Patient. This is a fully automated feature managed by the Payer; no action is required from the Provider. Therefore, the Payer initiates the process, and the Split Patient workflow routes the authorization to the proper Office.
Once a Placement is received from a Payer, go to the Patient Profile under Patient > General and click the Edit button. The Split Patient button becomes available to select under the Split Patient Record section. Click the Split Patient button to initiate.
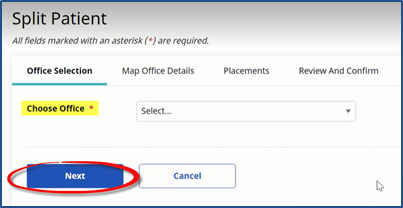
The Split Patient window opens to the Office Selection tab. Select the office in the Choose Office field and click the Next button.
The Offices available to select are limited to the offices the user is assigned to.
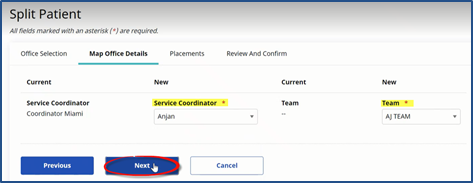
The next tab, Map Office Details appears. Complete the required fields* by selecting the Service Coordinator and Team. Click the Next button to continue.
Field requirements depend on the field requirements set at the Agency level under Admin > Agency Profile > Required Patient Fields.
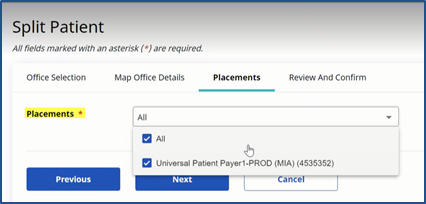
On the Placements tab, select the applicable Placement(s).
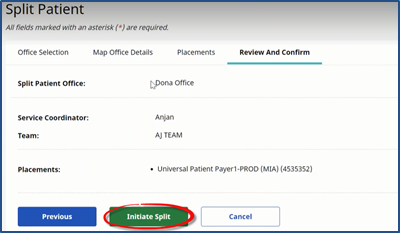
On the final tab, Review and Confirm, review the details and click the Initiate Split button.
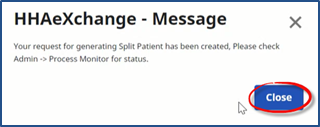
The system alerts that the Split Patient record has been created. Click Close to exit.
Once processed, the Split Patient Record appears in the Patient’s Profile General page. The original record remains in the header with the original Office. Any additional Authorizations go to the original Patient record as well as communications from the Payer.

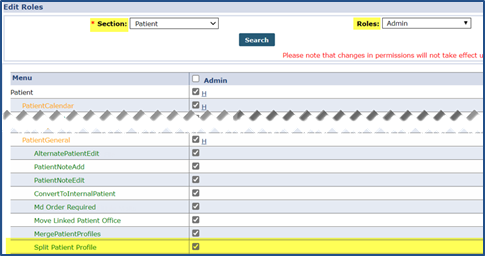
Permissions for this feature is role-based. To assign permissions, go to Admin > User Management > Edit Roles. Select Patient from the Section field, applicable Roles from the dropdown field and click Search. Under the Patient General category, select the Split Patient permission for the chosen roles and click Save to finalize.


