Live-in Visits
A Live-in visit is not a Service Type. Live-in Visits require a unique Service Code, Billing Rate, and Authorization. Confirmation for Live-in visits differ from normal visits if they are scheduled back-to-back.

Complete the following steps to create or edit Service Codes for Live-in visits.
-
Go to Admin > Reference Table Management.
-
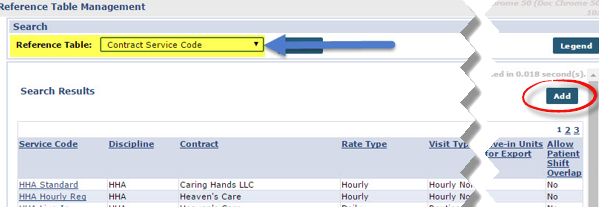
Select Contract Service Code under the Fiscal category from the Reference Table dropdown. Click the Add button to open the Contract Service Code window.
-
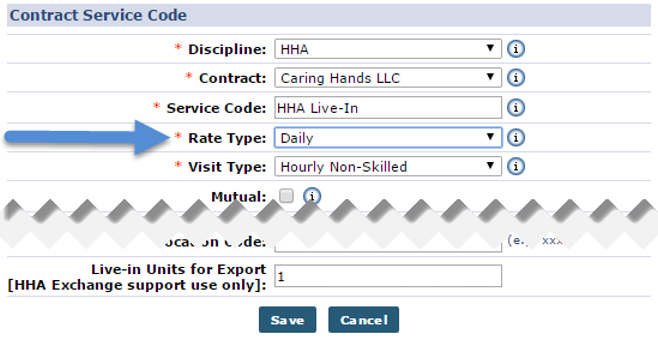
On the Contract Service Code window, complete the required fields. For Rate Type, Daily must be selected. Click Save.
-
Go to Admin > Search Contract and select the Contract authorizing the Live-in visits.
-
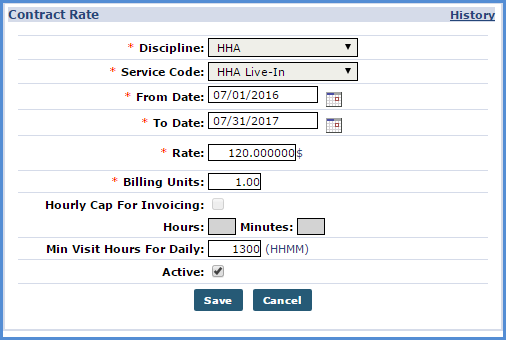
Go to the Billing Rates section and click the New Rate button to open the Contract Rate window. Complete all required fields. Ensure to enter a Billing Units value of 1 and a Min Visit Hours for Daily value of 1300.
Live-in visits are billed at a flat rate (required). Once a visit has crossed the 13-hour threshold, the system bills the visit at a flat rate instead of an hourly. Setting the Min Visit Hours For Daily to 1300 ensures a visit scheduled for less than 13 hours is not billed at an hourly rate.
Click Save.

Patient information must be properly configured to schedule Live-in Visits which involves setting up Authorizations that permit the Live-In specific Service Code.

An Authorization must be setup for service provided in a Live-In Visit. Complete the following steps to create or edit an Authorization.
-
Go to Patient > Patient Search and select the applicable Patient.
-
Select Authorizations/Orders from the left navigation panel.
-
Click the Edit link or click the Add button to create a new one.
-
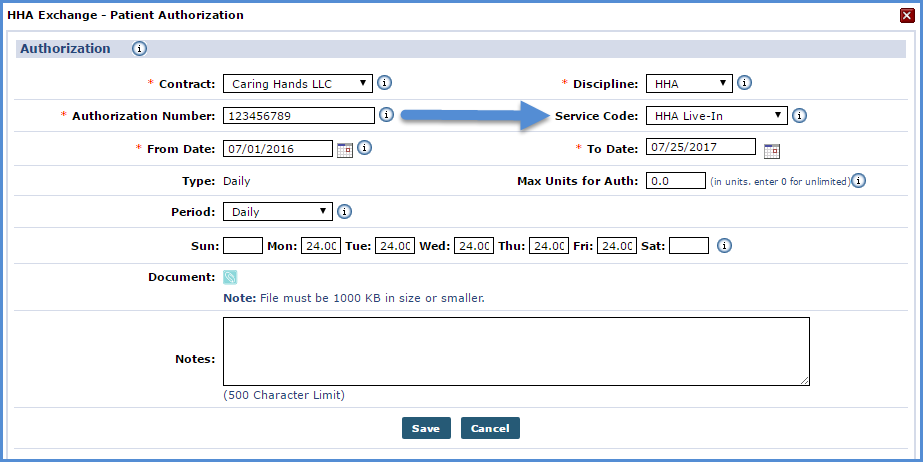
In the Patient Authorization window, complete the required fields. Ensure to enter a Service Code that is set up for Live-In Visit. Select Daily for the Period and set each day the Patient receives service to 24.
-
Click Save.

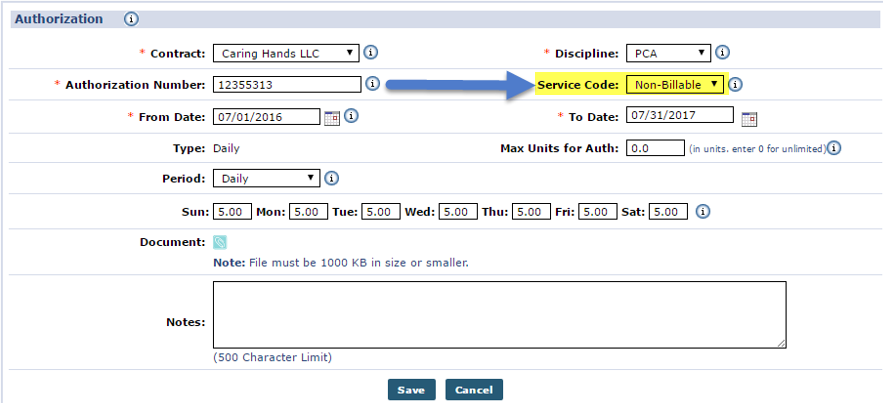
An Authorization can be created specifically for the Non-Billable Service Code, as follows:
-
Go to Patient > Patient Search and select the applicable Patient.
-
Select Authorizations/Orders from the left navigation panel.
-
Either click the Edit link to update an existing Authorization or click the Add button to create a new one.
-
The Authorization window opens. Complete/Update required fields. Select Non-Billable from the Service Code field. Click Save.
-
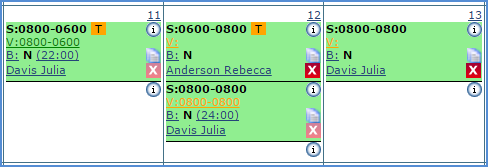
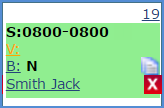
The Post-Shift now displays in green in the Patient’s Calendar as an authorized visit.

The Pre-Shift and Post-Shift functions allows one to make schedule changes by inserting partial shifts before or after a Live-in visit. These shifts are typically scheduled when a Caregiver must arrive and relieve the previous Caregiver before the normal transition time, or when a Caregiver must stay later than the original transition time if their replacement cannot arrive on time.
Complete the following to enter a Pre-Shift or Post-Shift.
-
Go to Patient > Patient Search and select the applicable Patient.
-
Select Calendar from the left navigation panel. Select the applicable visit.
-
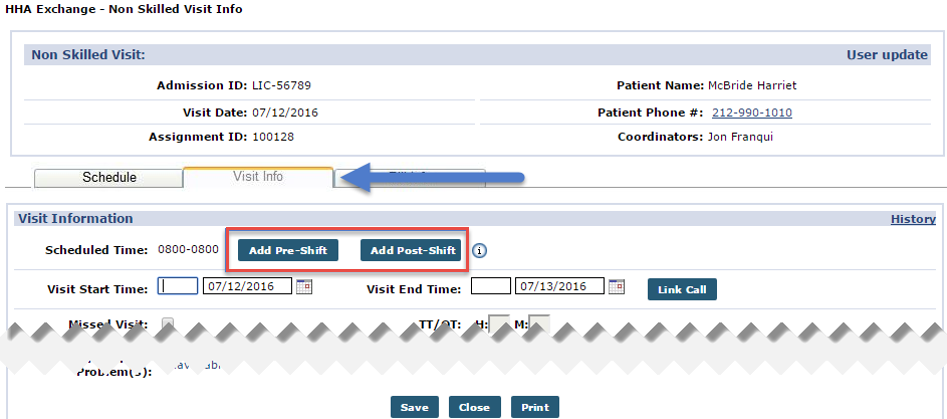
Select the Visit Info tab. Click the Add Pre-Shift or Add Post-Shift button, accordingly.
-
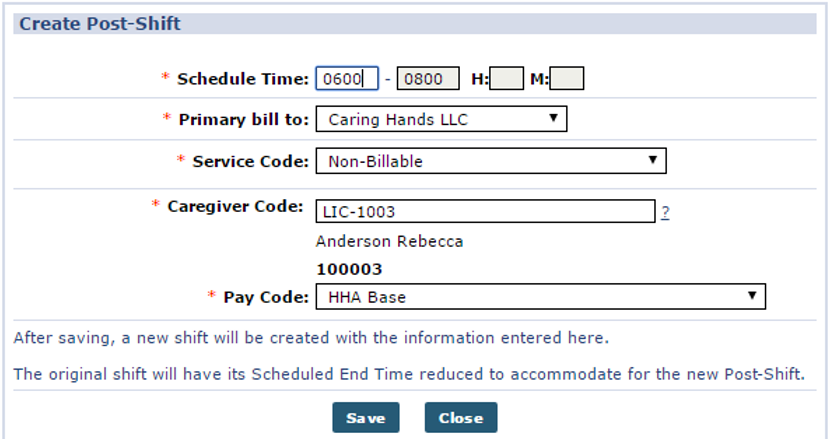
In this example, the Add Post Shift function is selected. In the Create Post Shift window, enter the Schedule Time, Service Code, Caregiver Code, and a Pay Code. The Primary bill to field defaults to the Contract set for the original visit. Select a non-billable Service Code for the Pre or Post-Shift; because Live-in visits are billed at a flat rate (not on an hourly basis).
Click Save to continue.
-
On the Calendar page, the added Post-Shift appears in Pink. Note that the Schedule Time for the previous Live-in visit has been adjusted in accordance with the Schedule Time of the Post-Shift.
-
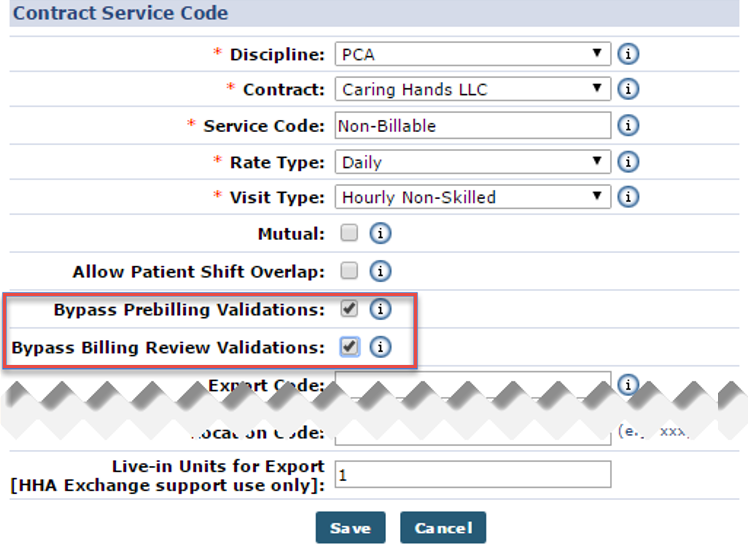
Correct the Post-Shift to pass Prebilling and Billing Review exception pages. Go to Admin > Reference Table Management and select the non-billable Service Code.
-
On the Contract Service Code page, select the Bypass Prebilling Validations and Bypass Billing Review Validations checkboxes.
Click Save.
Visits scheduled with the Non-Billable Service Code bypass all validations on the Prebilling and Billing Review exception pages.
-
The Post-Shift now displays in white in the Patient’s Calendar and may be included in an invoice.

Complete the following steps to schedule Live-in Visits.
-
Go to Patient > Patient Search and select the applicable Patient.
-
Select Calendar from the left navigation panel.
-
Select a date and add a New non-skilled visit. Complete all required fields. Ensure to select the correct Service Code. For Live-in Visits, ensure to schedule the hours from 0800-0800 to indicate a 24-hour shift. Click Save.
-
Live-in Visits are confirmed with a single Clock IN and Clock OUT if they are not scheduled back-to-back with another Live-in visit.
-
If scheduled back-to-back, the process is as follows:
This automated process only works if the Caregiver Clocks OUT within 30 minutes of the scheduled end time, or by 0830.
-
The Caregiver Clocks IN at 0800 for the first visit.
-
The Caregiver Clocks OUT at 0800 the following day and enters Duties.
-
The system automatically Clocks IN the Caregiver for the next visit at 0800 if they are scheduled to work it.
-
The Caregiver need only Clock OUT and enter Duties for each subsequent visit. The system automatically clocks them IN once the Clock OUT EVV is received.
-
