EVV-Based Visit Scheduling and Confirmation
If a Patient requires immediate service outside of their normal schedule, then EVV can be used to schedule and confirm visits, as follows:
|
Option |
Description (How it works) |
|---|---|
|
Automatic Visit Creation Based on EVV Confirmation |
Identify incoming EVV placed for Patients under a specific Contract and using the confirmation details to schedule and confirm the visit. |
|
Automatic Creation of Schedules |
Review all EVV received by the system that could not be matched to scheduled visits and use to create partially or fully confirmed visits. |

The following criteria must be met to use the Automatic Visit Creation functionality:
-
The Automatic Visit Creation Based on EVV Confirmation field selected on the Contract Setup page.
-
Patients receiving service under the associated Contract must have a Default Service Code.
-
The discipline(s) providing service to the Patient has a Default Pay Code.
-
Caregivers must place the EVV (both Clock In and Clock Out) from a single, verified, Patient phone number. If either call ends up on Call Maintenance, the system is not able to generate/confirm the visit.

Follow the steps below to complete the Contract Setup required to permit EVV-based visit scheduling and confirmation for a specific Contract.
-
Go to Admin > Contract Setup > Contract Search and select a Contract.
-
Select the Scheduling / Confirmation tab at the top of the page and scroll to the Scheduling Configuration section.
-
In the Scheduling Configuration section, select the Automatic Visit Creation Based on EVV Confirmation checkbox. Click the Save button to finalize.
Going forward, the system uses EVV from visits scheduled under this Contract to create and confirm Visits.

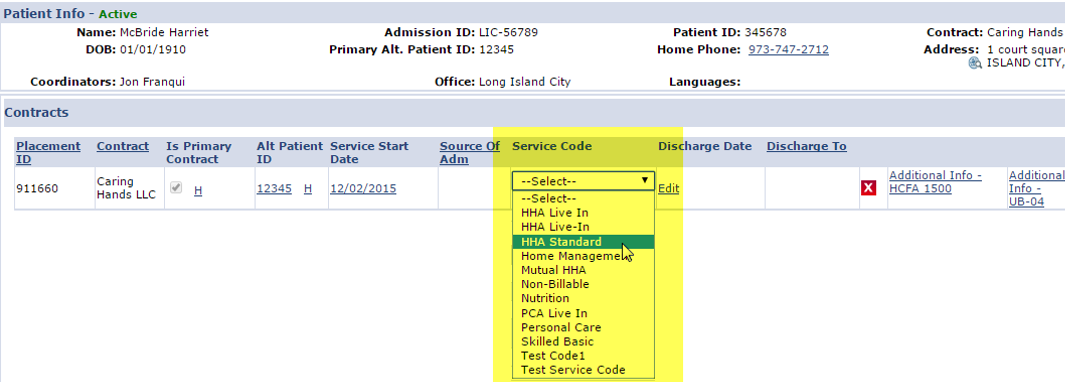
For the system to automatically generate a visit based on EVV information, all Patients receiving service under the associated Contract must have a Default Service Code. Complete the following steps to enter a Patient’s Default Service Code.
-
Go to Patient > Patient Search and select a Patient.
-
In the Patient Profile, open the Contracts page and check for the Service Code.
-
If no Service Code is associated with the Contract, click the Edit link under the Service Code column and select a code.
-
Once a Service Code is selected, click the Update link. The Patient now has a Default Service Code for the Contract.
Automatic Visit Creation may be deactivated at any time for a specific Patient by going to Patient > Patient Profile > General and selecting the Disable Automatic Visit Creation Based on EVV Confirmation checkbox.

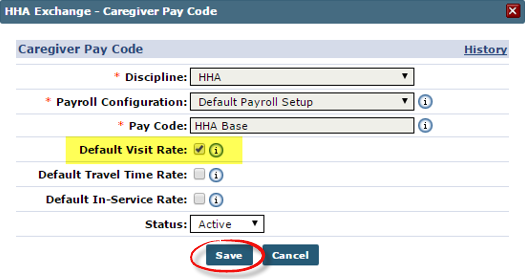
For the system to apply a Pay Code to the Visit, the discipline(s) providing service for the Patient needs a Default Pay Code. Complete the following steps to apply.
-
Go to Admin > Reference Table Management.
-
Select the Caregiver Pay Code Reference Table dropdown.
-
Click the Search button to view the existing Pay Codes. To add a new Pay Code, click the Add button.
-
The Caregiver Pay Code window opens. Complete the required fields marked with red asterisks. Select the Default Visit Rate checkbox.
-
Click the Save button to finalize. Moving forward, the system automatically applies this Pay Code to visits scheduled with the associated discipline.


