Verification Tab in Visit Info Page
This feature is activated by HHAeXchange System Administration. Contact HHAeXchange Support Team for details, setup, and guidance.
To be certified as an EVV alternate vendor, one of the core requirements is for the HHAeXchange system to identify, track, and resolve different exceptions. To further enhance the EVV verification process, a Verification tab has been added to the Visit Details page for Providers to capture reasons, notes, and attestation and resolve verification issues individually. Information associated with each exception and resolution is then sent at the correct times, via integration, to the EVV aggregator.

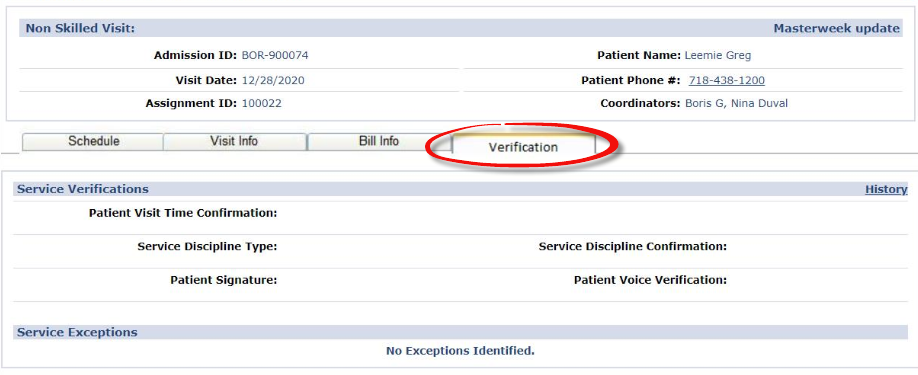
The Verification tab in the Visit window is used to record specific visit verification details under the Service Verifications and Service Exceptions sections.
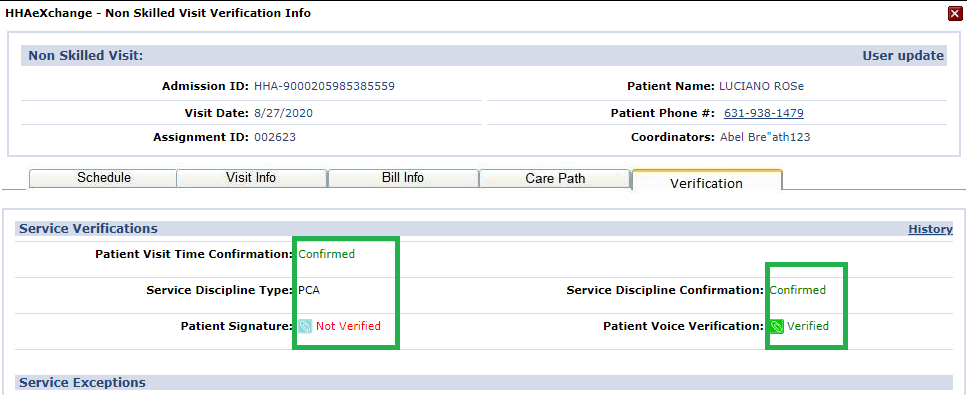
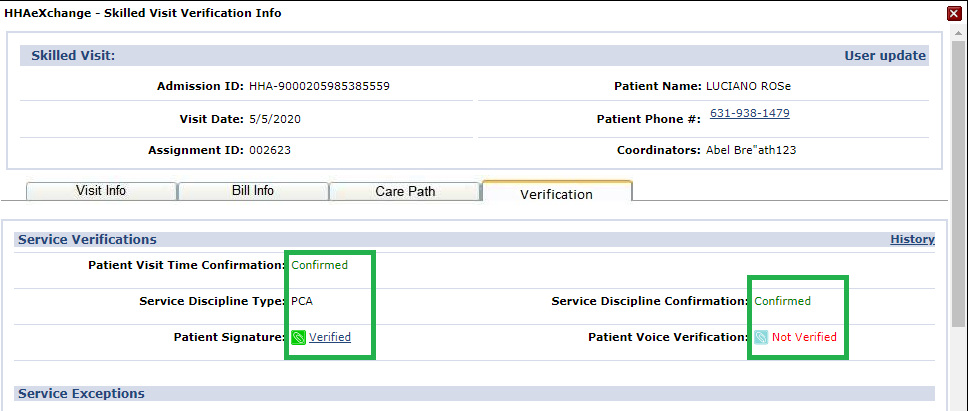
The Service Verifications section captures visit confirmation details applicable to the visit, such as:
-
Patient Visit Time Confirmation
-
Service Discipline Type
-
Service Discipline Confirmation
-
Patient Signature
-
Patient Voice Verification
Any exception to the verification details is captured under the Service Exceptions section below the Service Verifications.

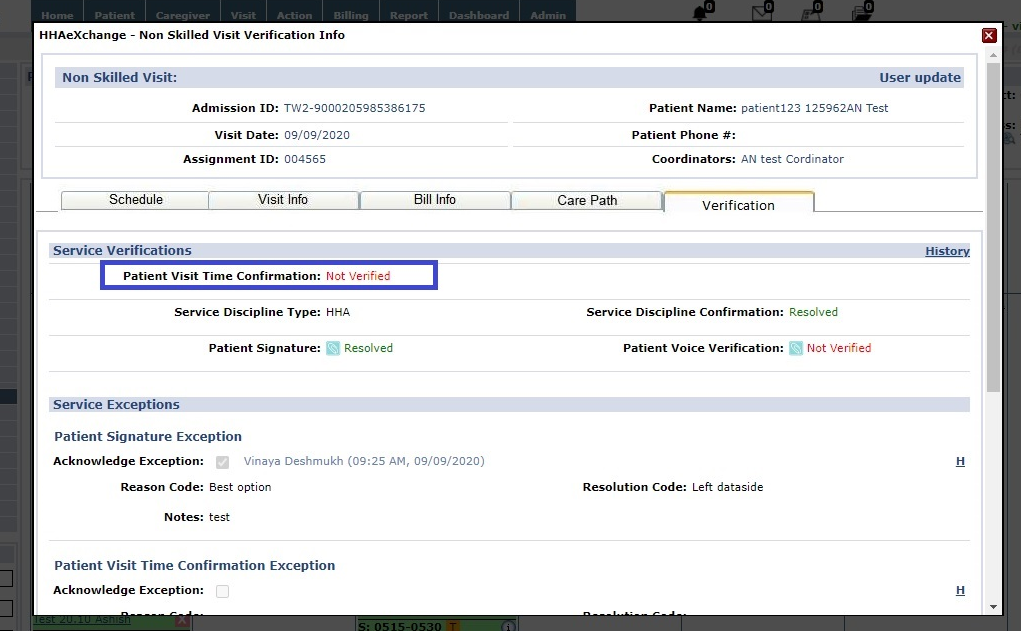
When a visit is created, the status in all fields display as Not Verified under the Service Verifications section. Once IVR is performed, the fields are populated with applicable information. For IVR, the Patient provides Voice Verification, audio file attached marked with a green paperclip attachment icon.

As with IVR, the same applies for EVV Verifications. When a visit is created, the status in all fields display as Not Verified under the Service Verifications section. Once EVV is performed, the fields are populated with applicable information. For EVV, the Patient Signature is captured rather than Voice Verification marked with a green paperclip attachment icon.
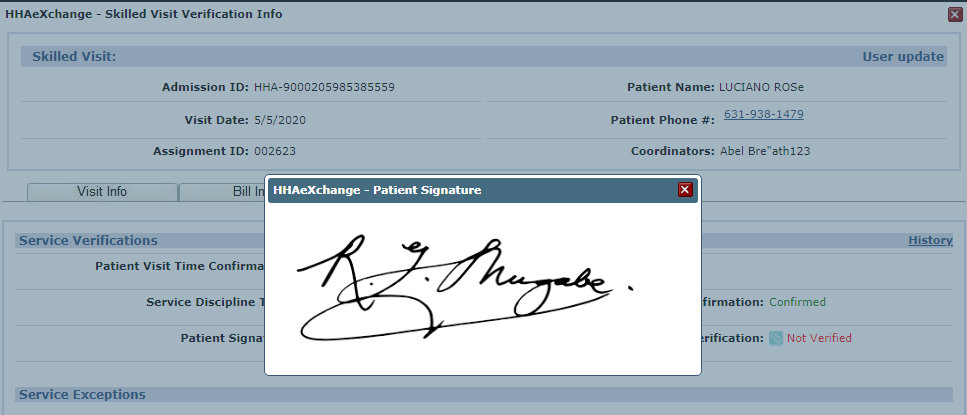
To view the Patient signature, hover over the Patient Signature Verified link. The Patient Signature pop-up window displays the captured signature.

The Verification tab also includes a Service Exceptions section to independently confirm that all required services were provided to the Patient. Service Exceptions appear when further confirmation is required for the verification.
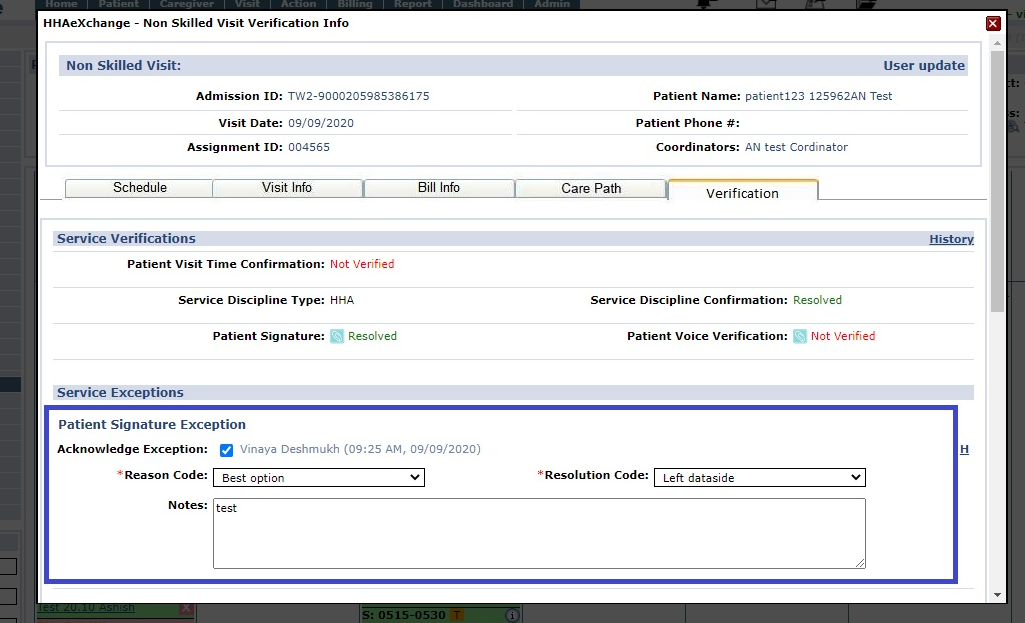
To acknowledge an exception, select the Acknowledge Exception checkbox. This captures the user who acknowledged the exception as well as the date and time. Select the Reason Code and the Resolution Code from the dropdown fields; values are derived from the associated Reference Table.
The Service Exceptions section includes the particular exception with the following fields and information to complete (per exception), as needed:
|
Field |
Description |
|---|---|
|
Acknowledge Exception |
Select checkbox to record the user, date, and time. |
|
*Reason Code |
(Required) Select the Reason Code (values from the Reference Table). |
|
*Resolution Code |
(Required) Select the Resolution code (values from the Reference Table). |
|
Notes |
(Optional) Enter notes if/as needed. |
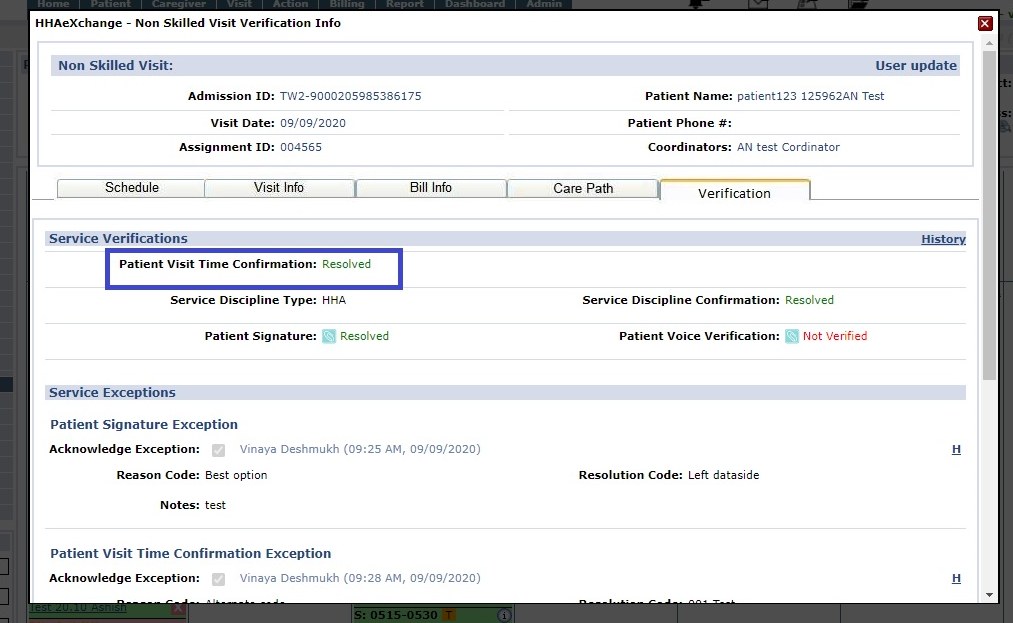
Complete details for all exceptions as there may be more than one. Once complete, click the Save button to finalize. When all required resolution information for an exception is entered, the status changes from Not Verified in red font to Resolved in green font.

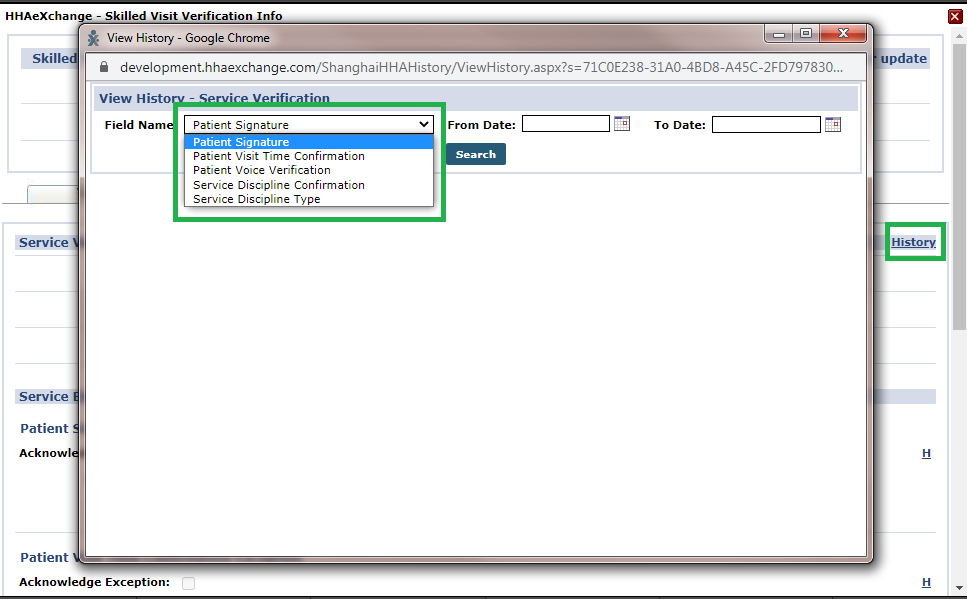
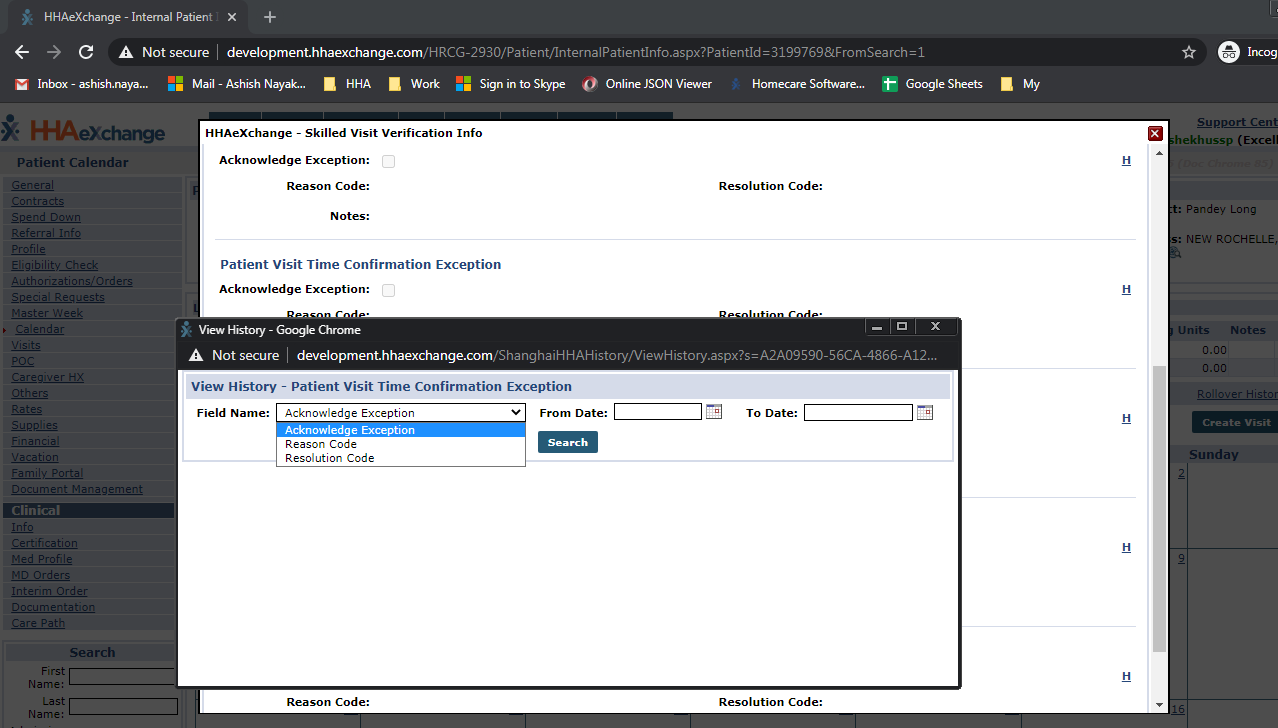
To view the verification history log for a visit, click the History link in the Service Verifications section. Select a Field Name to see specific information.
To view the history on specific Verification Exceptions fields, click the respective H link. Based on the selection select the category from the Field Name field.

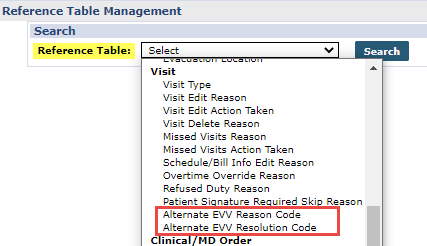
To add a value in either Reference Table, go to Admin > Reference Table Management and select the applicable Reference Table. Click the Add button to open the Add/Edit window. The example below illustrates adding an Alternate EVV Reason Code. The same applies for the Alternate EVV Resolution Code Table.
Enter a Reason Code. Ensure the Status is Active. Click Save to add.
To edit a Reason Code, click the existing Reason Code link and make edits in the window. The same applies to the Resolution Code values in the Alternate EVV Resolution Code Table.
Values cannot be deleted. To deactivate a value, select the existing Reason Code link from the Reference Table and select Inactive from the Status dropdown field.

To assign permissions to a role:
-
Go to Admin > User Management > Edit Roles.
-
Select Visit under the Section field and select applicable roles from the Roles dropdown.
-
Select the View Verification Tab checkbox to enable viewing information on the Verification tab. Select the Edit Verification Tab checkbox to enable editing on the Verification tab.
-
Click Save to finalize.
The View Verification Tab permission must be selected to enable the Edit Verification Tab permission.
