What is the consecutive shifts feature?
HHAeXchange offers 2 versions of our app, HHAeXchange and HHAeXchange+. Note the plus sign in the name of the app and ensure you are referencing instructions for the correct version of the app.
When set up by your agency, the consecutive shifts feature allows you to perform a single clock-in and clock-out for multiple consecutive shifts for the same patient or one consecutive shift for two linked patients, such as a husband and wife receiving back-to-back services at the same address.

Using the consecutive shifts feature affects more than one shift. Read the following items to get an understanding of how this works in various situations.
-
After you complete your consecutive shift, the app breaks the consecutive shifts into individual shifts.
-
The app uses the scheduled duration of the first shift to decide clock in and clock out times.
-
To make edits after completing a consecutive shift, from the Schedule page, select the shift you want to edit in the consecutive shift sequence by tapping View/Edit Visit.
-
If you clock out before the planned end of all shifts and don't clock in for the remaining shifts, the remaining shifts are marked as Missed.
-
If you didn't start a shift in a consecutive shift sequence, you can clock into that shift and complete it. The app treats multiple shifts as a new consecutive shift.
-
The app won't allow you to combine consecutive shifts for one patient and consecutive shifts for two linked patients.
-
Consecutive shifts don't allow rounding at the contract level when multiple contracts with different rounding methods exist for the same patient.

To clock in for a single patient consecutive shift (two or more shifts):
-
From the Schedule page, tap the shift for a single patient with scheduled consecutive visits. Visit Details are displayed with the Start Time of the first shift and the End Time of the last shift.
-
Tap Clock In to begin the consecutive shift.
-
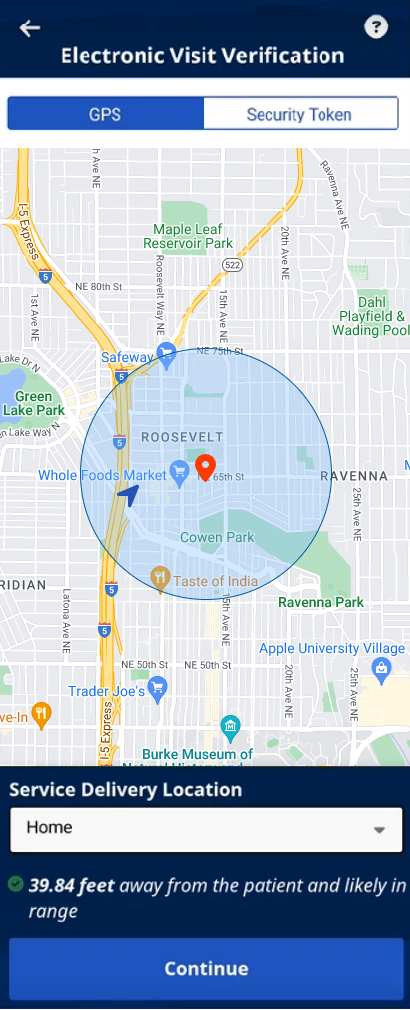
If prompted, on the Electronic Visit Verification page, select GPS or Security Token as the EVV method.
-
After you allow the app access to your location, you can select GPS and use the map to find a Patient Address. If set up by your agency, you can change the Service Delivery Location from Home to another value to bypass the need for proximity to the Patient Address.
-
If you select Security Token (FOB), you are prompted to enter the six-digit Device ID and Passcode.
-
Tap Continue.
-
-
If required, obtain a Patient Signature, an RN (Coordinator) Signature, and a Caregiver Signature.
-
Tap Submit or tap Skip (if available) and select the reason for skipping.
-
If required, obtain Patient Voice Consent (Record, Stop Recording) and tap Done, or tap Skip if available, and select the reason for skipping.
When clocked in, the Confirmed time (Start Time for the consecutive shift) is the Start Time of the first shift.

To clock out of a single patient consecutive shift, follow these steps.
-
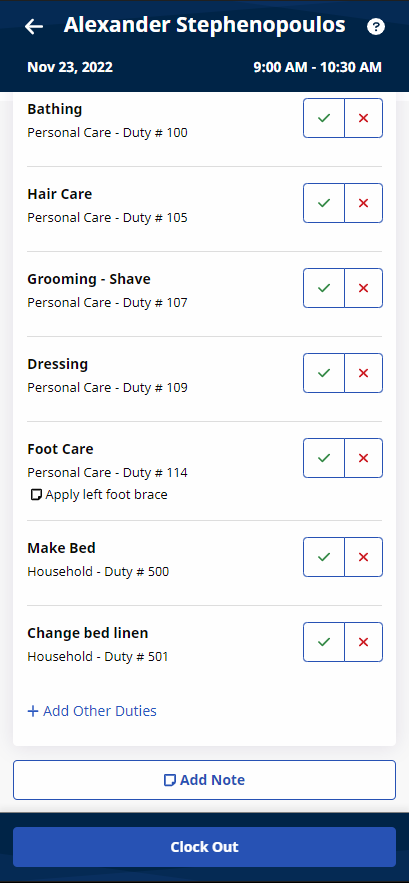
When the first shift's details are displayed, if you have Non-EVV Services to record, tap the checkmark to select Non-EVV Services and select the Duration of Non-EVV Services in Hours and Minutes.
-
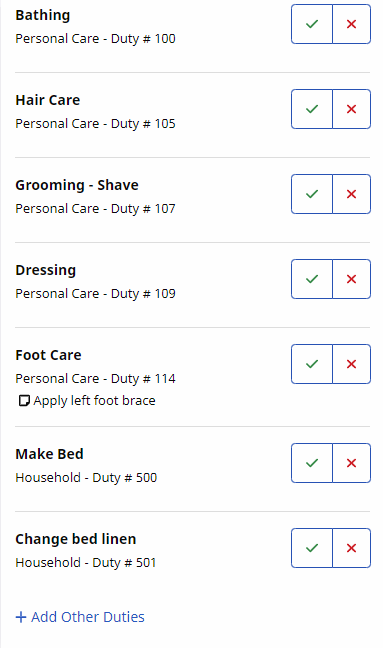
If a POC is included (or Other Duties), select the duties performed (checkmark) and duties refused (X). Select any required Value for duties performed and any Refused Duty Reason your agency requires.
You can add other duties that your agency requires for the visit by tapping + Add Other Duties.
-
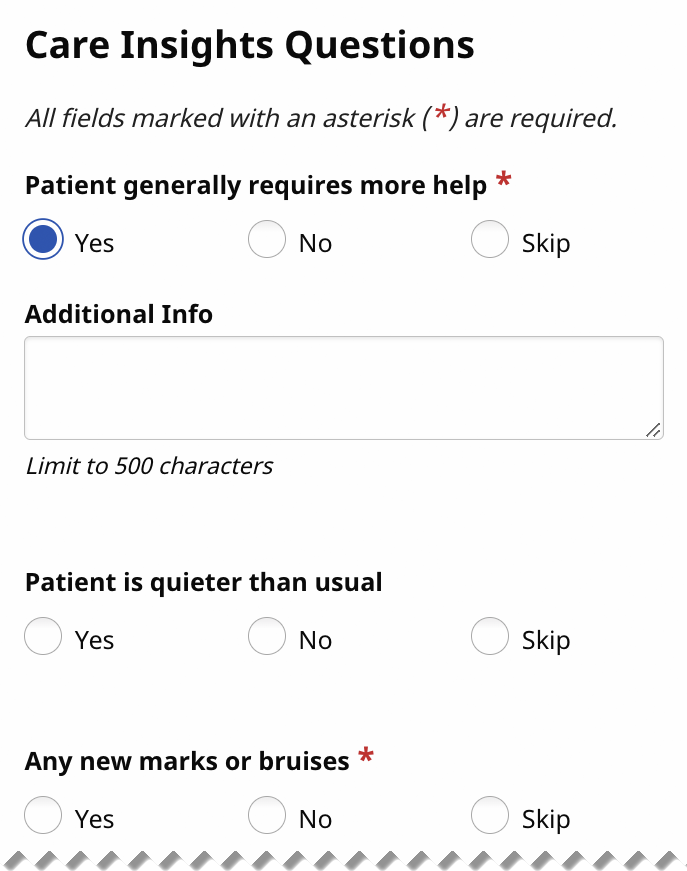
If the first shift includes Care Insight Questions, answer all required questions, and provide Additional Info as needed. Tap Save Responses.
-
Tap Add Note to add a note about the first shift.
-
Once you've documented your first shift, tap Continue at the bottom of the page to display the next consecutive shift's details.
-
When the next consecutive shift's details are displayed, complete the same steps (1-4) for that shift. When you finish documenting the last consecutive shift, tap Clock Out at the bottom of the page.
-
If prompted, on the Electronic Visit Verification page, verify GPS or Security Token settings and tap Continue.
-
If required, collect the Patient Signature and any other required signatures and tap Submit, or tap Skip if available and select the reason for skipping.
-
If required, obtain Patient Voice Consent (Record, Stop Recording) and tap Done, or tap Skip if available, and select the reason for skipping.

 Linked patients are labeled as such on the Schedule page and are designated with a chain link icon.

-
From the Schedule page, tap the first shift in the linked patient consecutive shift. The app displays Visit Details with the Start Time of the first shift and the End Time of the last shift. The app lists all linked patient names.
-
Tap Clock In to begin the consecutive shift.
-
If prompted, on the Electronic Visit Verification page, select GPS or Security Token as the EVV method.
-
If you select GPS, after you allow the app access to your location, you can use the map to help find the Patient Address. If set up by your agency, you can change the Service Delivery Location from Home to another value to bypass the need for proximity to the Patient Address.
-
If you select Security Token (FOB), the app prompts you to enter the six-digit Device ID and Passcode.
-
When you are finished, tap Continue.
-
-
If required, collect a Patient Signature for each linked patient, an RN (Coordinator) Signature, and a Caregiver Signature. Tap Submit, or tap Skip if available, and select the reason for skipping.
-
If required, collect a Patient Voice Consent (Record, Stop Recording) for each linked patient and tap Done, or tap Skip if available, and select the reason for skipping.
When clocked in, the Confirmed time is the Start Time for the consecutive shift.

-
If you have Non-EVV Services to record (and your agency allows it), tap the checkmark to select Non-EVV Services and select the Duration of Non-EVV Services in Hours and Minutes.
-
If the visit includes a POC (or Other Duties), select the duties performed (checkmark), and duties refused (X) for the first linked patient. Select any required Value for duties performed, and any Refused Duty Reason your agency requires.
You can add other duties that your agency requires for the visit by tapping + Add Other Duties.
-
If the visit includes Care Insight Questions, answer all required questions and provide Additional Info as needed. Tap Save Responses.
-
If you want to add a note about the visit, tap Add Note.
-
Tap Continue at the bottom of the page.
-
When the next linked patient's visit is displayed, complete the same steps (1-4) for that linked patient. When you finish documenting the visit for that linked patient, tap Clock Out at the bottom of the page.
-
If prompted, on the Electronic Visit Verification page, verify GPS or Security Token settings and tap Continue.
-
If required, obtain a Patient Signature for each linked patient and any other required signatures, and tap Submit, or tap Skip if available and select the reason for skipping.
-
If required, obtain a Patient Voice Consent (Record, Stop Recording) for each linked patient and tap Done, or tap Skip if available, and select the reason for skipping.


