Conversations Feature
This feature may not be available in all markets or for all Providers.
Clear communication is key to quality care. HHAeXchange's Conversations Feature helps Payers, Providers, Patients, their Representatives and Caregivers share updates, ask questions, and make care decisions in one secure place. This reduces confusion, saves time, and helps everyone stay on the same page to support better outcomes.
To open the Conversations Module, click on the Envelope icon on the right side of the top navigation bar:

In order to communicate with the Provider agency, the member must have a Coordinator assigned to their Provider in HHAeXchange. Prior to using conversations, Providers must ensure that all members have an agency Coordinator assigned.
To set up, search for, and/or edit Coordinators, click here.

To start a conversation:
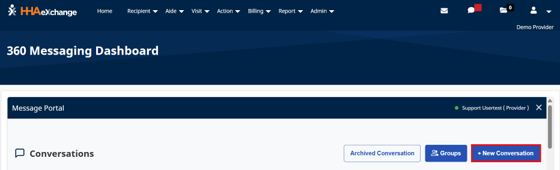
1. In the Conversations Module, click the + New Conversation button.
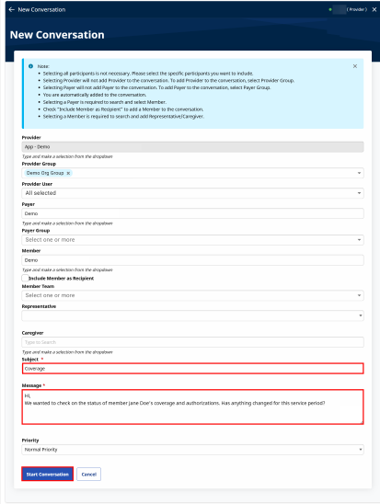
2. On the following page, select your Provider Group and Provider User, if applicable. Then, select to whom you would like to send the message using the Type to search… fields. You can include multiple entities in the conversation. Select any of the following recipients:
-
Payer
-
Payer Group
-
Member
-
Member Team
-
Representative
-
Caregiver
A Caregiver can only be added to a conversation if they have cared for the Member selected within the past 30 days.
Entering a Member name only associates the message with that Member. To make sure the Member sees the message, select the Include Member as Recipient checkbox. 
3. Enter a Subject and a Message and select a Priority. When finished, click the Start Conversation button.
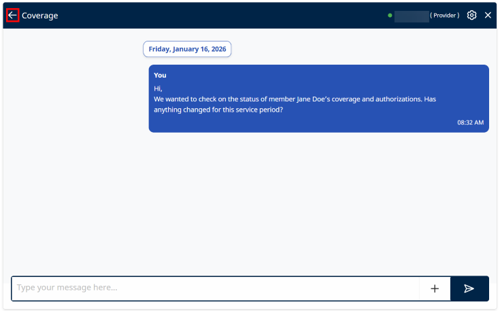
4. The conversation then opens, showing your message. Click the arrow on the left of the screen to return to the main Conversations page.
5. Your message now appears on the main Conversations page. Click on it to re-enter the conversation.
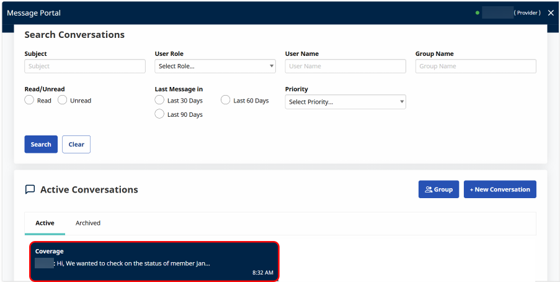
When someone sends you or responds to a conversation, it appears on the Conversations page with a notification symbol.
To respond to the message:
1. Click on the message.
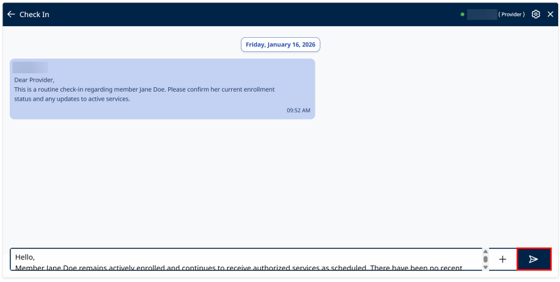
2. Type your response in the text box at the bottom of the page. When finished, click the Send button.
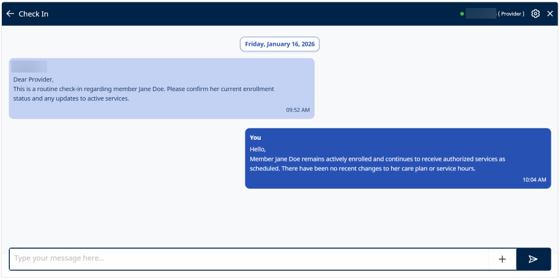
3. Your response appears below.
The system automatically archives messages that have no response after 30 days. A response to a message will remove it from the archive.
You can also archive conversations yourself that are no longer relevant and causing clutter. These conversations leave the main Conversations page, but can still be accessed or unarchived if needed.
To archive a conversation:
1. Click on the conversation you want to archive on the Conversations page.
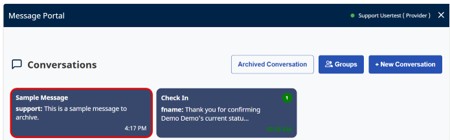
2. Click the gear icon in the upper right corner.
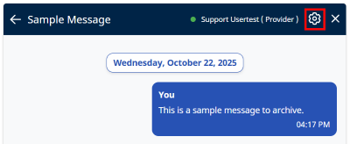
3. Click the Archive Conversation button.
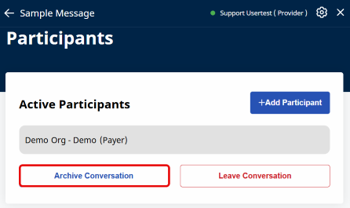
4. In the pop-up that appears, click Confirm.
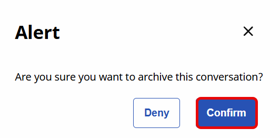
The conversation is now archived.
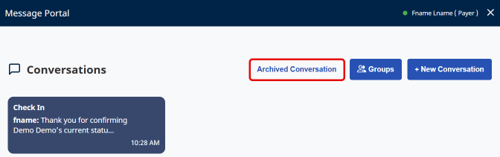
5. To view an archived conversation, click the Archived Conversations button on the main Conversations page.
6. Click the Active Conversations button to toggle back to unarchived conversations or click on an archived conversation to view it.
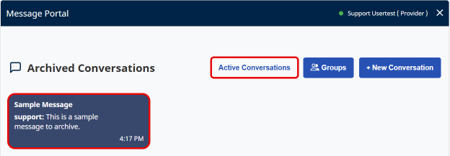
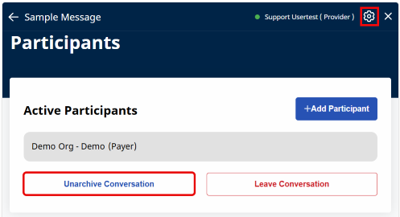
7. To bring the conversation back into the active Conversations page, click the gear icon, and then click the Unarchive Conversations button.
Provider Groups
Groups are an optional permission-based feature. Groups are a feature that allows a user to message all users within that group at once. Groups make sure that everyone who needs to see a message has access, even if someone is unavailable. A default group is created for you by HHAeXchange.
This feature may not be available in all markets or for all Providers.
Before starting a conversation, you must have a Provider group. A default group is created for you by HHAeXchange, but you can also create your own groups.
Groups make sure messages reach the right people, such as Payer teams or Provider offices. They make sure everyone who needs to see a message has access, even if someone is unavailable. This keeps communication clear and consistent with the systems providers already use today.
To create a group:
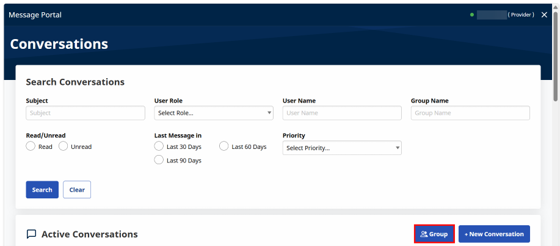
1. Click the Groups button on the main page of the Conversations Module.

2. Click the + Add Group button.

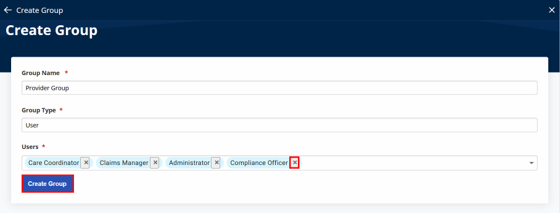
3. Enter a Group Name.
4. Select a Group Type from the drop-down:
-
Organization: Select to create a group for conversations between users in the Provider organization and users outside the Provider organization (Payers, Patients, their Representatives, and Caregivers).
-
User: Select to create a group for conversations between users in the Provider organization only.
5. Select the Users to add to the group by checking them off in the dropdown.
-
Use the Search field to find Users more easily.
-
Click the X next to a User's name to remove them from the group.
6. Click the Create Group button to create the group.
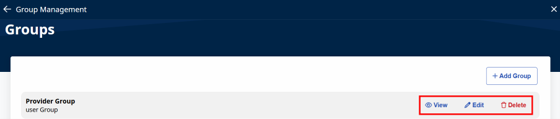
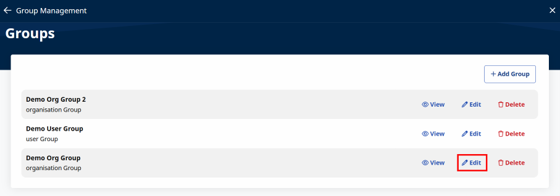
7. The group appears on the Groups page. You can now View the group, Edit its Name/Type/Users, or Delete it.
Before starting a conversation, you must have a Provider group. Groups make sure messages reach the right people, such as Payer teams or Provider offices. A default group is created for you by HHAeXchange, and this group can be edited to your liking.
To edit a group:
1. Click the Group button.
2. Find the group you want to edit and click the Edit link.
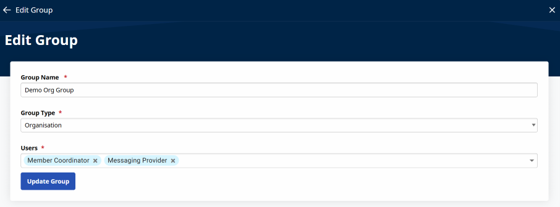
3. Make your desired edits to the group.
-
Change the Group Name.
-
Select a different Group Type from the dropdown:
-
Organization: Select to create a group for conversations between users in the Provider organization and users outside the Provider organization (Payers, Patients, their Representatives, and Caregivers).
-
User: Select to create a group for conversations between users in the Provider organization only.
-
-
Select the Users to add to the group by checking them off in the dropdown. Use the Search field to find Users more easily or click the X next to a User's name to remove them from the group.
4. Click Update Group.