Cash Payment Scenario - Rebill Paid Visit

Complete the following steps to remove the payment from the visit.
-
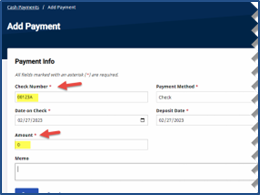
Go to the Billing > Cash Payment. On the Payment & Refunds tab, click the on the Add Payment button.
-
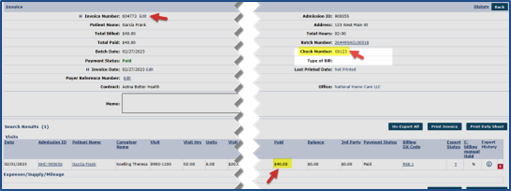
Search for the original invoice and check number under Billing > Invoice Search > By Invoice > Search Invoice.
-
Take the original paid Check Number and add letters or numbers to create a placeholder (dummy) check in the amount of $0. Click Save to create.
-
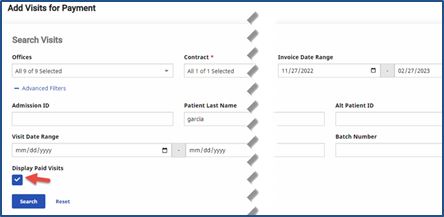
Once the placeholder check is created, scroll to the Visits Selected for Payment section. Click the Add Visits button. In the Add Visits for Payment window, select the Display Paid Visits field and click Search to find the visit.
-
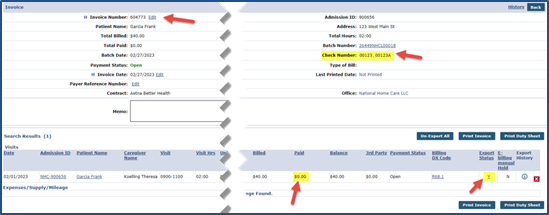
Locate the visit and apply a negative balance to the paid balance amount under the Payment column and click Save.

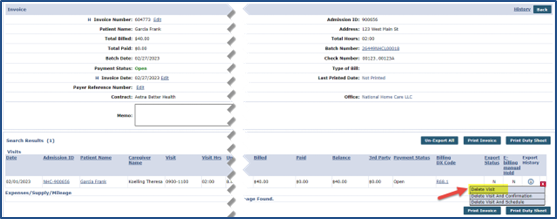
Complete the following steps to un-invoice the visit and delete the invoice.

Refer to the Billing Process topic for full details and instructions to invoice and create an e-billing batch and reinvoice the visit.

Complete the following steps to delete the placeholder check and apply the payment back to visit.
-
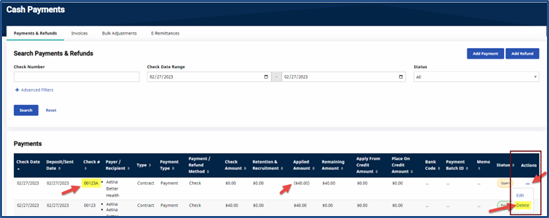
Go to Billing > Cash Payment. From the Payments & Refunds tab, search for the placeholder check.
-
Once located on the Payments section, select Delete from the Actions column.
-
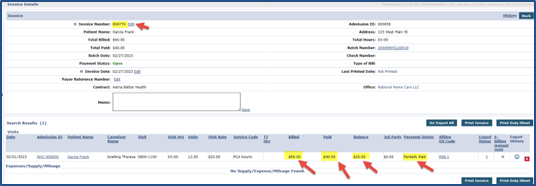
Once the placement check is deleted, the payment is automatically applied back to the visit, as seen in the Invoice Details page.

The below-listed phases in this scenario are necessary to rebill a paid visit. Each of these phases is detailed in the following subsections providing the steps to complete the rebilling process in its entirety.
-
Create a placeholder check and remove the payment from the visit.
-
Un-Invoice (un-export) the visit, delete the invoice, and update the visit.
-
Reinvoice the visit and create an e-billing batch.
-
Delete the placeholder check in the Cash Payment module and apply the payment back to the visit.
