Michigan State Services Portal
The Michigan Home Help program supports approximately 33,000 individual providers. There are various HHAeXchange system modules in the State Portal used to manage and maintain Individual Provider accounts. These features help the state meet Electronic Visit Verification (EVV) requirements while Individual Providers have choice and control in managing their time in a self-directed manner.
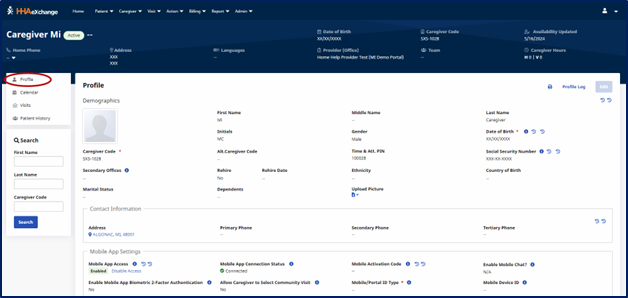
Through the HHAeXchange system, the State can view Beneficiary and Individual Provider Profiles, and view Individual Provider shifts via the Services Portal Management feature. This guide provides instructions and guidance on modules related to the Provider (State) application, to include:
- The Beneficiary and Individual Provider Profile pages.
-
Mobile App Integration – Activation Code to link IP’s Mobile App account to system.
-
A description of the Services Portal Management pages and features.2
-
Instructions to view Individual Providers in the Services Portal.
-
Instructions to create and send Announcements.
-
Instructions on how to use the Impersonate feature.
-
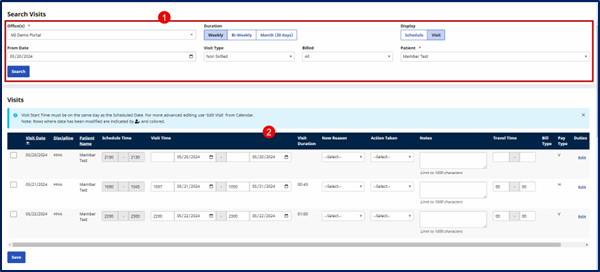
Instructions for using the visit Verification tab to view shared Services Portal information.
Refer to the Michigan Individual Provider Services Portal for guidance on features and functionality.

The State electronically transfers the following information to the applicable HHAeXchange systems:
- Beneficiary Profile (imported from the Payer system).
-
Authorization (imported from the Payer system).
-
Individual Provider Profile (imported from the State).
-
The Enterprise system links the Beneficiary Profiles with the associated Individual Provider Profiles (imported into the system).
-
Individual Provider Service Portal accounts are created by the system using imported data.
-
Mobile App Activation codes are sent via email to all Individual Providers to activate their Mobile App accounts once they download and sign up on the Mobile App. This links the Mobile App to the system. The Individual Provider receives email instructions to complete registration and activate their account.
-
In Phase 1, there is a single Service Code, automatically set up for the state, enabling shifts to be created.
-
Once all of the above is complete, the Individual Provider can add shifts via the Mobile App, IVR, and/or on their Services Portal. The State can view shifts and use the Impersonation feature to assist Individual Providers manage their account.

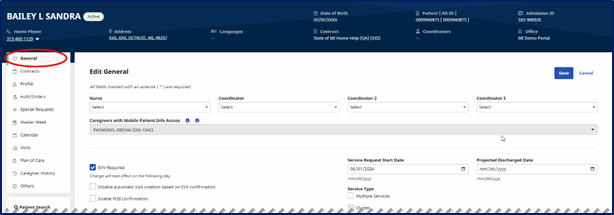
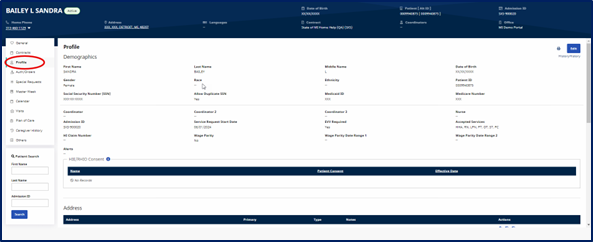
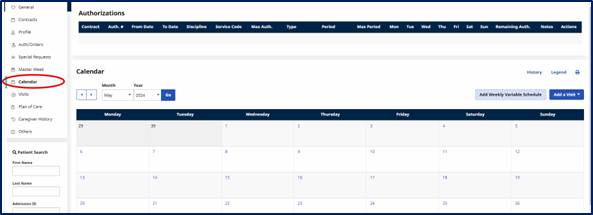
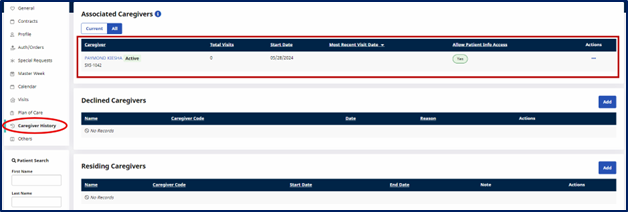
The Beneficiary Profile, imported from the Payer system, is comprised of various pages containing corresponding information such as general details, authorizations, calendar, visits, and Individual Provider History (showing the associated Individual Providers to the Beneficiary). This section covers a high-level view of the pages and a brief description of what applicable pages contain.

To search for a Beneficiary:
-
Go to the Beneficiary tab (on the top menu) and select Search Beneficiary.
-
On the Search Beneficiary page, use the search filter fields to locate a specific Beneficiary or click the Search button for a full search.
-
From the Search Results, locate the Beneficiary and click on their name hyperlink to route directly to their profile. By default, the system routes to the Calendar page.

The Individual Provider Profile is imported from the State system. This section covers the applicable pages for the State Admin users to view information such as demographics, mobile settings, calendar, and Beneficiary assignments. This section covers a high-level view of the pages and a brief description of what applicable pages contain.

To search for an Individual Provider:
- Go to the Individual Provider tab (on the top menu) and select Search Individual Provider.
-
On the Search Individual Provider page, use the search filter fields to locate a specific Individual Provider or click the Search button for a full search.
-
From the Search Results, locate the Individual Provider and click on their name hyperlink to route directly to their profile.

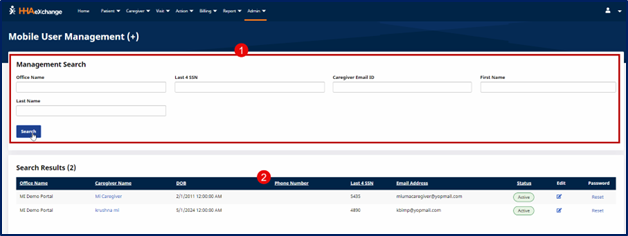
The Mobile User Management (+) page under Admin > Mobile User Management (+) facilitates the search and management of Mobile App users in the HHAeXchange system. On this page, search and view Individual Provider information such as the assigned office, date of birth (DOB), last 4 digits of their social security number (SSN), and the email address.
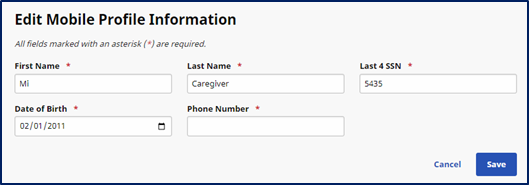
State Admins can also view the mobile status, edit the Individual Provider’s mobile information, and reset their password, as needed.
Use the search filters at the top of the page to search for a specific user or click Search to see all users. The results display on the bottom of the page. Each line item contains the Office Name, the Individual Provider Name, Date of Birth, Phone Number, Last 4 SSN, Email Address, Status, and the edit icon and password reset link.
To edit information on a user’s mobile profile, click the edit icon to open the Edit Mobile Profile Information window. Make applicable edits and click Save.

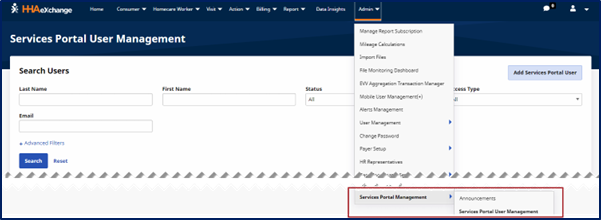
The Services Portal Management function enables the State to send announcements to Individual Providers as well as use the Impersonate feature to allow a State Admin user to access an Individual Provider’s portal. Go to Admin > Services Portal Management to access the Services Portal Management features (Announcements and Services Portal User Management).

The Announcements page is designed to create and manage announcements sent to Individual Providers on the Services Portal. Announcements prominently display in the Services Portal as a blue banner for the Individual Provider to read. The following image shows the various sections of the page, as described below.
-
By default, the page opens to All Announcements displaying all created announcements regardless of Status. Use the Status tabs to view All, Active, Scheduled, or Inactive announcements.
-
The grid at the bottom of the page displays announcements. Each line items contains the Active Dates, Recipients, Subject, Message, Status, and Actions (used to edit the status or view the history).
-
Click Add Announcement to create a new message. Refer to the section below for details.
-
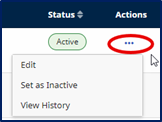
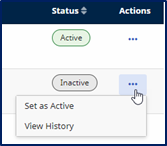
Under Actions, click the ellipsis (...) for the particular announcement to change the announcement status (for example, from Inactive to Active), or to view the history of the announcement.

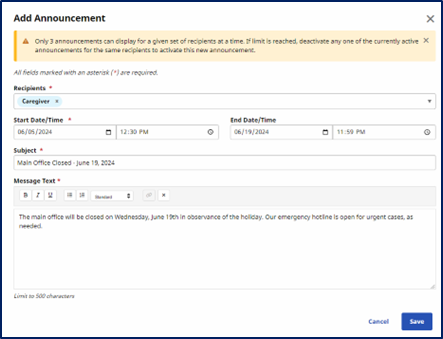
Click Add Announcement to create a new message for Individual Providers. Select or enter all required fields, marked with a red asterisk, as shown in the image below.
-
Select Recipients – Select Caregiver for Individual Providers.
-
Select the Start Date/Time – the date and time to activate the message.
-
Select the End Date/Time – (optional) when to inactivate the message.
-
Enter a Subject for the message.
-
Enter the message in the Message Text box.
-
Click Save to save the announcement.
Announcements can be scheduled to activate and deactivate based on the selected Start Date/Time and End Date/Time.
The announcement displays on a blue banner in the Services Portal for an Individual Provider to read. Up to three announcements can display for the Individual Provider at a time.

Announcements can be edited depending on the status of the announcement. Click the ellipsis (…) under the Actions column for the announcement for edit options.
Options for an Active Status message are Edit, Set as Inactive, or View History.
Options for an Inactive Status message are Set as Active or View History. Reactivated messages can be edited, as needed.

The Impersonate feature allows State Admin users to impersonate an Individual Provider in the Services Portal. Use the Impersonate feature to enter the Services Portal as an Individual Provider to better understand the system, workflows, and provide effective assistance. In the Services Portal, impersonation provides State Admins read-only access.
To impersonate an Individual Provider, complete the following steps:
-
Go to Admin > Services Portal Management > User Management and search for the applicable Individual Provider.
-
Locate the Individual Provider in the search results and click the Impersonate link under the Actions column to access their user details and assume their role in the system.
Once in the Services Portal as the user, the information opens to the Timesheets page. From here, State Admins can view Hours Worked per selected Time Period or go to the Shifts page to search and see shift details (such as Date, Member, Scheduled Time, Confirmed Time, Duration, Service Code, Authorization Status, Next Action, and Actions).
Access is read-only. No information can be edited or deleted using the Impersonate feature.

The visit Verification tab is used to view all shifts that take place for a Beneficiary in the Services Portal. The page is comprised of two sections: the Services Portal information section and the Shift History table within the section. The table below describes the fields related to the Services Portal information.
|
Field |
Description |
|---|---|
|
Shift Status |
The most recent type of status update performed. |
|
Shift History |
The historic table of shift status updates. |
The following table defines the fields in the Shift History section.
|
Field |
Description |
|---|---|
|
Date/Time |
The date and time when the shift status change occurred. |
|
Transitioned From/To |
The updated transition from one shift status to another status. |
|
Actor |
The Portal or Provider Coordinator responsible for updating the status. |
| Notes | Supporting notes written by the actor pertaining to the status update. |

The User Management feature is used to create and edit State Admin user accounts and assign role-based permissions to users in the system. This section covers how to create a new user account, edit a user account, reset a user password, and assign role-based permissions.
Permissions are required to operate in the User Management feature.

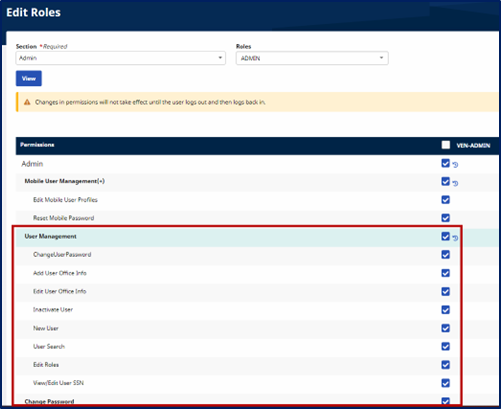
User Management permissions must be enabled for a State Admin to operate in the User Management feature.
-
Go to Admin > User Management > Edit Roles.
-
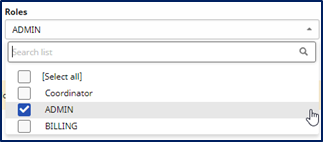
Select Admin from the Section dropdown field and select ADMIN from the Roles dropdown field.
-
Verify that the following permissions are selected:
-
Change User Password: Allows Admin to change a user’s password.
-
Add Office User Info: Allows Admin to add office information to user account.
-
Edit Office User Info: Allows Admin to edit office information for a user account.
-
Inactivate User: Allows Admin to deactivate a user’s account.
-
New User: Allows Admin to create a new user in the system.
-
User Search: Allows Admin to search for a system user.
-
Edit Roles: Allows Admin to assign role permissions in the system.
-
Change Password: Allows Admin to change passwords.
4. If any changes are made, click Save and exit the page.

-
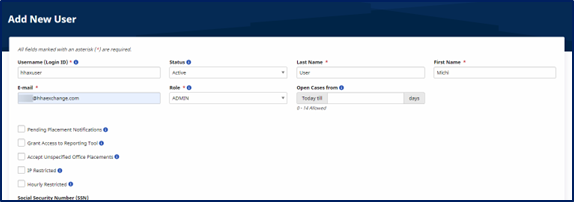
Go to Admin > User Management> New User to access the Add New User page.
-
2. On the Add New User page, complete the required fields (marked with a red asterisk), as described below the image.
-
Username (Login ID): Enter the login name for the user to enter the system. The Login name must be unique within the State Agency and across the HHAeXchange platform. A Username can include letters, numbers, underscores, dashes, @ sign, or dots. There is a 50-character limit to any login name. Email address can be used.
- Last Name: Enter the user’s last name.
-
First Name: Enter the user’s first name.
-
E-mail: Enter the user’s unique email address. This email address is used for any assigned notifications to include the initial email with temporary password to log in to the system.
-
Role: Select the role(s) for the user.
-
-
Select other user-specific permissions to include Pending Placement Notifications, Grant Access to Reporting Tool, Accept Unspecified Office Placements, and access restrictions (refer to the next step).
-
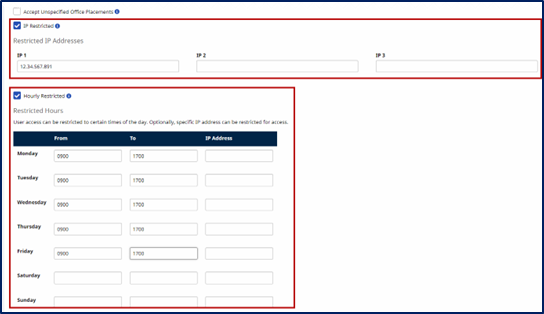
Access can be restricted by IP Address and/or Hourly Restricted (on a schedule of days and time ranges).
-
Select IP Address to open the IP Address fields to restrict access using an IP address. Up to three IP addresses can be entered for a user.
-
Select Hourly Restricted to open the schedule fields. Specify the time ranges on the days (Monday to Sunday) for a user to access the system. A valid IP address for each day of the week can also be added.
-
-
The Office Setup section is used to assign offices to the user. Click Add to assign the Primary office and specify functionality such as Coordinator, View Open Cases, Override OT, and view history. Additional offices can be added with assigned functions. Note that only one office can be designated Primary at a time. Once a Primary office is selected, functionality in other offices is limited.
-
The Operation Worklist Setup section does not apply to the Michigan market.
-
Click Save to create the new user account.
-
The system generates an email sent to the user with instructions and a temporary password to log in to the system. Provide the user with their username. For security purposes, the email does not include this information.

-
Go to Admin > User Management > User Search.
-
Use the search filter fields and click Search.
-
Locate the user from the search results. Click the edit icon under the Actions column to open the User Account page.
-
The Update User Account page opens to make the needed updates.
-
Click Save once complete

A password change or reset may be needed for various reasons, typically for security measures (for example, if credentials are compromised). Instead of providing a password for the user, the process is automated prompting the user to reset the password after the initiation from the State Agency Admin.
To change a password:
-
Go to Admin > User Management > User Search.
-
Use the search filter fields and click Search.
-
Locate the user from the search results. Click the edit icon under the Actions column to open the User Account page.
-
Click the Change Password button located at the top right corner of the page.
-
The Change Password window opens. Enter New Password, reenter the same new password in the Confirm Password field, and click Close to exit the window.
To reset the password:
-
Go to Admin > User Management > User Search.
-
Use the search filter fields and click Search.
-
Locate the user from the search results. Click the edit icon under the Actions column to open the User Account page.
-
Click the Reset Password button located at the top right corner of the page.
-
The system sends an email to the user with instructions and a link for the user to reset their password. The link is valid for 12 hours from the moment of issue.
-
Close the tab to return to the User Account page. Click Cancel to exit the page.

Permissions in the system are role-based; meaning, permissions are enabled for a role (rather than for an individual user). Functions, features, and modules are dictated by system permissions managed in the Edit Roles page under the Admin tab in the main menu.
Users are assigned roles in their User Account. Roles include Admin, Billing, and Coordinator. Roles can only be created by HHAeXchange.
Complete the following to assign role permissions for any feature in the system.
-
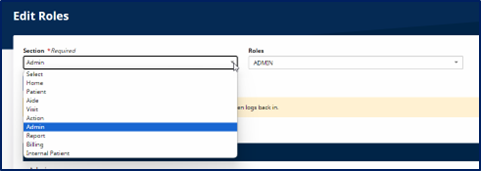
Go to Admin > User Management > Edit Roles.
-
Select the system section from the Section dropdown field. Sections are organized based on the main menu and function.
-
Select the applicable role from the Roles dropdown field. Multiple roles can be selected. Check all that apply.
-
Click View to see a list of system permissions for the selected section and roles.
-
A list of permissions is generated with selections. From this list, select the checkbox for the permission for the role.
-
Once complete, click Save to grant the role permission.
Permission changes take effect when the user reenters or logs back into the system.

-
Go to Admin > User Management > User Search.
-
Use the search filters and/or click Search.
-
Locate the user from the search results. Click the edit icon under the Actions column.
-
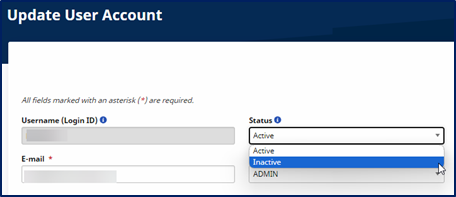
On the Update User Account page, select Inactive from the Status field.
-
Click Save. Once saved, the user can no longer access the system.
