Home Page Tabs
After logging in or clicking Home on the navigation bar, the Home page displays several tabs that provide internal communications tools. The tabs are used to handle communications from HHAeXchange, between internal employees, and from all active Caregivers.


The System Notifications tab under the Home page contains searchable, prioritized messages from HHAeXchange announcing new features, changes in Homecare health regulations, or other miscellaneous information affecting an Agency or the HHAeXchange system.
Complete the following steps to dismiss and close an open notification.
-
Go to the Home page and click the System Notifications tab.
-
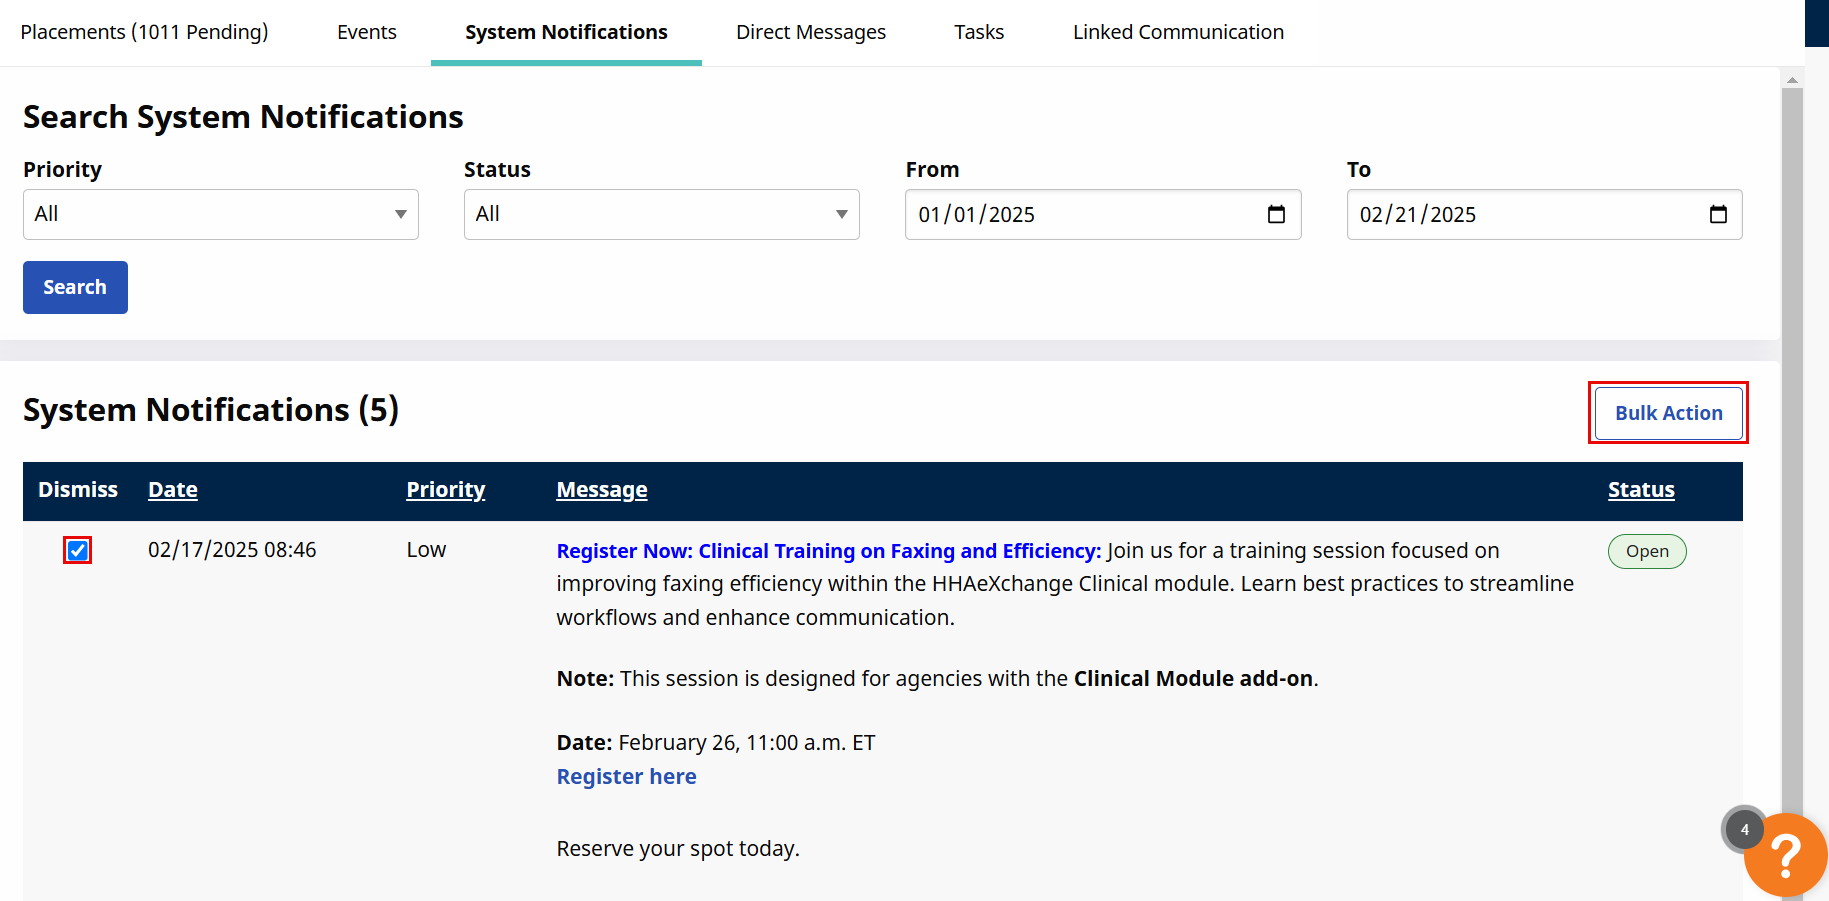
In the Search System Notifications section, select values from the search filter fields to find specific notifications by Priority (Low, Medium, or High), Status (Open or Closed), and a from or to date range. Click Search.
-
Select the checkbox for open system notifications to be closed. Click the Bulk Action button.
-
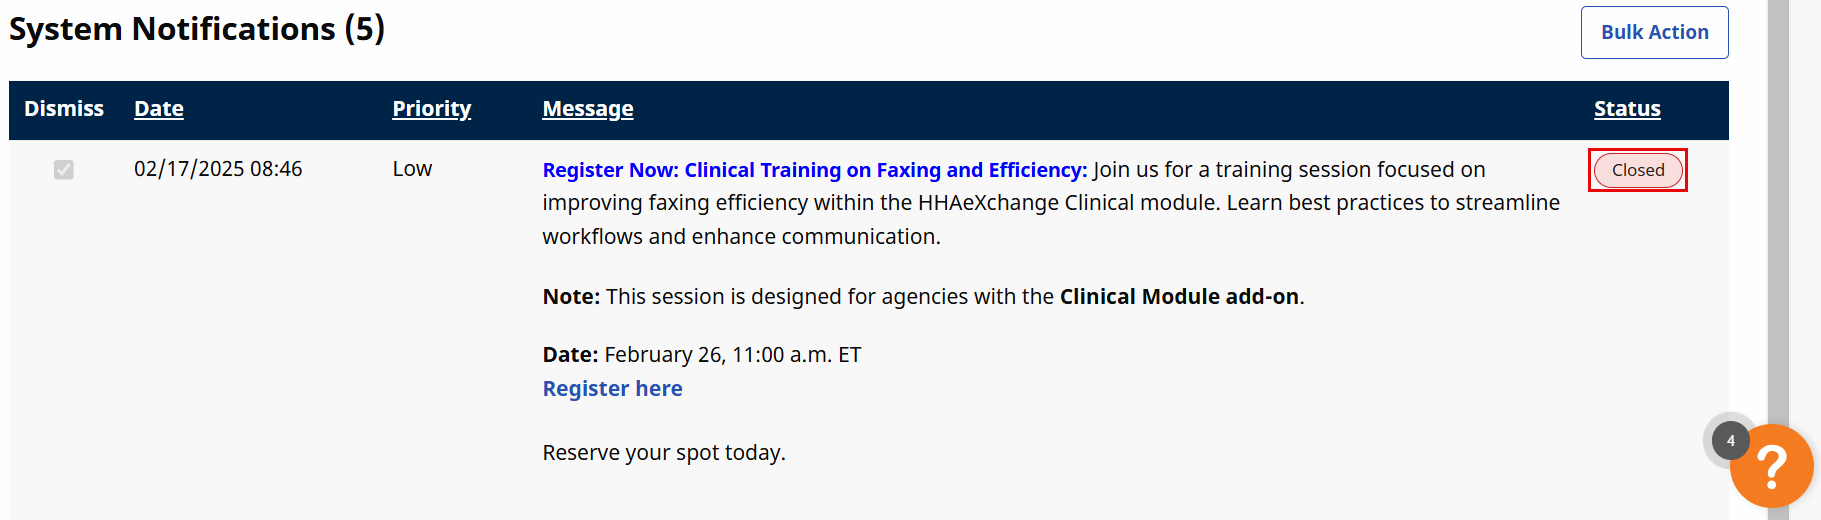
The system notifications display a Closed status.
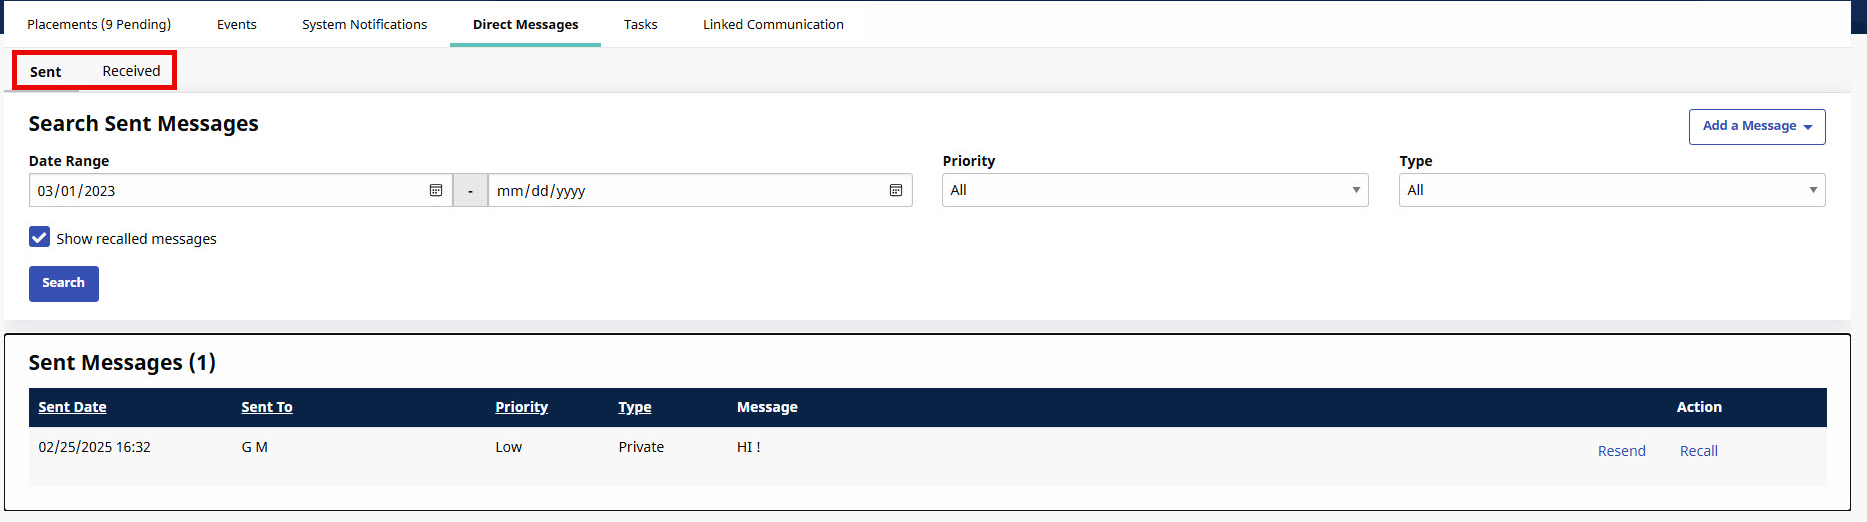
The Direct Messages tab under the Home page allows users to create and review internal messages within the Agency and send messages to Caregivers externally. Through the Sent or Received subtabs, sent and received messages can be reviewed separately, and messages can be recalled or resent as needed.
In the subtabs, search for existing messages by selecting a Date Range, Priority (Low, Medium, or High), and Type (Internal or Mobile/Text). Click the Search button.
Complete the following steps to create an internal or mobile message.
-
Go to the Home page and click the Direct Messages tab.
-
Click the Add a Message button, and click Internal Message or Mobile Message.
-
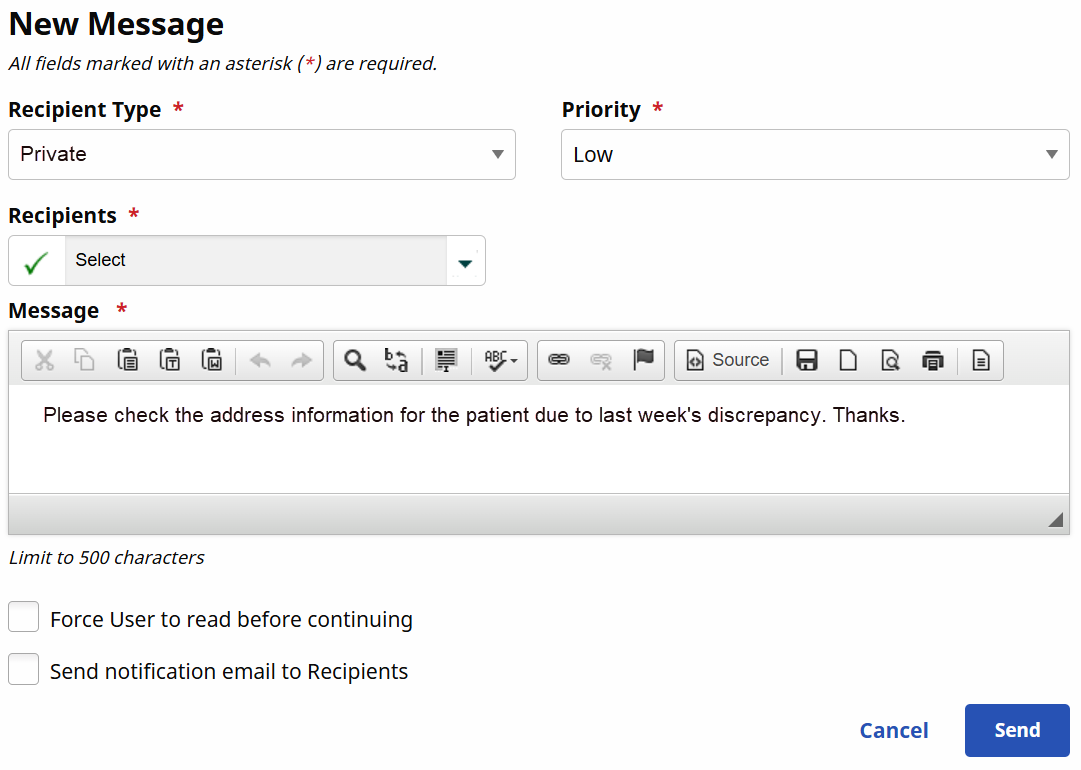
In the New Message window, complete the necessary fields.
Field Description *Recipient Type
Choose whether the Recipient Type is Private, Role (such as Admin-based), or All.
*Priority
Select the message Priority as Low, Medium, High or All.
*Recipients
Click the dropdown to access recipient(s) for the message. Select the checkbox(es) of the desired recipient(s).
*Message
Enter a message to be shared with the selected recipient(s).
-
Select the checkboxes for optional message settings to ensure users read the message before continuing in the system as well as receive a notification email.
-
Click Save to finalize.
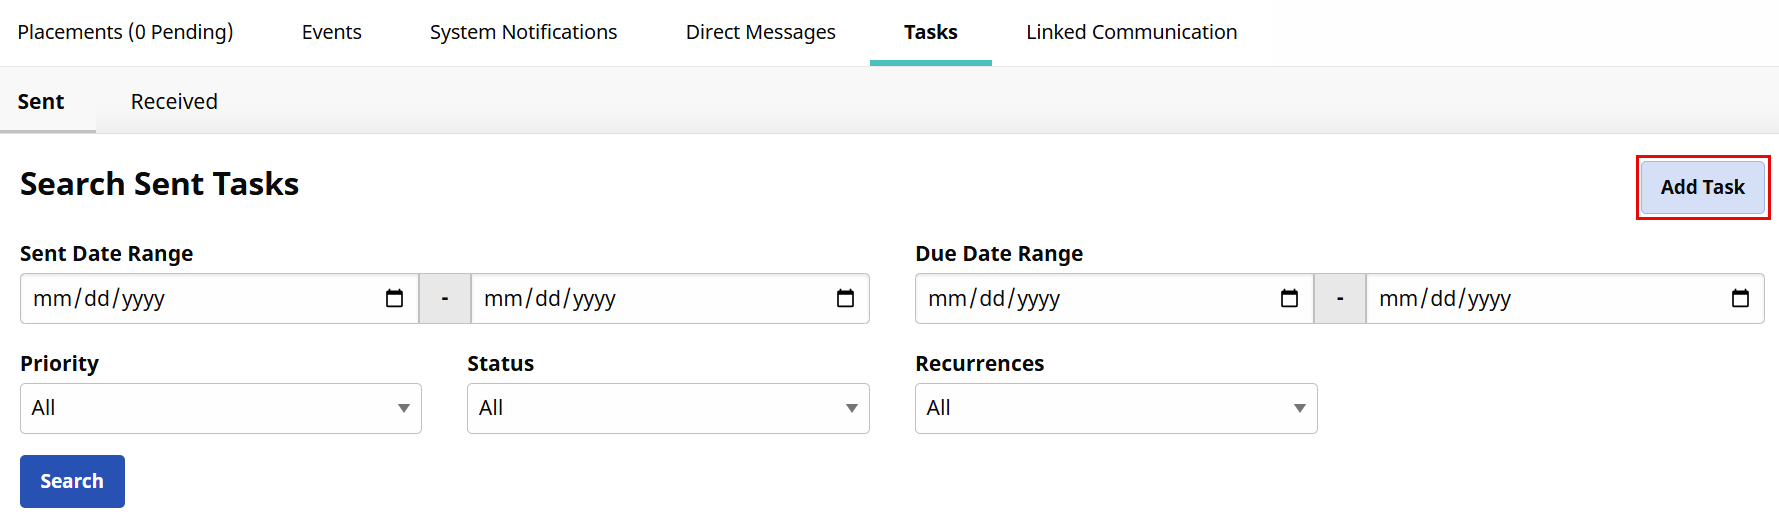
The Tasks tab on the Home page contains searchable, prioritized task messages that are sent and received between internal staff. Tasks display due dates and incomplete, complete, or overdue statuses.
Complete the following steps to create a task.
-
Click the Tasks tab on the Home page.
-
Click the Add Task button.
-
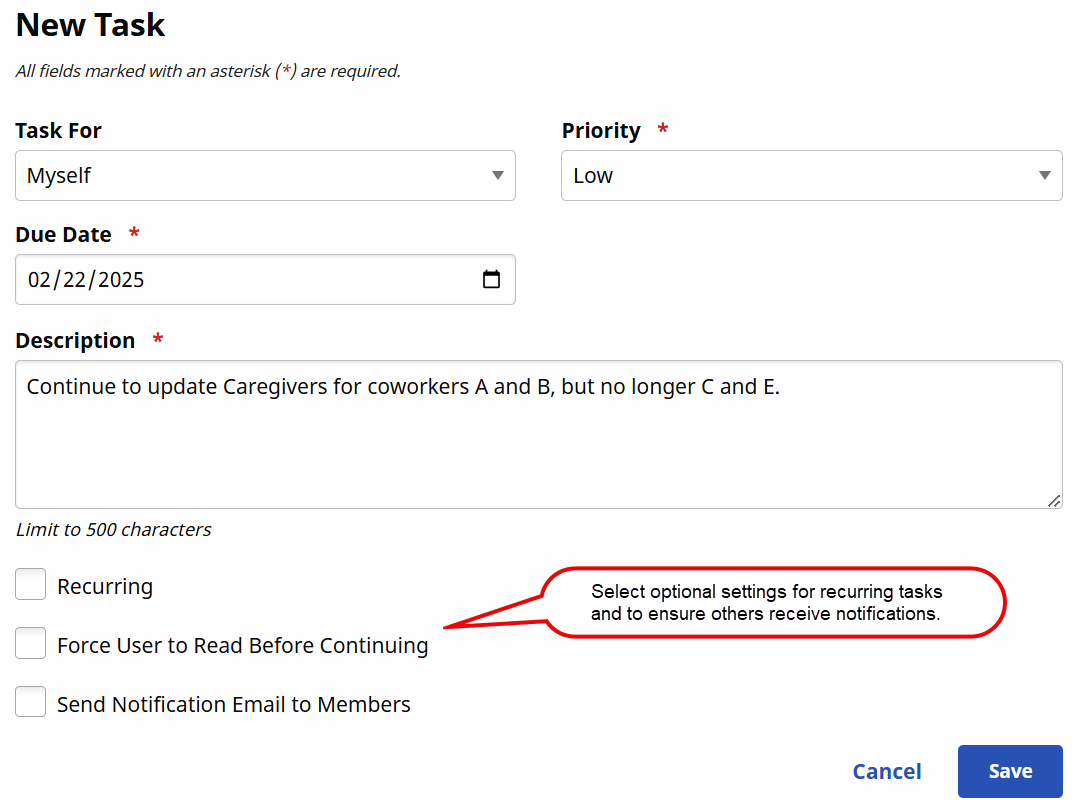
The New Task window opens. Complete the necessary fields.
Field
Description
*Task For
Indicate whether the Task is designated for Myself, Roles, or Users.
*Priority
Select the message Priority as Low, Medium, or High.
*Due Date
Select or enter the Task’s due date.
*Description
Enter the description of the Task.
-
Select the optional task settings for recurring tasks and to ensure others receive notifications associated with the task.
-
Click the Save button to finalize.
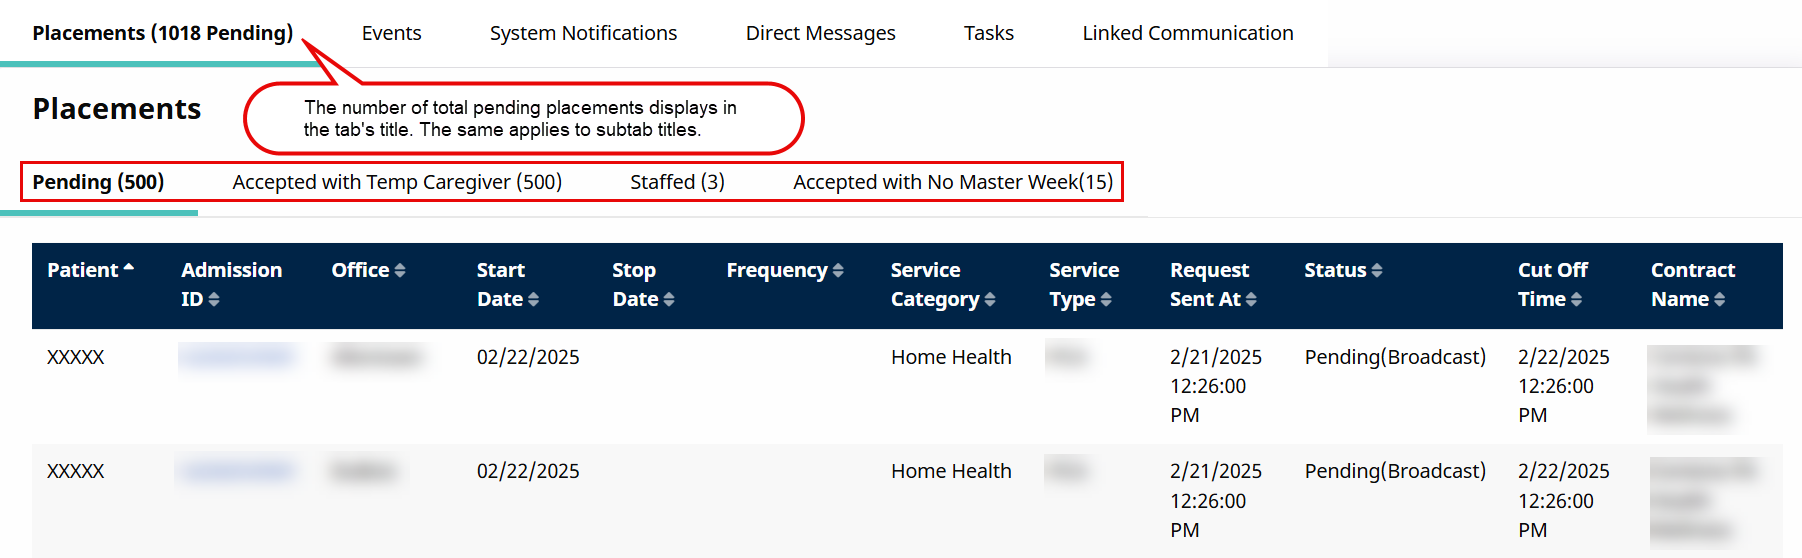
The Placements tab on the Home page contains new Patient cases presented to Providers from authorizing Payers, referred to as Placements. Agencies are free to review the Patient’s case before deciding whether to accept or reject it.
Types of Patient cases are divided into subtabs on the Placements tab. Such cases include those:
-
pending for acceptance or rejection
-
accepted with a temporary Caregiver
-
staffed, and
-
accepted with no Master Week (permanent shift).

The number of total pending Placements displays in parenthesis next to the tab’s title and with each subtab's title.
The Linked Communication tab on the Home page allows communication between an Agency and its associated Payers (Linked Contracts). This tab contains searchable, prioritized communications between an Agency and the Payer related to Linked Contract Patient cases.
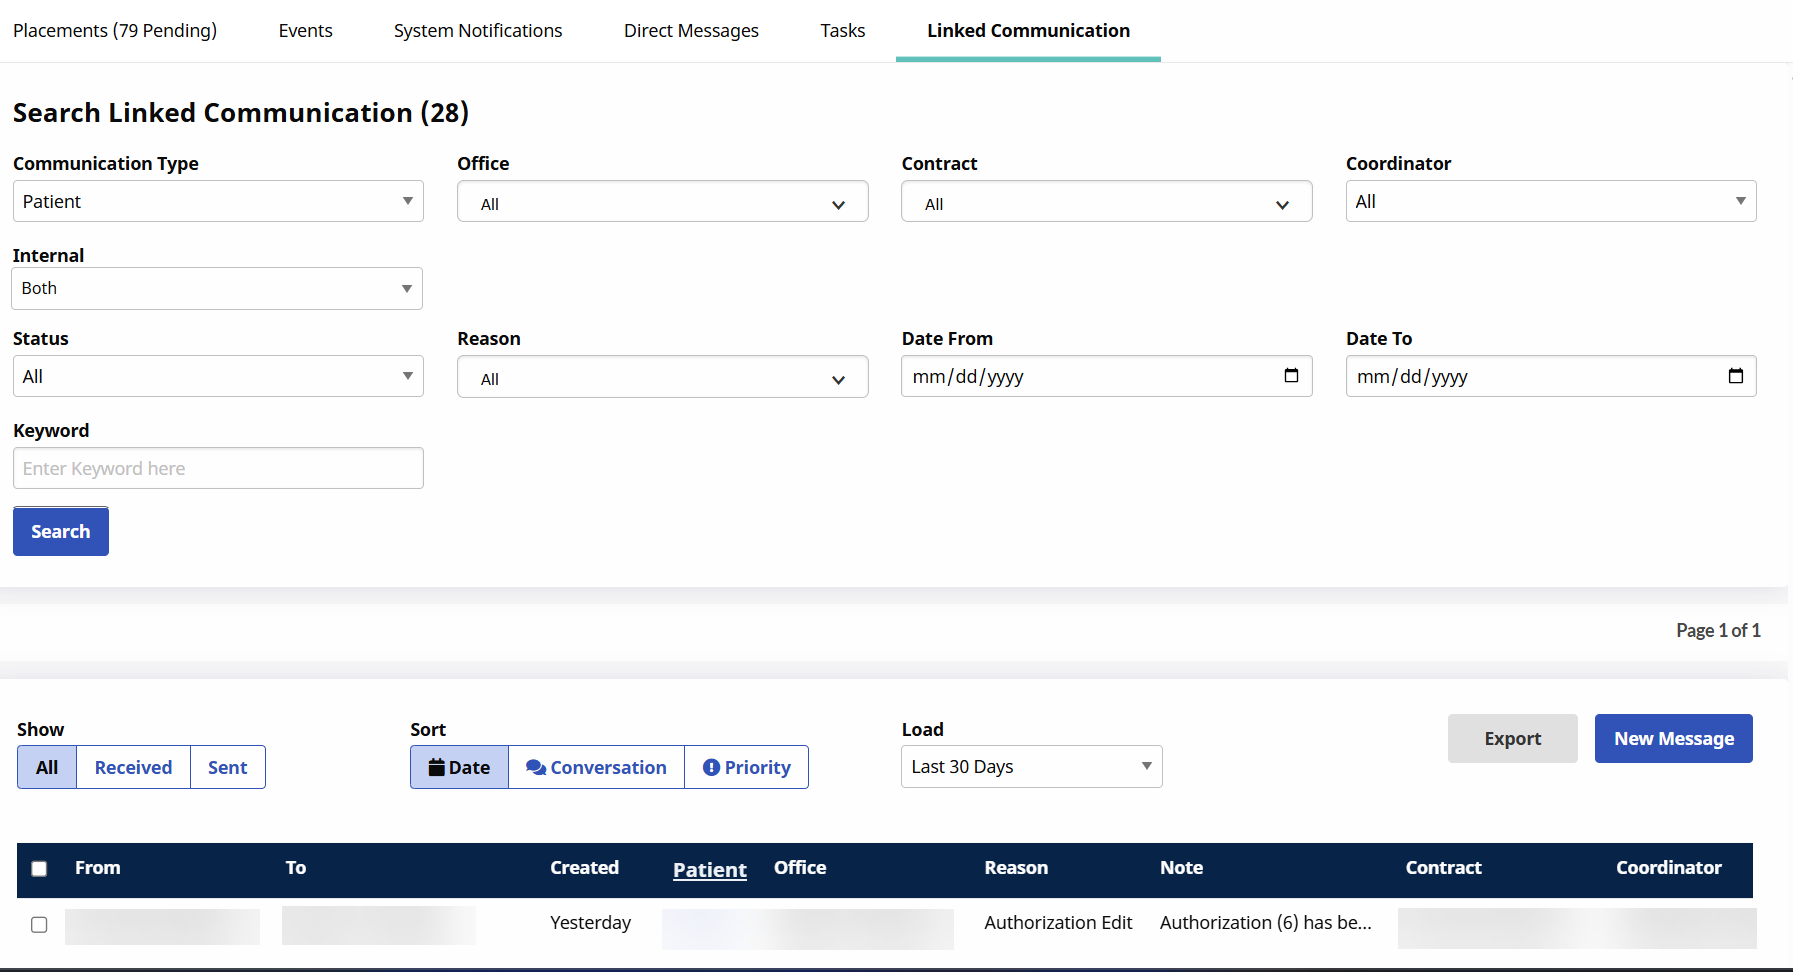
Use the search fields to search messages by criteria such as Communication Type (Non-Patient or Patient), Office, Contract, and Status.
In the results, you can filter and view messages based on Show, Sort, and Load values.
-
The Show feature allows you to filter the results by All, Received, or Sent messages.
-
The Sort feature allows you to sort messages by Date, Conversation, or Priority. Priority messages are marked with a red alert symbol.
-
The Load feature allows you to filter messages by specific time periods.
Use the Export button to export the results into a CSV file.
New Notes are automatically created for any changes applied to a Patient’s Authorization, Patient Status, Discharge Date, and if a visit is marked as a Missed Visit.
If a Note exceeds the allowed width on the results page, it appears truncated in the Notes column. Click any column to view the entire message in a pop-up window. If an attachment is included with a Note, a Paperclip icon displays in the Files column.
The Message Center button routes to the Communications (Message Center) page where exchanges with Payers can be viewed.
Hover over the contract name to see a tool tip with the message originator [Username, (Last Name, First Name)].

Notes can be viewed and managed directly from the Home page or from any of the Communications tabs, using the Status column.
Refer to the View Messages section for details and guidance.
Other Resources
Complete the following steps to create a Linked Communication message.
-
Go to the Home page and click the Linked Communication tab.
-
Click the New Message button.

-
The New Message window opens. Complete the necessary fields.
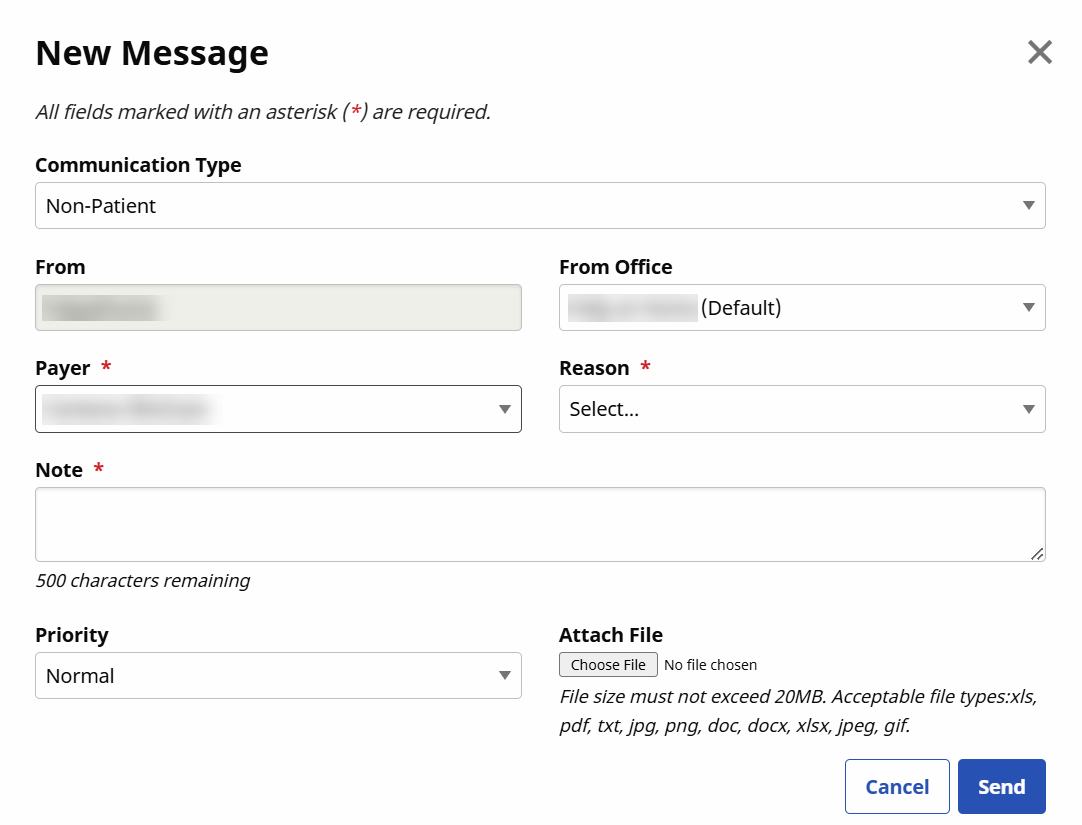
Field Description Communication Type
Select the message type as Patient or Non-Patient.
From Office
Select the sending Office.
*Contract
Select the receiving Contract or Payer.
*Reason
Select the reason the message is being sent.
*Note
Enter a descriptive note to define the message.
Priority
Select the Priority as Normal or High.
Attach File
Click Choose File to attach a file to the message.
-
Click the Send button to finalize.